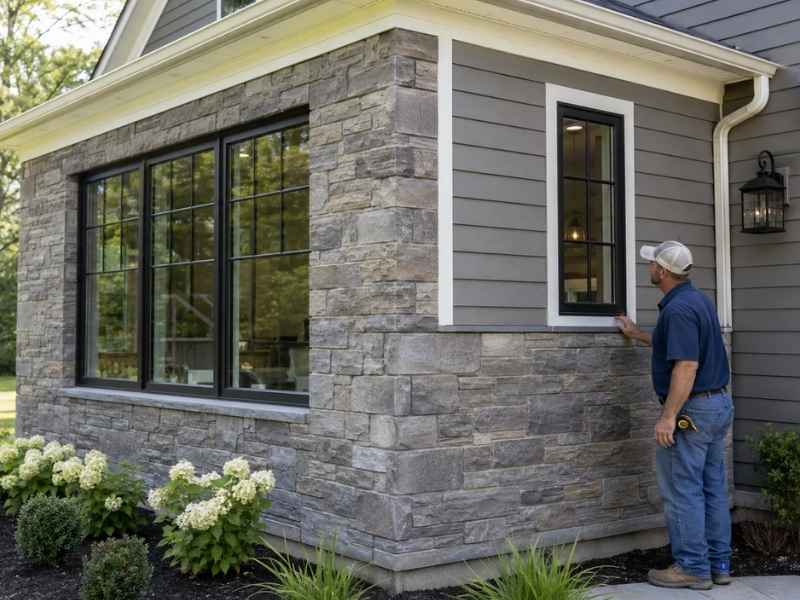
Mixing stone masonry with siding can make a home addition look sharp. But that mix only works if the meeting point between the two materials gets planned ahead of time. Stone and siding aren’t the same thickness. They don’t install the same way either. If nobody plans that transition before the walls go up, the crew ends up making decisions on the fly. That usually shows. A little planning early on keeps the finished addition looking like it was always meant to have both materials, not like two different projects stitched together.
Plan the Stone-to-Siding Transition Before the Addition Walls Are Finished
Stone masonry and siding don’t sit on a wall the same way. Stone is thicker and needs its own backing. The siding is thinner and gets installed differently. When these two materials meet somewhere on an addition, that spot needs real planning before anyone starts hanging exterior finishes.
Waiting until crews reach that spot in the field is asking for trouble. Once the mason and the siding installer are both standing there with different assumptions, someone has to improvise. That rarely leads to the cleanest result. Planning the transition on paper first gives everyone a clear target to build toward.
Keep the Water-Resistive Barrier Continuous Behind Both Materials
Every wall needs a way to manage moisture, and that job falls to the water-resistive barrier hidden behind the exterior finish. Where siding changes over to stone, this barrier has to stay properly connected. A gap or a break right at that spot creates a weak point.
This transition zone is exactly where water problems tend to start. Coordinating the barrier and its flashing across both materials gives water a clear path back to the outside instead of a place to collect. It’s a detail that doesn’t show once the wall is finished, but it matters for years afterward.
Detail Flashing Where Stone Masonry Stops and Siding Begins
Flashing does the real work of directing water away from vulnerable spots on a wall. Wherever stone stops and siding starts, whether that transition runs horizontal or vertical, flashing needs careful attention. Ledges, offsets, and other termination points are common in these spots, and each one needs its own detail.
The goal is simple. Any water that gets behind the cladding should have a way out, not a place to pool. Skipping proper flashing at these transitions can lead to water sitting behind the wall where nobody can see it, which is exactly the kind of problem that gets expensive later.
Account for Different Cladding Thicknesses at Corners and Wall Returns
Stone veneer usually sticks out farther from the wall than most siding does. That difference in thickness becomes obvious at corners and wall returns, where the two materials have to meet at an angle instead of a flat line.
Handled carelessly, this creates an awkward step where the stone juts out past the siding in a way that looks unplanned. Handled well, the transition reads as intentional. Coordinating the finished planes at these corners takes some extra thought, but it’s what separates an addition that looks patched on from one that looks like it belongs.
Coordinate Trim and Termination Details for a Clean Finished Addition
Trim pieces do more than decorate a transition. They give the eye a clean line to follow and give the materials themselves a proper edge to end at. Where stone stops, where siding starts, and where architectural breaks happen all need trim and termination details planned together.
This isn’t about picking a stone style or debating siding colors. It’s about the specific hardware and edges that make the two materials meet neatly instead of butting up against each other in a rough way. Getting this part right is often what makes an addition look finished rather than assembled.
Frequently Asked Questions
Can stone masonry and siding be used on the same home addition?
Yes, mixing them is common. The transition just needs to account for each material’s wall assembly, thickness, drainage needs, and how each one terminates at the meeting point.
Why is flashing important where stone meets siding?
Flashing directs water away from these vulnerable spots. It works together with the wall’s water-resistive barrier to keep moisture from collecting behind either material.
Should the stone and siding sit flush with each other?
Not necessarily. The two assemblies often have different depths. What matters more is planning a clear, deliberate transition that works both structurally and visually, not forcing them onto the same exact plane.
Can a stone-to-siding transition cause moisture problems?
Yes, if it’s not detailed well. Poor planning at this spot can create an easy path for water to get in, which is why the water-resistive barrier, flashing, and drainage all need to work together here.
When should the mason and siding installer coordinate the transition?
Before either one reaches that spot in the field. Planning ahead lets backing, flashing, trim, and termination details go in during the right sequence, instead of getting fixed after the fact.
