Welcome to Frisco Brick & Stone

Frisco Brick & Stone specializes in stone masonry and brick masonry construction. Our expertise in masonry covers brickwork, block work, stonework, and all sorts of related products and applications. We serve the City of Frisco and the North Texas communities.

Call us at (469) 981-7757 to discuss your project.

What is Masonry Work?
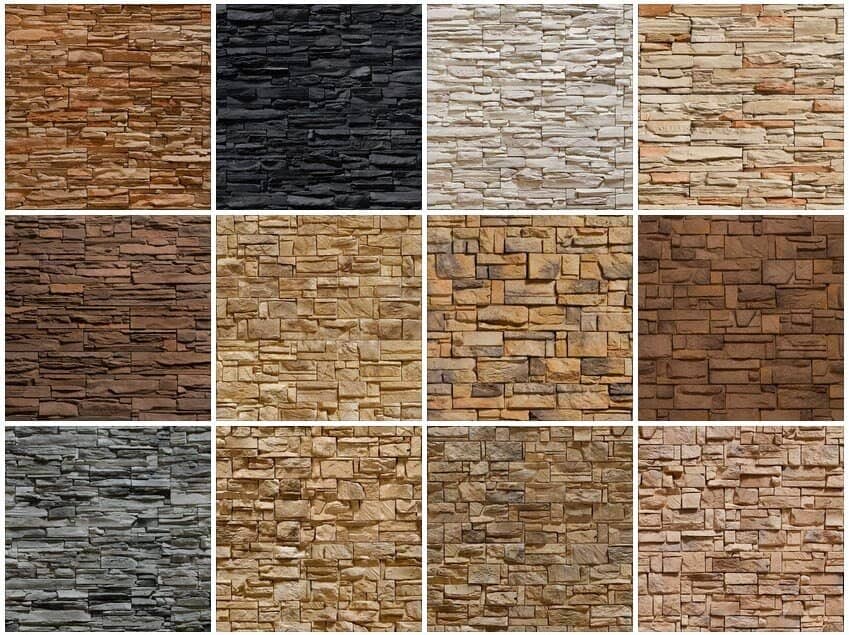
Seamless Masonry Stone WallsMasonry is building structures from individual units, which are often laid in and bound together by mortar. Common materials of masonry construction are brick, natural stone (such as marble, granite, travertine, and limestone,) cast stone, concrete block, stucco, tile, and glass block. Masonry is a highly durable form of construction.

The strength and durability of masonry are affected by the materials used, the quality of the mortar, the workmanship, and the pattern in which they are assembled. A person who constructs masonry is called a mason, a brick mason, stone mason, or bricklayer.

Applications of Masonry
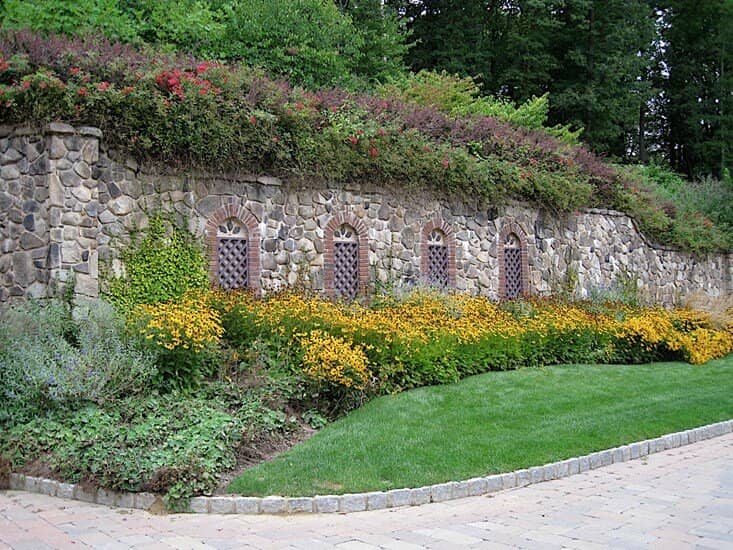
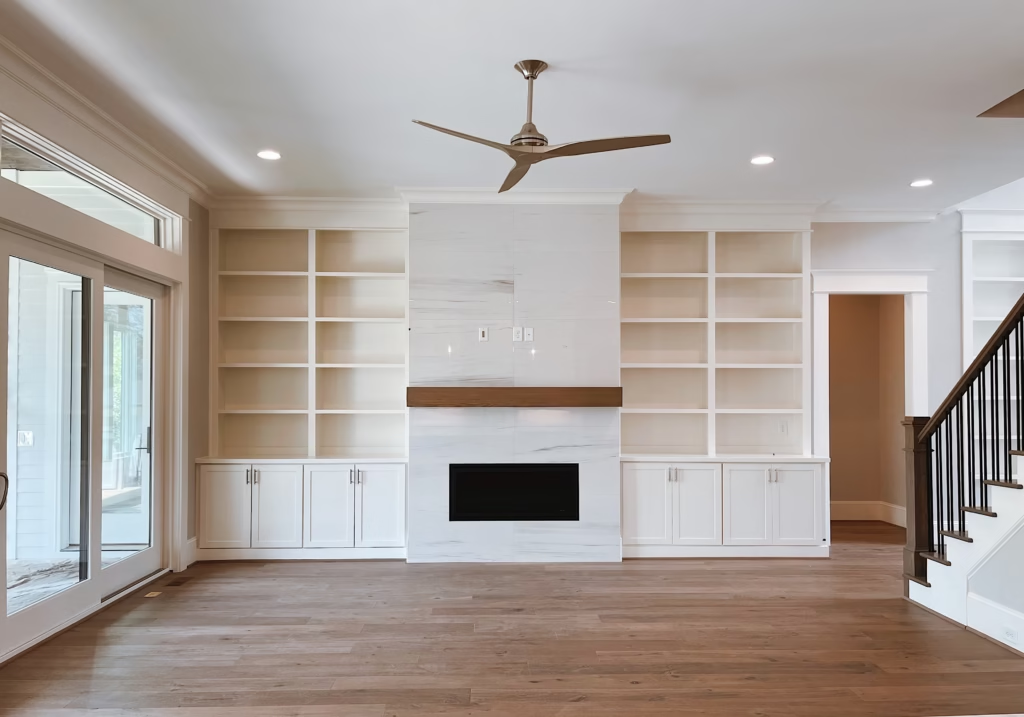
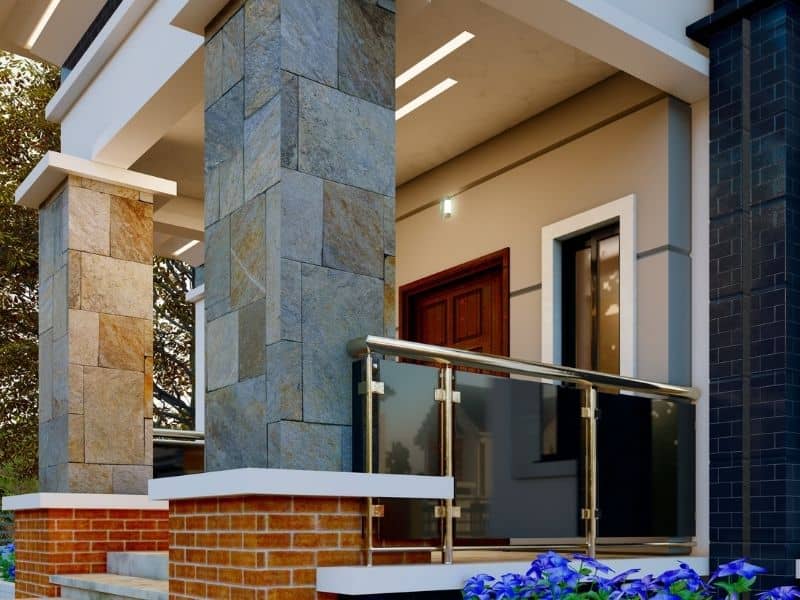
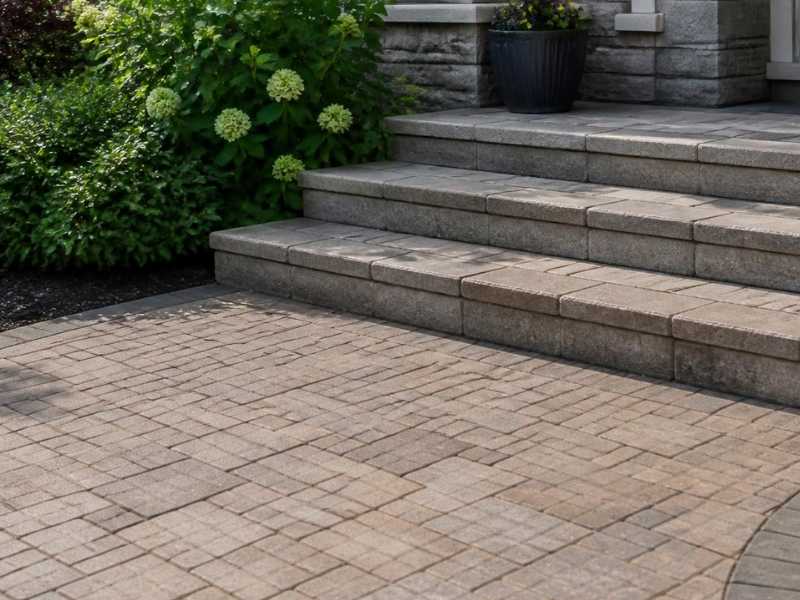
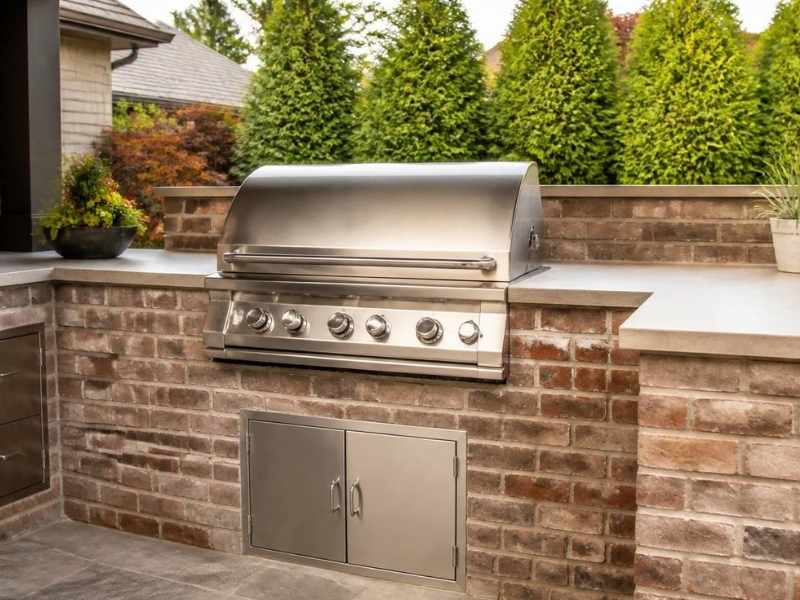
brick stone wall landscapingMasonry is commonly used for walls and buildings, either inside or outside. Brick and concrete block are the most common types of masonry in use and may be either weight-bearing or a veneer.  Stone, both natural and man-made, is being used more and more for decorative features inside, outside and in backyards. Patios, outdoor kitchens, outdoor fireplaces, fire pits, decorative walls, decking, retaining walls, landscaping or hardscaping, and lots of other amenity applications are common place now. Natural stone masonry can provide very aesthetically pleasing projects.

Advantages of Brick or Stone in Building

  • Bricks and stone masonry increases the thermal mass of a building
  • Brick and stone masonry is non-combustible and provides fire protection
  • Brick and stone masonry walls are more resistant to projectiles, such as debris from hurricanes or tornadoes.
  • Brick and stone masonry weathers well and needs much less maintenance over time than other natural materials.
  • No painting is necessary for brick or stone. Color and finish selections are almost endless.
  • Brick and stone masonry typically lasts longer than wood products
  • Brick and stone masonry has higher compressive strength compared to wood and other natural products.
  • Brick and blockwork walls provide excellent sound insulation.
  • Stone does not warp, swell, bend, splinter, or dent.
  • Brick and stone are versatile in their aesthetic appeal and can work well with other construction materials.
  • Use of brick and stone signals a strong sense of permanence and longevity.
Call Frisco Brick & Stone at (469) 981-7757 for a free quote on your brick or stone masonry project. Or, fill out the contact form to the right.

Stone Wall Caps That Protect the Top of Masonry Features

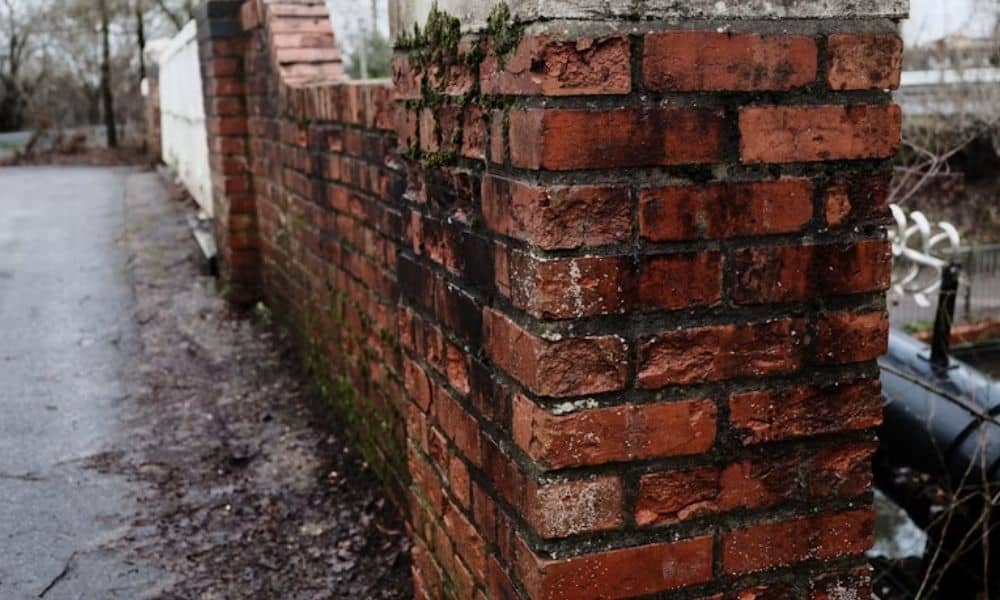
Brick masonry wall topped with an overhanging cap that helps protect the wall from rainwater

A stone wall can stand for decades, but the part that gives out first is almost always the top. In Frisco and across North Texas, that flat top surface takes the full beating of sun and hard rain all year long. A stone wall cap is the piece built to shield it. Set the right cap and the wall below stays dry and sound. Skip it or size it wrong and water starts working its way in from the top down.

Why the Top of a Stone Wall Is Especially Vulnerable

The top of a wall is the one surface that can’t shed water on its own. The face of the wall is vertical, so rain runs down and off it. The top is flat, so water lands and just sits there. It soaks into the joints and into the stone itself, then sinks deeper with every storm.

North Texas makes this harder. Summer sun bakes that top surface hour after hour. Then a heavy rain hits it flat and fast. On a rare cold night, trapped water freezes and pushes the stone apart from the inside. All of that wear starts at the top, which is why a cap matters. A cap does more than finish the wall for looks. It works like the wall’s roof and takes the weather so the stone below doesn’t have to.

How a Stone Wall Cap Directs Water Away From the Masonry

A good cap pushes water off the wall instead of letting it run down the face. It does this a few ways. First is overhang, where the cap sticks out past the wall on both sides. There’s also a drip edge, a small groove or lip cut under that overhang. And the top gets a slight slope so water rolls toward the front and leaves.

Water that runs down the face is the thing you want to stop. It stains the visible stone. It soaks the joints below. Over time it can freeze and chip the surface you paid good money for. The overhang and drip edge break that path so water drops straight to the ground and misses the wall. During one of North Texas’s fast, heavy downpours, that small detail moves a lot of water off the wall in a hurry.

Choosing Cap Stone Thickness, Width, and Edge Profile

Cap size should match the wall it sits on, not a standard piece pulled off a shelf. A tall or exposed wall needs a thicker cap that won’t crack under heat and weather. A short garden wall can take a thinner one. The cap also needs enough width to cover the full top of the wall plus that overhang on each face. Too narrow and part of the wall top stays open to the rain.

The edge shape matters too. An eased edge softens the square corner just a little and sheds water cleanly. A chiseled edge keeps a rough, natural look that suits rustic stone. A bullnose edge rounds the front over so runoff rolls off fast. Each one changes how water leaves and how the cap wears. Pick the profile for how the wall gets used and how exposed it is, not just for the look you liked in a photo.

Stone Wall Cap Materials for North Texas Outdoor Masonry

The best cap stone for North Texas handles heat, sheds water and matches the wall below. Limestone is popular here and looks right on most Texas walls, but it’s softer and soaks up more water, so it can stain and wear faster. A denser cut of limestone holds up better. Granite is very hard, takes on little water and shrugs off heat and stains, though it costs more and weighs a lot.

Heat is a real factor in this part of Texas. That top surface can get scorching in July, and softer stone reacts to that swing more than dense stone does. Staining is the other thing to watch. Sprinkler spray, hard water and iron inside some stone can leave rust marks and dark streaks. Pick a cap that resists all of that, and match its color and texture to the wall so the finished feature reads as one piece and not a patch job.

Small Cap Details That Can Extend the Life of a Stone Wall

The small work is what makes a capped wall last. The joints between cap pieces need to be tight and sealed so water can’t sit in the seam and seep down. The mortar bed under each cap should be full and even, with no hollow spots that hold water or let a piece rock loose. Every cap should sit level and in line so water runs the way it’s meant to.

A capped wall is easy to check once you know the signs. Walk the wall now and then and look for trouble:

  • Cap pieces that rock or shift when you press on them
  • Joints between caps that have opened up or cracked
  • Stains or damp patches on the wall right under the cap edge
  • Caps that have slid out of line or dropped lower than the rest

A little movement or one open joint is worth fixing early, before water gets behind the cap. For a prominent wall or entrance feature, it pays to have a mason look it over. A trained eye catches a failing bed or a bad joint before it turns into a wet, cracked wall.

Frequently Asked Questions

What does a stone wall cap actually do?

It covers and protects the flat top of the wall, the one spot rain can’t run off by itself. The cap sheds water past the wall face and keeps it out of the joints and the stone below. It also finishes the wall with a clean top edge. Think of it as a small roof for your wall.

How far should a wall cap hang over the wall?

Enough to throw water clear of the wall face, usually a small projection on each side with a drip edge underneath. The right amount depends on the wall’s height and how exposed it is. A taller or more open wall often needs a bit more overhang. Your mason can set the correct projection for your wall.

Is limestone or granite better for a cap in North Texas?

Both work, and the choice comes down to budget and wear. Limestone looks natural on Texas walls and costs less, but it’s softer and can stain, so ask for a dense cut. Granite resists heat, water and stains the best, but it’s heavier and pricier. Matching the wall below often makes the call.

Can I add a cap to a stone wall that’s already built?

Yes, as long as the top of the wall is sound and level enough to take one. A mason cleans and preps the top, lays a full mortar bed and sets the cap so it sheds water. If the wall top is already worn or uneven, that gets fixed first. Adding a cap later can add years to a wall that never had one.

How do I know if my wall cap needs repair?

Look for caps that rock, joints that have opened or cracked and damp or stained stone right below the cap line. A cap that has slipped out of place is another clear sign. Any of these means water is finding a way in. Catching it early keeps a small repair from turning into a rebuild.

Brick Mailboxes Designed Around Modern Package Delivery

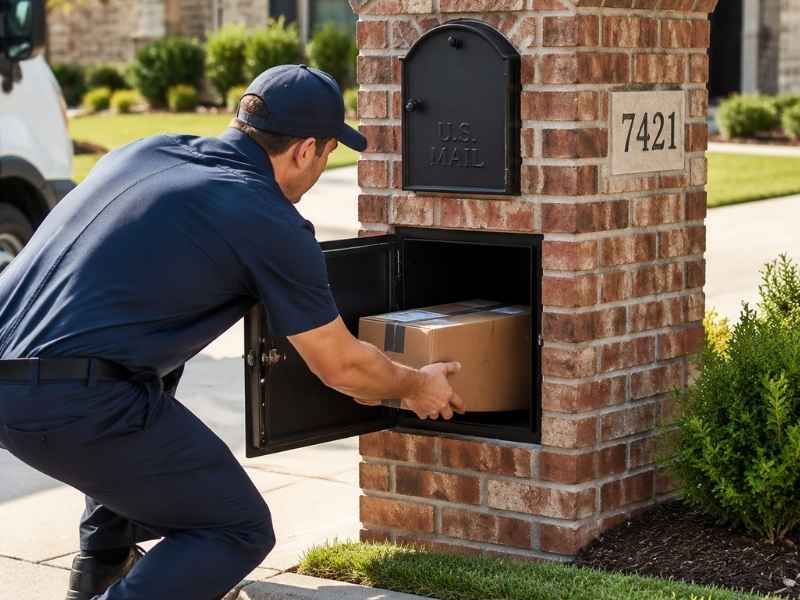
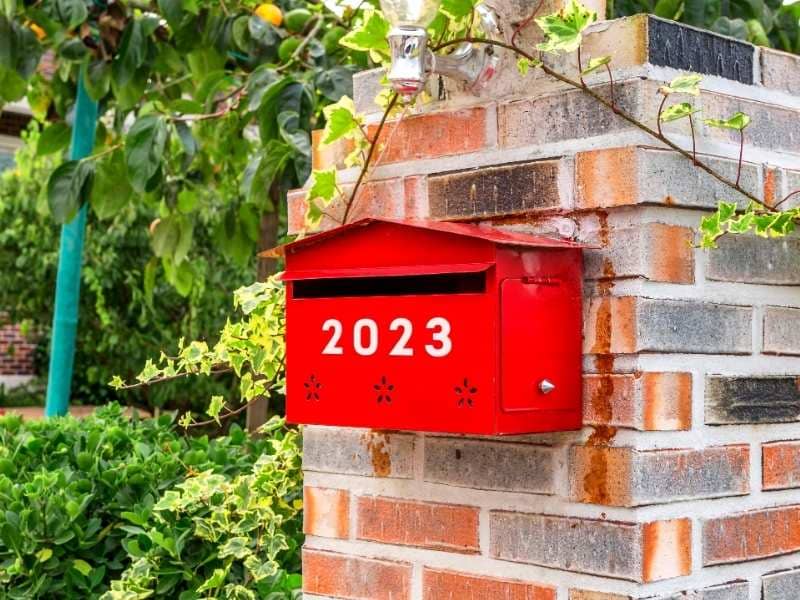
Brick mailboxes designed around modern package delivery in Frisco Texas with a custom masonry mailbox holding a package compartment for residential deliveries

Package delivery has changed how homes work. Trucks stop at driveways every day, not just once a week. That’s why more homeowners are looking at brick mailboxes built for real life, not just letters and bills. A good brick mailbox can hold packages, keep them dry, and even keep them safe from porch pirates. This isn’t a small upgrade. It’s a smart response to how people actually shop and receive goods now. In this article, we’ll walk through what makes a brick mailbox work for today’s delivery habits, from size and placement to security features that matter.

Why Traditional Mailboxes Are Not Built for Today’s Delivery Needs

Most standard mailboxes were made for one job: holding envelopes. A stack of mail, maybe a magazine or two. That’s it.

But shopping has changed. Online orders show up almost daily at many homes. Small boxes, medium boxes, sometimes oversized ones too. A regular mailbox can’t hold any of that. So packages get left on the ground, on porches, or shoved halfway into a box that was never meant for them.

This creates real problems. Boxes get rained on. Packages get stolen. Delivery drivers sometimes leave items in odd spots just to get them off the truck.

A masonry mailbox flips this problem around. Instead of a small metal box on a post, it’s a solid structure. It can be built with real storage in mind, not just a slot for letters. The goal shifts from “hold the mail” to “handle whatever shows up today.”

This shift matters because delivery isn’t slowing down. Homes need structures that match how people actually receive their goods, not how mail worked decades ago.

Features That Make a Brick Mailbox More Practical for Package Storage

Not every brick mailbox is built the same way. The difference comes down to what’s inside, not just what it looks like from the street.

Here are features that turn a brick mailbox into something genuinely useful for deliveries:

  • Larger interior compartments. A bigger space means more than one box can fit at a time.
  • Separate storage areas. One section for letters, another for packages. This keeps small items from getting buried.
  • Weatherproof design. A sealed compartment keeps rain and snow off cardboard boxes.
  • Wide, accessible openings. Delivery drivers need room to slide boxes in without struggling.
  • Sturdy shelving inside. Shelves stop boxes from piling on top of each other and getting crushed.

These features work together. A big compartment doesn’t help much if it floods every time it rains. A weatherproof door doesn’t help if the opening is too small for a shoebox. Good design means every part supports the others.

The point isn’t to make the mailbox look impressive. It’s to make daily deliveries less of a hassle.

Planning Mailbox Size and Placement Before Building a Custom Masonry Structure

Before any brick gets laid, homeowners need to think through a few basics. Size and location matter just as much as the features inside.

Start with size. How many packages does your home typically get in a week? A household that orders often needs more room than one that gets a box once a month. Building too small means the upgrade won’t solve the problem it was meant to fix.

Next, think about placement. The mailbox needs to sit somewhere delivery trucks and mail carriers can reach without trouble. A spot too far from the road, or blocked by landscaping, can slow drivers down or lead to missed drop-offs.

Driveway location plays a role too. Mailboxes near the end of a driveway often work better than ones tucked around a curve. Drivers should be able to see the box clearly and reach it without backing up or stopping in an awkward spot.

Accessibility also matters for the homeowner. If the box sits too far from the house, checking it daily becomes a chore. A short walk is fine. A long trek across the yard isn’t.

Getting these details right before construction begins saves time and money later. Fixing placement after the brick is set isn’t simple.

Combining Brick Masonry With Secure Delivery Solutions

A solid brick structure gives homeowners something a plastic or metal mailbox can’t: a strong base for real security features.

Locking compartments are one option. Instead of an open slot anyone can reach into, a locked door keeps packages inside until the homeowner opens it. This cuts down on theft, especially in neighborhoods where package pickup happens fast.

Some designs include separate locked sections for mail and packages. This way, a delivery driver can drop off a box without needing a key, while the homeowner still controls access to sensitive mail.

Reinforced doors and frames add another layer of protection. Brick already resists damage well. Pairing that with a solid door means the whole structure holds up against tampering.

Placement plays into security too. A mailbox visible from the house, or under a porch light, discourages people from messing with it. Combine that with a locked compartment, and packages sit safer than they would on a doorstep.

None of this requires a giant, complicated build. Small security upgrades, built into a solid masonry frame, go a long way.

How a Custom Brick Mailbox Can Support Long-Term Home Upgrades

Delivery habits keep shifting. What works for a household today might not fit in five years. A well-planned brick mailbox can adjust to that without needing to be torn down and rebuilt.

Extra interior space, even if it’s not fully needed right away, gives room for growth. Families expand. Shopping habits change. A structure with a bit of extra capacity handles those shifts without a struggle.

Design choices also matter for the property as a whole. A brick mailbox that matches the home’s exterior, or fits the layout of the driveway, adds to the overall look of the property. It’s not just a delivery point. It becomes part of the home’s structure.

Some homeowners plan mailboxes that can support small additions later, like extra locking units or added shelving. Thinking ahead during the planning stage makes future changes easier and cheaper.

A brick mailbox built with care isn’t just solving today’s delivery needs. It’s setting up the property to handle whatever comes next, without starting from scratch. Regular maintenance and timely brick repair can help preserve the mailbox’s appearance and keep the masonry structure in good condition as it ages. 

Brick Patio Installation Around Existing Porch Columns

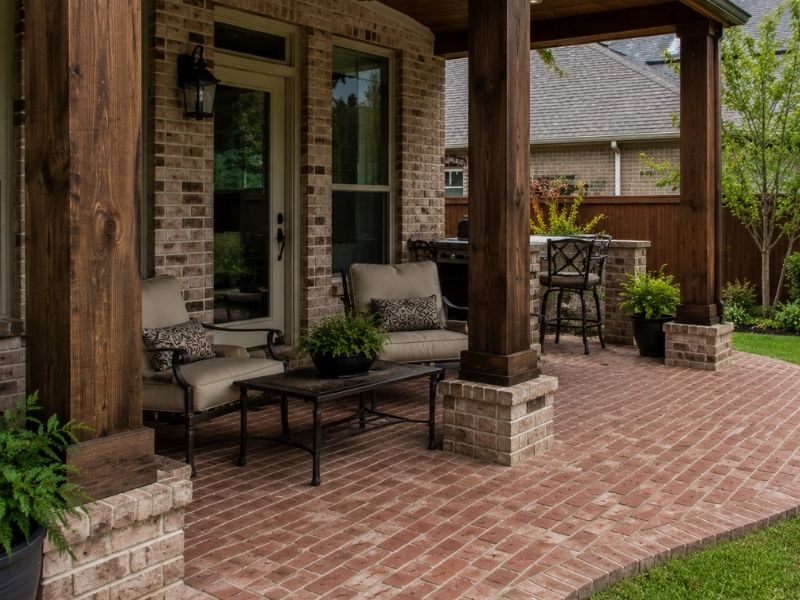
Brick patio installation around existing covered porch columns in a residential backyard in Frisco, TX.

Homeowners often compare brick to natural stone walls when they plan a new patio near a covered porch. Brick tends to fit tight spaces better, and it usually costs less to install than stone. Before any digging starts, a construction survey marks the porch columns, footings, and drainage lines, so the crew knows exactly where the new patio can go. This step matters most when a patio has to wrap around fixed columns, because one small measuring mistake can leave you with narrow brick strips or odd angles at each post. 

Planning Brick Patio Installation Around Existing Porch Columns

Porch columns don’t move, so the patio has to work around them. That starts with measuring the exact spot where each column meets the ground, then marking a buffer zone so the brick doesn’t press right up against the base. Skip this step and you’ll end up with skinny slivers of brick that look like an afterthought.

Next comes the usable footprint. Draw a rough outline of the patio space and note where each column sits inside it. Some columns land near the edge. Others sit closer to the middle of the planned area. Either way, the layout should treat them as fixed points, not obstacles to work around at the last minute.

Avoid narrow sections wherever you can. A strip of brick less than a foot wide between a column and the patio edge looks cramped and it’s hard to keep clean. Widen the footprint slightly or shift the border line instead.

Creating Clean Brick Transitions at the Base of Porch Columns

The spot where new brick meets an old column is where sloppy work shows up fastest. Even spacing around the base makes a big difference. Most installers leave a small consistent gap, often filled with sand or mortar, so the brick isn’t locked tight against the column.

Cutting bricks to fit a curved or square column base takes patience. Rounded columns need curved cuts on several bricks in a row, and those cuts should match each other closely. A jagged, uneven cut around one post stands out, even if the rest of the patio looks great.

A clean transition also means picking a border style and sticking with it at every column. Whether it’s a soldier course, a simple straight edge, or a rounded detail, using the same treatment at each post makes the whole patio look planned rather than patched together.

Setting Patio Elevations Without Creating Problems at Column Bases

Height matters as much as layout. If the finished brick surface sits too high near a column base, water can pool against the wood or stone and cause damage over time. The patio should slope gently away from the house and from each column, not toward it.

Thresholds are another spot to watch. Where the patio meets a porch step or door, the elevation change needs to stay small enough to walk safely, but low enough that it doesn’t trap water against the column footings. A quarter inch of drop per foot is a common starting point, though the exact number depends on the site.

Getting this wrong doesn’t always show up right away. Poor drainage near a column base can take a season or two to cause visible damage, which is why elevation planning happens before the first brick goes down, not after.

Designing Brick Patterns That Work Around Multiple Fixed Supports

A herringbone or basketweave pattern looks great on an open patio, but columns interrupt the flow. The fix is picking a starting point that keeps full bricks near the columns and pushes the smaller cut pieces toward the edges of the patio, where they’re less noticeable.

Border planning helps too. A soldier course border around the whole patio, including around each column, gives the eye a clean line to follow even when the interior pattern has to bend or shift near a post. Without a border, cuts near columns can look scattered and random.

Pattern direction should stay consistent across the whole space. Switching directions partway through, just to dodge a column, usually makes the layout look disjointed instead of solving the problem it was meant to fix.

Planning Frisco Covered Patio Upgrades as One Connected Outdoor Space

A new brick patio can tie a covered porch to the rest of the backyard instead of leaving it as a separate slab. Matching the patio footprint to the porch width, rather than stopping short at the columns, makes the transition feel natural.

Access paths matter here too. A walkway that lines up with the porch steps, rather than one that cuts across at an angle, keeps the whole layout feeling connected. Seating areas placed just past the columns can use the porch roof for shade while still feeling like part of the open patio.

The goal is a single outdoor space that happens to have a covered section and an open section, not two separate projects sitting next to each other.

Frequently Asked Questions

Can brick patio installation be completed around existing porch columns? 

Yes. The layout can be planned around existing columns so the brick surface fits cleanly around their bases while keeping the overall design balanced.

How close can patio bricks be installed to porch columns? 

The spacing depends on the column material, the base design, and how much movement or transition space the site needs. Measurements should be settled before the brick layout begins.

Should the brick pattern be planned before installation starts around porch columns? 

Yes. Working out the pattern and the starting point ahead of time helps avoid small, uneven cuts around each column.

Can a brick patio be added to an existing covered porch? 

Yes. A brick patio can extend around or beyond an existing covered porch as long as the layout and the finished surface height are planned to work with the structure that’s already there.

How do existing porch columns affect the size and shape of a brick patio? 

Columns can interrupt the usable footprint and shape where borders, seating areas, walkways, and pattern transitions end up.

Planning a Retaining Wall Beside an Existing Patio

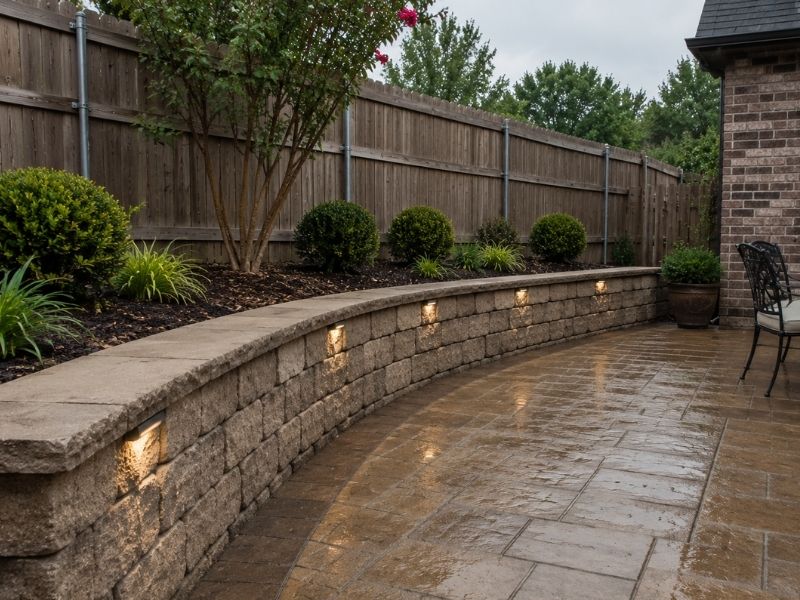
Retaining wall project beside an existing stone patio in a compact residential backyard in Frisco, TX.

If you already have a patio and you’re planning a retaining wall project, the space next to that patio changes almost everything. Many backyards are tight. A patio often takes up a big share of the usable ground. Before any digging starts, a construction survey shows you exactly where your property lines sit and where the patio ends.

How Patio Location Influences a Retaining Wall Project

Where your patio sits changes how a wall can be built next to it. A patio that runs along the back fence leaves a narrow strip for the crew to work in. A patio set closer to the middle of the yard might give you more room on one side. But it could leave almost none on the other side.

The shape of the patio matters too. A square patio is easy to plan around. An L-shaped patio, or one with a pergola or built-in seating, creates corners and blind spots. A builder has to plan around all of that.

Start by walking the yard. Measure the space between the patio edge and the spot where the wall needs to go. Three feet of clear space is a very different job than eight inches. That gap decides how the crew moves equipment, stores materials, and digs without bumping into the patio.

Retaining Wall Access Challenges in a Compact Frisco Backyard

Frisco lots are often narrow. Side yards can be barely wide enough for one person to walk through. That’s a real problem when a retaining wall project needs stone, block, or gravel brought in from the front of the house.

A standard gate is usually 36 to 48 inches wide. Some machines, like skid steers and mini excavators, can’t fit through a gate that size at all. When that happens, crews carry materials in by hand using buckets and wheelbarrows. That slows the job down. Or the crew rents a smaller machine, which often costs more.

Tight access also limits where extra dirt can go. If there’s no room to pile dirt for a while, it has to be hauled away right away. That means more trips and more time. A good contractor walks the whole path into the yard before quoting the job, not after.

Retaining Wall Project Costs When Working Around an Existing Patio

Cost is one of the first things homeowners search for. It’s also one of the hardest things to pin down. A retaining wall built in an open, empty yard costs less than one squeezed next to an existing patio.

Labor is usually the biggest reason costs go up. Digging by hand near a patio takes longer than digging with a machine in open ground. More hours worked means a higher bill. Moving materials by hand instead of by truck adds cost too. When trucks can’t get close to the work site, every bag of gravel or block has to be carried in.

Protecting the patio is another cost to plan for. Plywood, padding, or temporary fencing can shield the surface during construction. That protection isn’t free. But skipping it can lead to cracked pavers or stained concrete, and fixing that later costs even more.

Digging near an existing patio also takes more care. Crews often find footings or drain lines that were never marked on any plan. Working around those hidden problems takes more time and slows the whole job down.

Small Backyard Retaining Wall Layouts That Preserve Patio Space

A retaining wall doesn’t have to eat into the patio you already enjoy. In a small backyard, the layout decides whether you end up with a cramped patio or one that still feels open.

One option is stepping the wall back a bit from the patio edge, even by just a foot. That small gap also makes it easier to care for the wall later. Another option is curving or angling part of the wall instead of running it in a straight line. A curved wall can follow the slope of the yard without cutting into patio space.

Wall height matters here too, though maybe not in the way you’d expect. A slightly taller wall in one spot can sometimes take the place of two shorter walls. That frees up ground space that two separate walls would have used. Every foot you save in the layout is a foot you get to keep for sitting outside, grilling, or just walking around.

Protecting an Existing Patio During a Retaining Wall Project

The order that work happens in can make or break your existing patio. Starting to dig right next to the patio edge without a plan is how cracks and chips happen.

A smart plan starts with marking a clear work zone. That keeps equipment and foot traffic away from the patio surface as much as possible. Heavy materials should sit on a protected spot, not directly on pavers or stamped concrete. The weight alone can cause damage over time.

Shaking from equipment is another thing worth planning for. Packing down soil or driving stakes too close to the patio can loosen joints or crack a slab that looked fine before the project started. Spacing that kind of work out, or using hand tools near the edge instead of heavy machines, helps keep the patio in one piece while the wall goes up.

Once the wall is done, walk the patio surface one more time. That final check catches anything that needs fixing before the crew leaves the site.

Frequently Asked Questions

Can a retaining wall be built beside an existing patio? 

Yes. A wall can be built next to a patio. The layout just needs to account for the patio’s edges, the space available to work in, and how close the wall footing will sit to the existing slab.

How does limited backyard access affect a retaining wall project? 

Narrow gates and tight side yards can block larger equipment. That means more hand labor, slower material delivery, and sometimes a higher cost because the job takes longer.

What factors affect the cost of a retaining wall project beside a patio? 

Labor access, moving materials by hand, protecting the patio, and digging carefully near hidden features all add to the final price.

How can a retaining wall preserve usable patio space in a small backyard? 

Stepping the wall back a bit, angling sections instead of building straight lines, and raising wall height in certain spots can all help you keep more of the patio usable.

How do you protect an existing patio during retaining wall construction? 

Mark a clear work zone, keep materials off the patio surface, and limit shaking near the slab. All of this helps prevent cracks and other damage during the project.

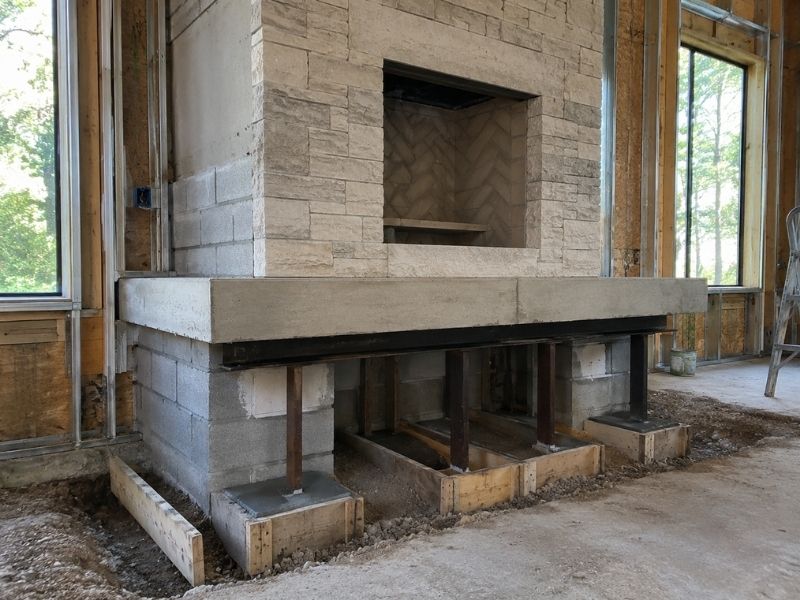
Why a Fireplace Foundation Matters With Heavier Masonry

Stone fireplace under construction with a newly installed mantel in Frisco, TX.

A brick or stone fireplace looks solid, but all that weight has to go somewhere. That’s where the fireplace foundation comes in. If you’re planning a masonry upgrade, a construction survey of the existing structure can tell you what the floor and framing can actually hold before work begins. Heavier stone or brick adds real weight, and skipping this step is one of the most common mistakes homeowners make during a remodel.

How a Fireplace Foundation Supports Heavy Masonry Loads

A masonry fireplace isn’t like a piece of furniture you can move around. It sits in one spot and pushes its full weight straight down through that same spot, year after year. Brick and stone are heavy. A single section of stone veneer can weigh far more than drywall or wood siding covering that same area of wall.

That weight needs a path to travel. The foundation under a fireplace has to spread the load out so no single point of the structure carries more than it can handle. Without a foundation built for that job, the weight concentrates in a small area. Over time, this can lead to settling, cracking or a gradual tilt that’s hard to notice until it’s already a problem.

This is why fireplace foundations get treated differently from a typical wall footing. The load isn’t spread across a long run of framing. It’s stacked in one column, and the foundation has to be built to match that.

Foundation Planning for a Frisco Fireplace Remodel

Remodeling a fireplace often means adding more brick or stone than what’s already there. A thin brick surround might get replaced with full stone veneer, or a small firebox might get wrapped in a much taller masonry column. Each change adds weight the original structure was never built to carry.

Before locking in the new design, it helps to look at what the existing foundation can actually support. This isn’t about assuming the current setup is fine just because it hasn’t failed yet. A structure can carry a lighter load for years without any visible strain, then start showing problems once more weight gets added on top of it.

Frisco sits on clay-heavy soil that expands and contracts with moisture changes through the year. That kind of soil movement already puts stress on foundations, and adding a heavier masonry load on top of it raises the stakes. Checking the existing support before the remodel starts gives you a much clearer picture of what’s realistic for your home.

Signs an Existing Fireplace May Need Structural Evaluation

Some warning signs show up long before a fireplace has a serious problem. A gap opening up between the fireplace and the surrounding wall is one of them. So is a floor that feels like it dips or bounces near the hearth.

Cracks are another clue, especially ones that run diagonally from a corner or seem to grow wider over time. A small hairline crack in the mortar isn’t automatically a red flag, but a crack that keeps spreading is worth a closer look.

Doors or windows near the fireplace that stick or no longer close properly can also point to movement in the structure. These signs don’t always mean something is seriously wrong, but they do mean a professional should take a look before any new masonry gets added. Catching movement early is a lot cheaper than dealing with it after a heavy remodel is already finished.

Matching Foundation Capacity to the New Masonry Design

The design details of a fireplace remodel change how much weight the foundation ends up carrying. A taller masonry column adds more weight than a short one. Full-bed natural stone weighs more than manufactured stone veneer. A thicker wall of brick adds up fast once it runs from floor to ceiling.

These choices aren’t just style decisions. Each one changes the total load the foundation has to hold. A design that looks similar to the original fireplace on paper can end up weighing two or three times as much once the new materials get factored in.

This is why the foundation assessment needs to happen before the design gets locked in, not after. If the existing support can’t handle the planned height or material, it’s much easier to adjust the design early than to redo finished masonry work later.

Coordinating Masonry and Structural Work Before Installation

A fireplace remodel usually involves more than one trade. The mason handles the brick or stone work, the general contractor manages the overall project, and in some cases a structural professional needs to weigh in on what the existing framing and foundation can support.

Getting these people talking to each other before any material shows up on site makes the whole project smoother. The mason needs to know what load limits apply before choosing a design. The contractor needs to know if any structural reinforcement has to happen first. And if a structural evaluation turns up a concern, that work should be finished before the heavier masonry goes in, not worked around afterward.

Sequencing this correctly protects the investment you’re making in the new fireplace. It also avoids the more expensive scenario of removing finished masonry later to fix a problem underneath it.

Frequently Asked Questions

Does a masonry fireplace need its own foundation? 

A masonry fireplace often needs its own dedicated foundation, especially when it uses brick, stone or other heavy material. Lighter designs and local construction requirements affect the answer, so a mason or engineer can confirm what your specific project needs.

Why does heavier stone or brick affect a fireplace foundation? 

Stone and brick weigh far more than drywall, wood trim or thin veneer. Adding more of either material increases the total load pressing down through the same footprint. The foundation has to be strong enough to carry that extra weight without shifting or cracking.

Can an existing fireplace support a heavier masonry remodel? 

Not necessarily. A fireplace that has held up fine for years might still be too weak for a much heavier design. The current setup working well doesn’t guarantee it can handle added weight, so homeowners shouldn’t assume the support is adequate without checking first.

Should the foundation be checked before remodeling a fireplace in Frisco? 

Yes. Checking the existing support before adding heavy masonry helps catch structural limits early. This matters even more in Frisco, where shifting clay soil can already put stress on foundations before any new weight gets added.

Who should evaluate a fireplace foundation before a major masonry remodel? 

The masonry contractor can flag obvious concerns, but a structural professional or engineer should evaluate anything involving significant added weight. Their assessment gives a clearer picture of what the existing foundation and framing can actually support.

Brick Masonry Around Windows Requires Careful Transition Planning

Brick wall in Frisco Texas showing careful masonry transitions around a residential window.

A brick wall looks solid and simple until you reach a window. That’s where things get tricky. Brick masonry has to stop, make room for the window, and then pick back up cleanly on the other side. Getting that spot right takes real planning. The window frame, the opening in the brick, the trim, and the surrounding wall all have to fit together with no last-minute guessing. That planning, and crews end up making decisions on site that don’t always turn out well. Plan it ahead of time, and the window becomes a clean, solid part of the wall instead of a rough patch job.

Plan the Brick-to-Window Transition Before Masonry Installation Begins

Every window opening needs enough room for the frame, the brick around it, and the trim that ties them together. If that space isn’t planned before the brick goes up, someone ends up trying to force a fit later. That rarely goes smoothly.

Coordinating these dimensions early gives everyone working on the project a shared target. The mason knows exactly where the brick should stop. The window installer knows exactly what space they’re working with. Nobody has to improvise once the wall is already built. That kind of planning saves real time and avoids awkward gaps or tight squeezes at the opening.

Detail Flashing at Window Heads to Direct Water Away From the Opening

Right above a window is one of the more vulnerable spots on a brick wall. Water that gets into the wall assembly needs a way back out, and flashing at the window head is what makes that happen. Without it, water can end up trapped right where the window meets the brick.

This isn’t about the wall’s whole moisture system. It’s specifically about the detail right above the window opening. Getting this flashing placed and lapped correctly keeps water moving toward the outside instead of settling in behind the brick, which is exactly where problems tend to start.

Coordinate Brick Sills With Window Frames and Drainage Paths

The bottom of a window needs just as much attention as the top. A brick or masonry sill has to line up with the window frame, project out far enough, and slope in a way that actually moves water away from the opening.

Get the slope wrong, or leave an awkward gap at the joint, and water sits right where it shouldn’t. Planning the sill alongside the window frame from the start avoids that problem. It also keeps the joint at the bottom of the window looking clean instead of pieced together after the fact.

Allow for Movement Where Brick Masonry Meets Window Materials

Brick and window frames don’t move the same way. Temperature swings and moisture changes push and pull each material differently. A rigid connection between the two, with no room to move, tends to crack or fail over time.

That’s why the perimeter joint around a window needs real thought. Properly placed sealant and a joint sized for movement give both materials room to expand and contract without damaging each other. This isn’t a full lesson on expansion joints across a building. It’s specifically about the small, critical gap that lets the window and the brick coexist without fighting each other.

Keep Jamb and Corner Details Consistent Around the Entire Window Opening

The sides of a window opening, known as the jambs, need to line up cleanly with the brick coursing, the trim, and the flashing running around the rest of the opening. When these details don’t match up, the whole window can look slightly off, even if nobody can quite say why.

Keeping the jambs and corners consistent all the way around the opening is what makes the finished window read as one coordinated piece. It’s a detail that matters more than it seems, since a mismatched corner or an uneven jamb draws the eye in a way that plain brick never does.

Frequently Asked Questions

Why does brick masonry need special detailing around windows? 

Windows break up the smooth run of a brick wall, creating spots where the brick, flashing, sealants, trim, and the window itself all have to work together properly.

What is the purpose of flashing above a window in a brick wall? 

It redirects water that gets into the wall assembly, moving it back toward the outside instead of letting it stay trapped around the window opening.

Should a brick window sill slope away from the house? 

Generally, yes. Sills are usually designed to push water outward rather than let it sit against the window frame, though the exact detail depends on the wall system and the project.

Why are joints needed between brick masonry and window frames? 

Brick and window materials expand and contract at different rates. A properly sized joint gives them room to move without cracking or breaking the seal around the opening.

When should window and masonry transition details be finalized? 

Before the brick installation reaches that part of the wall. That way, the mason, the window installer, and other trades can all follow the same planned dimensions and flashing sequence.

Small Stone Details That Transform a Front Entry

Stone details in Frisco Texas adding a finished look to a front entry with stone accents around columns steps and the doorway.

A front entry doesn’t need a full stone makeover to look better. Small stone details, placed in the right spots, can change how the whole entrance feels. A short stone surrounds the door. A capped edge on a low wall. A stone base at the bottom of a column. None of these require tearing off the entire facade. They just need to land in the right places. That’s the real appeal of stone details done this way. A homeowner gets a stronger, more finished entrance without taking on a full exterior remodel.

Add Stone Around the Doorway Without Reworking the Entire Facade

A narrow stone surround around the front door adds real visual weight without touching the rest of the house. Sometimes a partial-height treatment works just as well, stopping at a natural break point instead of running the full height of the wall.

This kind of detail stays small on purpose. It’s not a full stone masonry project. It’s a focused accent that draws the eye straight to the entrance. Done well, it makes the door feel like the clear focal point of the front of the house, without the cost or scope of redoing the whole exterior.

Use Stone Caps on Low Entry Walls and Porch Edges

Short walls near an entry, whether they border a porch or flank a set of steps, often end with a plain, flat top. A stone cap gives that edge a cleaner finish. The size of the cap, how far it projects past the wall, and how well it lines up all affect the final look.

Beyond looks, a well-set cap also helps shed water off the top of the wall instead of letting it sit there. This isn’t about retaining walls or larger stone-wall projects. It’s specifically about finishing the small walls right at the entry in a way that looks intentional and holds up over time.

Frame Porch Columns With Small Stone Base Treatments

Porch columns often look better with a little extra weight near the bottom. Adding stone just to the lower portion of a column or post gives the entry a sturdier, more grounded feel without covering the whole column.

Getting the proportion right matters here. The stone base needs to stop at a height that looks balanced against the rest of the column, not too short and not too tall. This kind of detail should also line up with the style of the existing exterior, so it reads as part of the house rather than an odd add-on.

Finish Front Steps With Stone Treads or Edge Details

Front steps get a lot of visual attention since they lead right up to the door. Using stone on the tread surfaces, along the risers, or just on the exposed edges can make a set of steps feel far more finished than plain concrete or worn wood.

The key is keeping the scale right for the porch. A small entry doesn’t need heavy, oversized stone treatments that overwhelm the space. Choosing details that connect visually with materials already nearby, like the porch railing or the entry wall, helps the whole area feel like one cohesive design instead of a patchwork of finishes.

Create a Cleaner Transition Between the Walkway and Front Door

The walk up to a front door matters just as much as the door itself. A small stone landing border, a threshold accent, or a short transition piece can mark that arrival point clearly, giving visitors a sense that they’ve reached the entrance.

These are small, focused details, not a full landscaping or paver project. A stone accent right where the walkway meets the entry steps or porch can define that transition in a way plain concrete alone can’t. It’s a small touch, but it does a lot of work in making the approach feel finished.

Frequently Asked Questions

What small stone features work well around a front entrance? 

Doorway accents, column bases, wall caps, step details, and landing borders all work well. The key is using stone selectively rather than covering the whole facade.

Can stone be added to an existing front entry without a major remodel? 

Often, yes. Limited stone accents can usually be added to an existing entrance, though the wall structure, surface underneath, dimensions, and current finishes need to be checked first.

Should the front-entry stone match the stone used elsewhere on the house? 

Not exactly, no. It doesn’t need to match perfectly, but the color, texture, scale, and joint style should relate closely enough to the rest of the exterior that the new detail looks planned.

Where should a small stone accent stop around a doorway or column? 

It should stop at a logical spot, like a trim line, a corner, or another natural architectural break. Ending randomly in the middle of a flat surface tends to look unfinished.

Can small stone details make a front entry look more substantial? 

Yes. Concentrating stone at a few key spots adds real depth and definition to the entrance, all without requiring a large masonry project across the whole house.

When Stone Masonry Meets Siding at a Home Addition

Stone masonry in Frisco Texas showing a clean transition between stone veneer and siding on a home addition.

Mixing stone masonry with siding can make a home addition look sharp. But that mix only works if the meeting point between the two materials gets planned ahead of time. Stone and siding aren’t the same thickness. They don’t install the same way either. If nobody plans that transition before the walls go up, the crew ends up making decisions on the fly. That usually shows. A little planning early on keeps the finished addition looking like it was always meant to have both materials, not like two different projects stitched together.

Plan the Stone-to-Siding Transition Before the Addition Walls Are Finished

Stone masonry and siding don’t sit on a wall the same way. Stone is thicker and needs its own backing. The siding is thinner and gets installed differently. When these two materials meet somewhere on an addition, that spot needs real planning before anyone starts hanging exterior finishes.

Waiting until crews reach that spot in the field is asking for trouble. Once the mason and the siding installer are both standing there with different assumptions, someone has to improvise. That rarely leads to the cleanest result. Planning the transition on paper first gives everyone a clear target to build toward.

Keep the Water-Resistive Barrier Continuous Behind Both Materials

Every wall needs a way to manage moisture, and that job falls to the water-resistive barrier hidden behind the exterior finish. Where siding changes over to stone, this barrier has to stay properly connected. A gap or a break right at that spot creates a weak point.

This transition zone is exactly where water problems tend to start. Coordinating the barrier and its flashing across both materials gives water a clear path back to the outside instead of a place to collect. It’s a detail that doesn’t show once the wall is finished, but it matters for years afterward.

Detail Flashing Where Stone Masonry Stops and Siding Begins

Flashing does the real work of directing water away from vulnerable spots on a wall. Wherever stone stops and siding starts, whether that transition runs horizontal or vertical, flashing needs careful attention. Ledges, offsets, and other termination points are common in these spots, and each one needs its own detail.

The goal is simple. Any water that gets behind the cladding should have a way out, not a place to pool. Skipping proper flashing at these transitions can lead to water sitting behind the wall where nobody can see it, which is exactly the kind of problem that gets expensive later.

Account for Different Cladding Thicknesses at Corners and Wall Returns

Stone veneer usually sticks out farther from the wall than most siding does. That difference in thickness becomes obvious at corners and wall returns, where the two materials have to meet at an angle instead of a flat line.

Handled carelessly, this creates an awkward step where the stone juts out past the siding in a way that looks unplanned. Handled well, the transition reads as intentional. Coordinating the finished planes at these corners takes some extra thought, but it’s what separates an addition that looks patched on from one that looks like it belongs.

Coordinate Trim and Termination Details for a Clean Finished Addition

Trim pieces do more than decorate a transition. They give the eye a clean line to follow and give the materials themselves a proper edge to end at. Where stone stops, where siding starts, and where architectural breaks happen all need trim and termination details planned together.

This isn’t about picking a stone style or debating siding colors. It’s about the specific hardware and edges that make the two materials meet neatly instead of butting up against each other in a rough way. Getting this part right is often what makes an addition look finished rather than assembled.

Frequently Asked Questions

Can stone masonry and siding be used on the same home addition? 

Yes, mixing them is common. The transition just needs to account for each material’s wall assembly, thickness, drainage needs, and how each one terminates at the meeting point.

Why is flashing important where stone meets siding? 

Flashing directs water away from these vulnerable spots. It works together with the wall’s water-resistive barrier to keep moisture from collecting behind either material.

Should the stone and siding sit flush with each other? 

Not necessarily. The two assemblies often have different depths. What matters more is planning a clear, deliberate transition that works both structurally and visually, not forcing them onto the same exact plane.

Can a stone-to-siding transition cause moisture problems? 

Yes, if it’s not detailed well. Poor planning at this spot can create an easy path for water to get in, which is why the water-resistive barrier, flashing, and drainage all need to work together here.

When should the mason and siding installer coordinate the transition? 

Before either one reaches that spot in the field. Planning ahead lets backing, flashing, trim, and termination details go in during the right sequence, instead of getting fixed after the fact.

Brick Arches Need Support Planned Before Masonry Begins

Brickmason builds a supported brick arch over a Frisco home entry

Frisco custom exterior projects often use brick arches to soften an entry, frame a window, or add detail to a covered porch. The finished curve gets the attention, but its performance depends on what supports it from the start.

A brick arch looks like a simple shape once it’s built. Underneath that shape is a small structural system, working out how weight moves through the curve and into the wall on either side. Get the support wrong, and an arch can crack, settle unevenly, or push the brick around it out of place. None of that shows up on day one. It shows up months or years later.

An Arch Transfers Weight Sideways, Not Just Downward

A flat lintel over a window carries weight straight down onto the wall below it. An arch works differently. It takes the load pressing down on the curve and pushes part of that force outward, toward the sides, before sending it down into the wall.

This sideways push is called thrust. It means the areas on either end of the arch aren’t just holding up weight from above, they’re also resisting a push trying to spread the arch apart at the bottom.

That changes how the ends of an arch need to be planned. They need enough solid wall, or the right kind of support behind them, to handle that outward push, not just the downward load. This has to be worked out before the curve is built, not adjusted after the fact. Once an arch is set in place, there’s no easy way to add support it should have had from the start.

The Springing Line Is Where the Arch Plan Truly Starts

Every arch has a springing line. It’s the level where the straight wall ends and the curve begins on each side.

Both sides of that line need to sit at the same elevation. If one side starts even slightly higher or lower than the other, the curve won’t come together evenly at the top, and the finished arch will look off no matter how carefully the brick above it is laid.

The springing line also needs a stable, correctly prepared support underneath it on both sides. This is usually a solid section of wall, a pier, or another structural element built specifically to carry the load and thrust coming from that point. A brickmason checks this line and its support before laying a single curved brick, since the entire arch depends on both ends starting from the same solid footing.

A Brickmason Plans the Support Zones Before Choosing the Curve

The shape of an arch isn’t picked from a catalog and then made to work. It comes out of a few practical factors working together.

Opening width plays a part, since a wider opening spreads more thrust outward and asks more of the support on each side. Arch shape matters too. A shallow, flatter curve pushes outward more forcefully than a taller, rounder one, even across the same opening width. Wall construction, whether the brick is a veneer over framing or part of a solid wall system, changes what kind of support is realistic to build behind it. And whatever sits above the arch, whether that’s more brick, a second story, or just roof framing, adds to the load the whole system has to carry.

A brickmason works through these factors before settling on a final curve. Picking a shape purely because it looks good, then trying to make the support work around it, is backward. The support zones on either side should be planned first, with the curve chosen to fit what those zones can actually carry.

Temporary Centering Holds the Shape Until the Masonry Can Work as One

An arch isn’t strong on day one. Each brick is set in wet mortar, and the curve has no real strength until that mortar cures and the whole arch can act as a connected unit.

Centering solves this problem. It’s a temporary form, usually built from wood, shaped to match the curve of the planned arch. The mason lays brick against this form, following its shape exactly, so every joint lines up the way the design calls for.

The centering stays in place through the entire build and for a period after, while the mortar gains strength. Removing it too early is one of the more common mistakes on arch projects, since a curve that looks finished can still be far short of its full strength. A brickmason follows a set curing period, based on conditions and mortar type, before pulling the form and letting the arch carry its own weight for the first time.

The Details Beside and Above the Arch Need a Water-Management Plan

An arch sits in the path of water running down a wall, and its curved shape creates spots where water can collect if the surrounding details aren’t planned correctly.

Flashing needs to route water around the arch and back out, not let it pool at the top of the curve or behind the brick. Drainage space behind the brick, part of the wall assembly identified earlier in planning, needs to stay clear at the arch so water has somewhere to go. Materials next to the arch, whether that’s siding, stone, or trim, need joints and transitions that shed water instead of directing it toward the curve.

These details depend on the specific wall assembly and the exact project design, so there’s no single template that fits every arch. What matters is treating water management as part of the arch plan from the beginning, not something worked out after the brick is already in place. An arch that’s structurally sound but poorly flashed can still develop problems that trace back to water finding a way in above or behind the curve.

Planning a New Opening in an Existing Brick Wall

Contractor measures a planned patio door opening in an existing brick wall before construction begins

Established home updates can involve turning a window into a door, adding a new window for daylight, or creating access to a patio. Before any brick wall is cut, the opening needs a plan that accounts for the wall’s role, the surrounding materials, and a finished transition that keeps water out.

Cutting brick looks simple from the outside. Grab a saw, cut a hole, frame it in. In practice, a new opening touches structure, water management, and appearance all at once. Skipping the planning step is how a straightforward window swap turns into a leak two years later, or a door that never quite looks like it belongs.

Start by Identifying What Sits Behind the Brick Wall

Not every brick wall is built the same way. On a lot of homes, brick is a veneer, a single layer of brick standing in front of a framed wood wall, with a gap and a drainage plane between the two. On others, brick is part of a solid or reinforced wall system that carries more of the building’s load.

This distinction changes everything about the project. A veneer wall means the framing behind the brick is doing the structural work, so a new opening mostly involves cutting the brick and matching the header already planned for the framed wall behind it. A load-bearing or reinforced brick wall means the brick itself is helping hold the building up, and removing a section without the right support can cause real problems above the opening.

Before anyone marks a cut line, find out what’s actually behind the brick. A contractor can check this with a few probes or by reviewing existing plans, if they exist. Guessing here is the single riskiest shortcut in this kind of project.

Treat the Proposed Opening as a Full Wall Assembly Change

A new window or door is never just a hole in the brick. It’s a change to the whole wall assembly at that spot.

That means planning for:

  • The window or door unit itself, sized to a standard that’s actually available, not a custom size that adds cost and lead time.
  • Framing, since the rough opening in the framed wall behind the brick has to match the unit and carry the load above it.
  • Support above the opening, in the form of a header or lintel sized for the span and the load coming down on it.
  • Insulation, filling the gap around the new framing so the opening doesn’t become a cold or hot spot later.
  • Flashing and exterior finish, tying the new opening back into the drainage plane and the brick around it.

Treating brick removal as its own separate task, apart from these other pieces, is how projects end up with a window that fits but leaks, or a door that’s watertight but framed wrong for the load above it.

Map the Brick Courses Before Choosing the Final Opening Size

Brick comes in fixed sizes, laid in courses with consistent joint spacing. A new opening that ignores this pattern almost always leaves narrow slivers of brick at the edges, or a top and bottom line that doesn’t match the coursing on the rest of the wall.

Before locking in a final size, lay the proposed opening out against the existing wall. Mark where it falls relative to:

  • Full and half brick courses, so the cut lines land on natural joints instead of mid-brick.
  • Nearby windows and doors, so spacing and placement look consistent from the street.
  • Corners and trim, so the new opening doesn’t crowd an existing edge.

A few inches of adjustment in either direction, before any brick is removed, is the difference between an opening that looks like it was always part of the house and one that reads as an obvious patch. This step is worth doing on paper, or chalked out on the wall itself, before the first cut.

Plan the Water-Shedding Details Before the First Brick Comes Out

Water is the main risk with any new opening in a brick wall. Rain doesn’t just hit brick and stop, it works its way behind the surface over time, and a new opening creates a fresh path if it’s not detailed correctly.

Flashing needs to direct water that gets behind the brick back out, not into the wall cavity. Weep holes need to stay clear so trapped moisture can drain. Sealant belongs at specific joints, not smeared everywhere as a catch-all. Trim around the new window or door has to work with the flashing underneath it, not sit on top of it as an afterthought.

The right combination of these details depends on the wall assembly identified in step one and on the specific window or door product being installed. A generic approach copied from a different house or a different wall type is a common source of leaks that show up long after the crew has left.

Make the New Opening Look Intentional From the Street and Patio

A well-planned opening doesn’t just perform. It looks like it belongs.

Headers should line up with existing window or door heights nearby, not sit at a random level that breaks the rhythm of the wall. Trim should match, or intentionally complement, what’s already on the house rather than introducing a new style with no connection to the rest of the exterior. Brick around the new opening should match the original in color and texture as closely as possible, since a visible seam between old and new brick is one of the fastest ways to make an addition look like an afterthought.

Small choices, like keeping the same joint width and mortar color, carry a lot of weight here. Get them right, and a new window or door reads as something the house was always meant to have. Get them wrong, and even a structurally sound opening looks like a patch job from the sidewalk or the backyard.