Brick Patio Edges That Stop Pavers From Spreading Into the Lawn

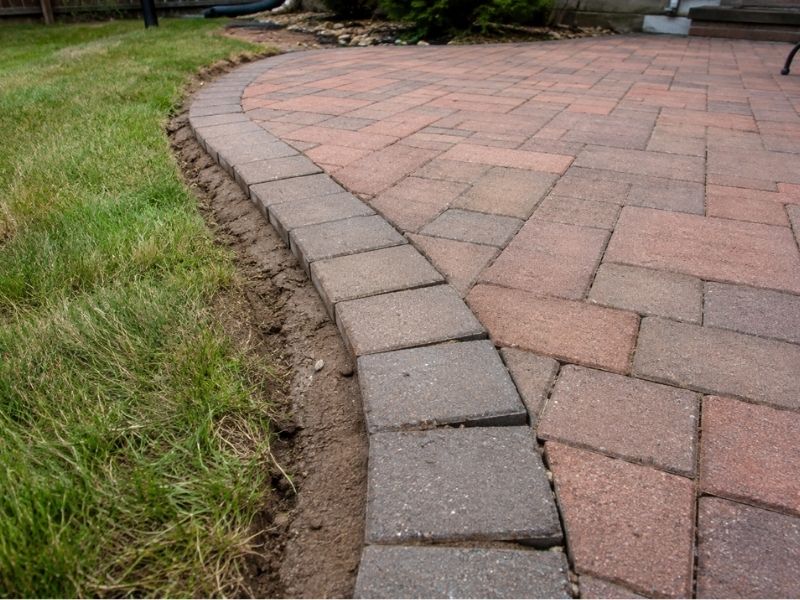
Brick patio with secure edge restraints preventing pavers from spreading into the lawn in a residential backyard in Frisco, TX.

A brick patio can look perfect the day it goes in and still start to spread a year later. The outer pavers creep out, the border line goes crooked, and grass sneaks into the gaps. In Frisco backyards, where space is tight and the clay soil moves with the seasons, a strong edge keeps a patio holding its shape. The edge does the quiet work of locking every paver in place, so getting it right keeps the patio crisp for years.

Why Brick Patio Edges Matter More in Small Backyard Designs

In a small yard, pavers have almost no room to shift before they push into the lawn or a flower bed, so the edge carries more weight than people expect. A big patio can lose a little shape at the border and nobody notices. A small one cannot.

When the yard is tight, the patio sits right against the grass, the beds and the walkway. A few pavers sliding out show up fast as a wavy edge or a gap by the lawn. Frisco lots often pack a lot of living into a small footprint, so a firm edge keeps the line between patio and lawn sharp and stops chairs and feet from catching on loose pavers.

Choosing the Right Edge Restraint for Long-Term Patio Stability

Edge restraint is the strip that holds the outer pavers from sliding out, and the right type locks the patio tight without changing how it looks. Some restraints are hidden. A plastic or metal strip sits just below the surface, and long spikes pin it into the base. You do not see it once the grass grows in, but it holds the outer row firm.

Other edges are part of the design. A row of bricks set on end, a soldier course, or a poured concrete curb can frame the patio and act as the restraint at the same time. Both work when they’re set right. What matters is that the outer pavers cannot drift sideways, because a weak or missing edge lets the whole field loosen over time.

Base Preparation Beneath the Edge Determines How Well It Performs

The edge is only as strong as the ground under it, so the compacted base needs to run past the pavers and support the whole perimeter. People often build a solid base under the middle of the patio and skimp at the edges. That is where trouble starts. If the base stops at the last paver, the border has nothing firm to sit on, and the edge sinks or slides.

The fix is to extend the compacted gravel base a bit past the visible pavers. Crushed aggregate, packed in thin layers, gives the restraint and the outer row solid footing. A professional brick patio installation includes extending the compacted base beyond the patio perimeter to provide lasting stability. Over Frisco’s clay, this matters even more, since clay swells and shrinks and can have a poorly built edge out of line.

Drainage Around Patio Borders Helps Protect the Entire Installation

Water that pools or runs along the patio edge washes out the soil that holds it, so good drainage at the border keeps the whole patio from shifting. When water collects along the border or sheets into the lawn, it carries soil with it. Lose that soil, and the restraint loses its grip.

Grading is the first defense. The patio should slope just enough to send water away from the house without pooling at the edge. Keep downspouts and sprinklers from dumping right at the border, since a steady soak softens the ground that anchors the edge. Where water gathers, a simple drain or graded swale moves it along, and steady drainage calms the wet-dry swing in clay soil.

Joint Sand and Routine Border Inspections Keep Patio Edges Secure

Full joint sand and a quick look at the border a couple times a year catch small edge problems before they turn into a spreading patio. Joint sand fills the gaps between pavers and lets them lock together as one surface. When that sand washes out or sinks, the pavers loosen and the edge starts to wander.

Grass is the other thing to watch, since lawn grass creeps into the seam and its roots push pavers apart. Pulling it along the edge keeps the border firm. When you walk the perimeter, look for these signs:

  • Pavers on the outer row that rock or sit low
  • Gaps opening between the border and the lawn
  • Joint sand dropped well below the paver tops
  • An edge restraint spike that has lifted or pulled loose

Catch these early and the fix is small. Ignore them, and a loose edge slowly lets the whole patio spread.

Frequently Asked Questions

Why do brick patio pavers start spreading into the lawn?

Pavers spread when nothing holds the outer row in place. Foot traffic, weather and soil movement push the field outward, and without a firm edge the border pavers slide toward the lawn. A weak base, washed-out joint sand or a missing restraint usually sits behind it.

What type of edge restraint works best for a brick patio?

Both hidden strips and decorative borders work well. A spiked plastic or metal restraint stays out of sight and locks the outer pavers down. A soldier course or concrete curb frames the patio and restrains it at once. The best choice fits the look you want, as long as it sits on a solid base.

Does the patio base affect how well the edges hold in place?

Yes, a lot. If the compacted base stops at the last paver, the edge has nothing firm to rest on and will sink or slide. Running the packed gravel base past the pavers gives the border steady support that keeps the edge from moving.

Can poor drainage cause brick patio edges to fail?

It can. Water that pools or runs along the border washes out the soil that anchors the edge. Once that soil is gone, the restraint loosens and the pavers shift. Grading the patio to shed water and keeping runoff off the border protects the edge.

How often should brick patio edges be inspected or maintained?

A look twice a year handles most patios, plus a check after heavy storms. Walk the border for rocking pavers, gaps by the lawn, low joint sand and any lifted restraint. Small fixes like topping up sand or pulling grass take minutes and prevent bigger repairs.

Brick Mailbox Damage After an Impact Needs a Below-Grade Check

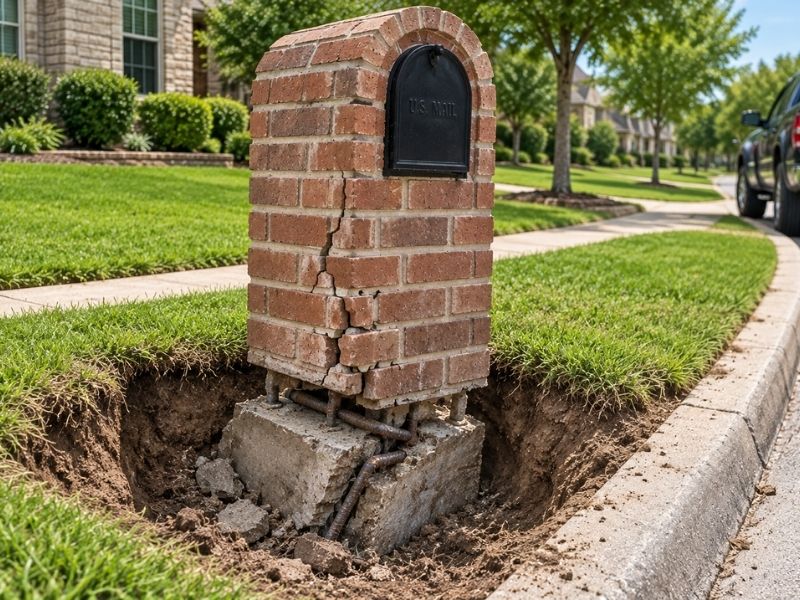
Damaged brick mailbox in Frisco, TX with cracked masonry, exposed concrete footing, bent rebar, and below-grade foundation damage after a vehicle impact.

A brick mailbox sits close to the street, so a car can hit it with real force. After a crash, most people see cracked bricks and think that is the whole story. In Frisco, where mailboxes stand near busy roads, the harm often runs deeper. The base and the steel inside can take the worst of the blow, which is why a below-grade check matters before you rebuild.

Why the Visible Damage May Be Only Part of the Problem

A hard hit spreads force down into the base and steel, so hidden damage is common even when the brick looks fine. A car does not stop the moment it touches a brick. The force keeps moving down the column into the footing, and it pushes on the steel that holds everything together.

Frisco soil holds a lot of clay, which swells when wet and shrinks when dry. That slow push and pull already stresses a mailbox base. Add a crash on top, and the footing can shift or crack where you cannot see it from the curb.

Inspecting the Concrete Footing Before Any Brick Is Rebuilt

Check the concrete footing first, because rebuilding on a cracked base gives you a mailbox that fails again fast. The footing is the pad under the brick. It keeps the whole thing level and steady, so it needs a real look before the new brick goes on.

Watch for a column that leans, cracks in the concrete, gaps where brick pulled from the pad, and spots that no longer sit level. Water pooling near the base is another sign the ground moved. New brick on a broken pad cracks again within a season, and concrete needs time to reach full strength, so fix or repour the footing before you rebuild.

Checking Reinforcement Inside the Mailbox Structure

Look at the steel inside the mailbox next, since bent or rusted rebar can stay hidden after fresh brick goes up. Rebar runs through the column for strength. Anchor bolts tie the metal mail box to the brick, so this frame does a lot of quiet work.

A crash can bend this steel or pull it loose. Once new brick covers it, the outside looks normal, but bent rebar no longer holds the column straight. If the hit cracked the coating on the steel, rust starts and pushes the brick apart from the inside, so straighten or replace damaged steel before the column gets closed up.

Protecting Underground Utilities During Mailbox Reconstruction

Find out what runs under the mailbox before you dig, because a curbside spot often sits over buried lines. If the footing has to come out, digging blind can strike a line. That means a safety risk and a repair bill.

In Texas, the law says to call 811 at least two business days before you dig, not counting weekends or holidays. The call is free. Crews then come to mark their lines so you can dig around them.

Buried services that can sit near a curbside mailbox include:

  • Electric lines for yard lights or the mailbox lamp
  • Cable, phone or fiber internet lines
  • Irrigation and sprinkler pipes
  • Gas lines
  • Water and drain lines

Planning a Durable Brick Mailbox Repair for Long-Term Performance

A repair that lasts fixes the base and steel first, then matches the new brick for clean curb appeal. The order matters: base, then steel, then brick. Jumping straight to the brick just to look fixed sets up the next failure.

Once the footing is solid and the steel is sound, a skilled mason matches the color, size and mortar so the patch blends in. The below-grade findings also settle the repair-or-rebuild choice. A sound base and straight steel mean a repair is enough, while a shattered footing or badly bent steel calls for a full rebuild.

Frequently Asked Questions

Can a brick mailbox still have hidden damage if only a few bricks are cracked?

Yes. The brick you see is only the outer shell. A hard hit sends force into the footing and the steel, so the base can shift or the rebar can bend while the brick still looks fine. Cracked bricks are a reason to check deeper.

Why should the concrete footing be inspected before rebuilding a brick mailbox?

The footing keeps the mailbox level and steady. If it cracked or moved in the crash, new brick on top will loosen and crack again fast. Checking and fixing the base first gives the rebuild a solid start.

Can a vehicle impact bend the reinforcement inside a brick mailbox?

It can. Rebar and anchor bolts run through the column, and a strong hit can bend or loosen them. Bent steel no longer holds the column straight, and a cracked coating lets rust start, so the steel needs a look before the brick goes back.

Should underground utilities be located before replacing a brick mailbox foundation?

Yes. A curbside mailbox often sits near buried electric, cable, gas, water or irrigation lines. Texas law calls for a free 811 request at least two business days before digging so crews can mark them and you avoid a costly strike.

How can homeowners tell whether a brick mailbox needs repair or complete reconstruction?

The answer sits under the surface. A sound footing and straight steel usually means a brick repair works. A broken base or badly bent steel points to a full rebuild, and a below-grade check gives the clear answer.

Painted Brick Peeling Near the Ground May Point to a Moisture Path

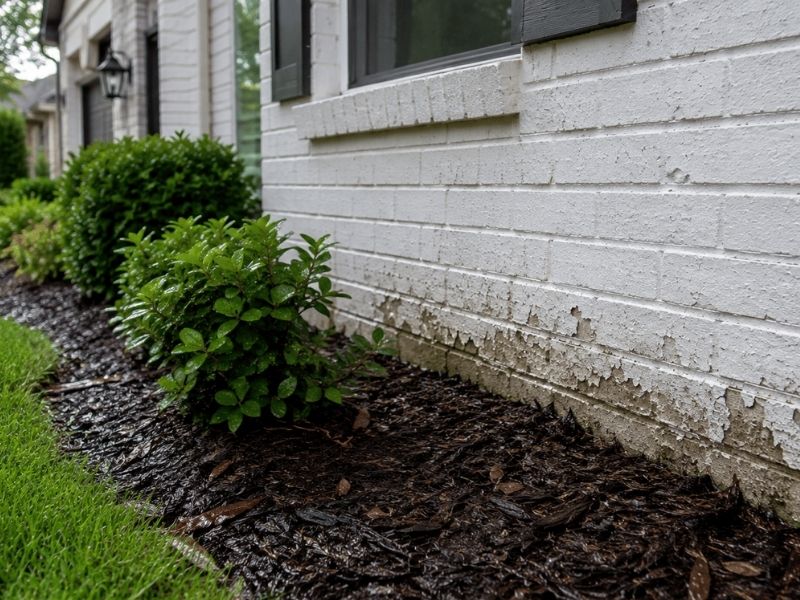
Painted brick peeling near the foundation of a Frisco, TX home, showing moisture damage along the lower brick courses next to damp mulch and landscaping.

You painted the brick a few years back. Now the paint near the ground is flaking or curling away, while the brick higher up still looks fine. When painted brick peels low on the wall and holds up top, water near the soil is usually the reason. Around Frisco, where clay soil holds moisture and lawns get watered often, the bottom rows stay damp longest. The peeling is the symptom, and the moisture path underneath is the real problem.

Why Paint Usually Fails First Along the Bottom Rows of Brick

Paint peels near the ground first because that is where brick meets the most water. Rain splashes back from the soil onto the lower courses. Sprinklers hit the same spot each morning. If the yard slopes toward the house, water sits against the base and soaks in. Brick is porous, so it holds that moisture.

The shape of the damage helps too. An even band of peeling a foot or two up usually means water is wicking upward from wet soil. Patchy flaking near a downspout or spigot points to splash. Higher brick dries between rains, but the bottom rows rarely get that chance.

Hidden Moisture Paths That Keep Feeding Paint Failure

Some water sources are easy to miss, and they keep the wall wet long after you repaint, so a fresh coat fails again. Before you touch a scraper, walk the base of the wall and look for these:

  • Weep holes packed with dirt, paint or mortar, so trapped water cannot drain
  • Mulch or flower beds piled against the brick, holding damp soil on the wall
  • A hose bib that drips and keeps one section wet
  • Flashing that is bent, cracked or missing, letting water slip behind the brick
  • Downspouts that dump rain at the foundation instead of carrying it away

Finding the path matters far more than the paint. Trace the water to its source, fix that, and the paint has a real chance of holding.

What Efflorescence Reveals About Moisture Behind Painted Brick

Those white, chalky stains have a name: efflorescence. They form when water moves through the masonry, picks up salts, and carries them to the surface, then evaporates and leaves the powder behind. So efflorescence is proof that water is traveling through the wall.

You will often spot these deposits before or alongside peeling paint. Both point to moisture on the move. Scrubbing off the powder or painting over it does nothing about the water feeding it. Check the source before any cosmetic work.

Why Masonry Repairs Should Come Before Surface Preparation

Repairs to the brick and joints come first, before any scraping or priming. Close off the water entry points you found, whether that means regrading the soil, clearing weep holes or fixing flashing. Repair cracked brick and crumbling joints. Then let the wall dry out.

Drying takes weeks, not days. A moisture meter helps, or tape a square of clear plastic to the brick and check for condensation a day later. Wait until the wall reads dry to start painting. Skip this order and you seal fresh paint over a damp wall, which pushes the coating right back off.

How Frisco Homes Benefit From Early Moisture Investigations

Frisco homes face conditions that keep lower brick damp. Seasonal storms drop heavy rain fast. The expansive clay soil swells when wet and shrinks when dry, which shifts grading and cracks joints over time. Add regular lawn irrigation, and the base of the wall rarely dries fully.

Catching the moisture path early keeps a small paint problem from becoming a bigger repair. Damp brick left alone can spall, where the face flakes off, along with joint and interior damage. Sloping the soil so it drops about six inches over the first ten feet away from the house sends water where it belongs.

Frequently Asked Questions

Why is painted brick peeling only near the bottom of my house?

The bottom rows take on the most water. Rain splashes up from the soil, sprinklers wet the same area, and damp ground lets moisture wick into the porous brick. Higher brick dries between rains, so its paint holds and the lower section fails.

Can efflorescence cause paint to peel off brick?

Not on its own, but it signals the same problem that does. Those white salt deposits mean water is moving through the wall, and that moving water breaks down the paint film.

Should peeling paint be removed before fixing the moisture problem?

Fix the moisture first. Strip and repaint while the wall stays wet, and the fresh coat peels again within a season. Trace the water source, stop it, and dry the brick before dealing with the old paint.

How can I tell where moisture is getting into my brick wall?

Look at the pattern. An even band of peeling suggests rising damp from wet soil. Flaking near a downspout or spigot points to splash or a leak. Check for clogged weep holes, mulch against the wall and grading that tilts toward the house.

Is it better to repair the brick before repainting my home’s exterior?

Yes. Repairing cracked brick and open joints closes off water paths, and drying afterward gives paint a stable surface. Repainting first only hides the damage while moisture keeps working behind the coating.

Brick Masonry Expansion Joints Only Work If the Seal Holds

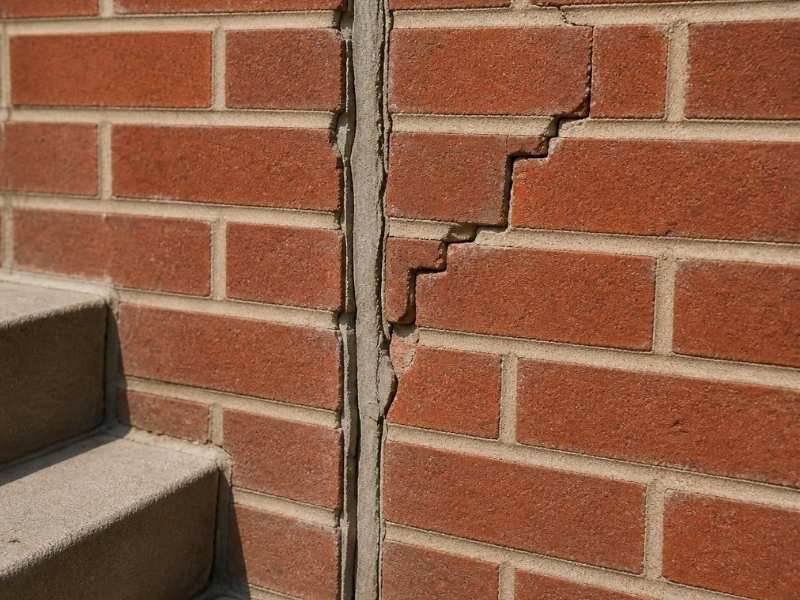
Failed brick masonry expansion joint with cracked sealant and stair-step cracking in Frisco, Texas.

Run your eye down a long brick wall and you will find a thin vertical line filled with soft sealant. That line is one of the brick masonry expansion joints, and it does a quiet but big job. It gives the wall room to grow and shrink as the weather changes. When the seal in that joint hardens, cracks or gets filled with mortar, the wall loses that room and starts to crack on its own. For developers building long walls around Frisco, where summers bake the brick and winter nights drop below freezing, that back-and-forth movement never stops. A joint that cannot move is a wall that will crack.

What an Expansion Joint Is Doing

A brick wall does not sit still. It takes in moisture, warms in the sun and cools at night. Each change makes it swell or shrink a hair, and those small moves add up over a long run. An expansion joint is a planned soft gap that swallows that movement, so the growth lands in the gap instead of the brick.

An expansion joint is different from a mortar joint. A mortar joint is hard and holds brick together. An expansion joint stays open and flexible, filled with backer rod and sealant, so the two sides can move without pushing on each other. Mix those two up and you get the most common mistake on this whole topic.

How to Spot a Joint That Has Failed

The best time to check is twice a year, once in the heat and once in the cold, since a stressed joint shows it most in the extremes. Walk the wall slow and look at each vertical line up close.

  • Sealant that has gone hard, brittle or chalky instead of soft and springy
  • Sealant cracked down the middle or pulled away from the brick on one side
  • A joint packed with mortar or painted over, so it can no longer move
  • A lumpy, wrong-color caulk line where someone patched it fast
  • A long straight wall with no soft joint at all

Press the sealant with a key or screwdriver. Good sealant gives a little. Bad sealant feels like rock or crumbles. A gap that looks dry, split or stuffed with something hard has failed.

What a Bad Joint Does to the Wall

A joint that cannot move pushes the problem into the brick. The wall still wants to grow, but now it has nowhere to go. So it cracks, often near corners, windows or where the wall changes height. Brick edges along the stuck joint can chip and flake off as they grind together. A long run with no joint can even bow out.

Water is the part that turns a small problem into a big one. A split seal lets rain sit in the open joint. On a cold night that water freezes, swells and pries at the brick and mortar around it. Do that a few dozen times over a winter and the edges start to crumble. Caught early, this is a reseal. Left alone, it can turn into brick replacement or a wall that needs rebuilding at one end.

How to Reseal an Expansion Joint the Right Way

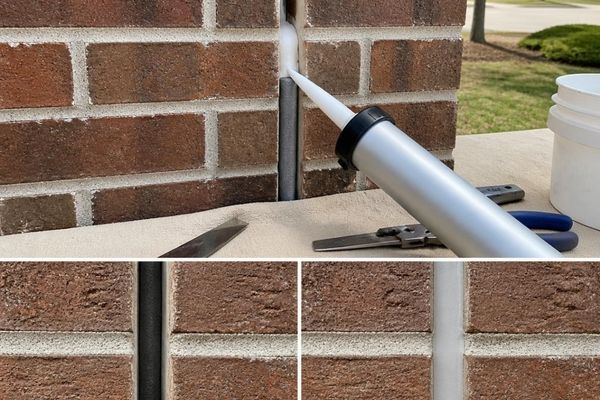
Brick masonry expansion joint repair with backer rod and fresh sealant in Frisco, Texas.

Start by clearing the joint, not covering it. Rake out the old, dead sealant all the way down with a hand tool or an oscillating tool. Brush the joint faces clean so the new sealant can grab bare, dry brick. Do not smear fresh caulk over a cracked line, since it will fail again in a season.

Push in the backer rod to set the right depth. The rod also keeps the sealant from sticking to the back of the joint, which is what lets it stretch. Then fill the joint with a flexible sealant made for masonry. Tool the bead smooth so it presses into both faces and sheds water. Match the joint width the wall was built for, and keep the sealant soft and slightly recessed so it can move. Give it time to cure before rain hits it, which the product label will spell out. Plan the work for a dry day at mild temperature, since wet or freezing brick will not let the sealant grip.

What Never to Do

Never fill an expansion joint with mortar. Hard mortar locks the wall and starts the cracking all over again. Never paint the joint shut, since a coated joint cannot move and the paint hides it from the next person. And never caulk over old dead sealant, because the fresh bead only grips the failure underneath.

When to Bring in a Pro

One clean joint is a steady weekend job. A long wall with many failed joints, a joint packed solid with mortar or a wall built with no joint at all is a different story. Those need a mason, and a missing joint on a tall or load-bearing wall needs an engineer to place it right. Call before the cracks spread, not after.

Frequently Asked Questions

What is the difference between an expansion joint and a mortar joint?

A mortar joint is the hard line that bonds brick to brick. An expansion joint is a soft, open gap built to move. One holds the wall together, the other lets it flex. Filling an expansion joint with hard mortar cancels the whole point of it.

Can I just caulk over a cracked expansion joint?

No. Caulk laid over dead sealant only sticks to the old failure, so it splits again fast. Rake the joint clean, set the backer rod for depth, then apply fresh masonry sealant. Doing it right once beats patching it every year.

How often do expansion joint seals need replacing?

Most joint sealant lasts several years before it hardens or pulls loose, often in the range of ten to twenty. Sun, heat and weather wear it faster. Check the joints once a year and reseal the ones that have gone stiff or cracked before water gets in.

What happens if a long brick wall has no expansion joint?

The wall has no room to grow, so it makes its own room by cracking. You will see cracks near corners and openings, chipped brick edges and sometimes a bow in the wall. Adding a proper joint later takes a mason or engineer, so it is best planned early.

Can a mortar-filled expansion joint be fixed?

Yes, but it takes real work. A mason cuts the mortar back out of the joint, cleans the edges and rebuilds it as a soft joint with backer rod and sealant. Once it can move again, the cracking around it usually stops.

How a Brick Mason Matches Mortar Without Leaving a Patchwork Repair

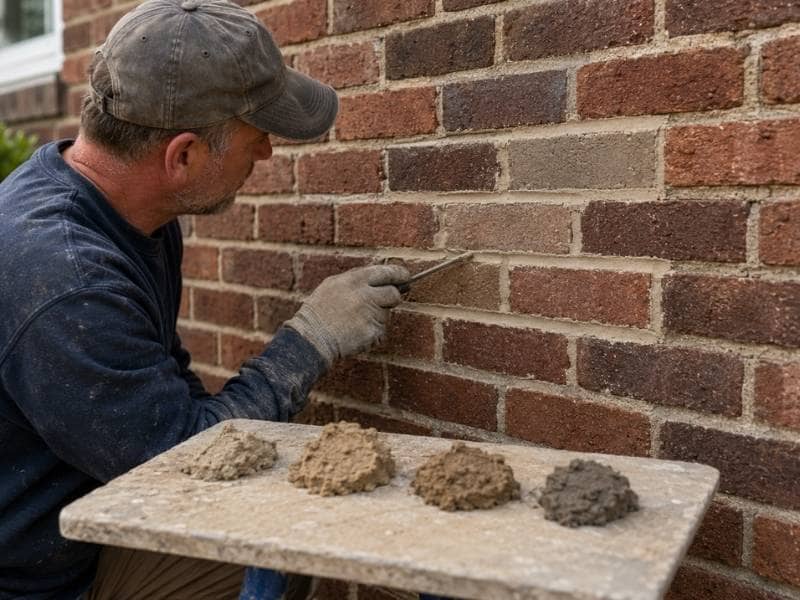
 Brick mason matching mortar samples and carefully tooling new joints to blend a repair into an existing brick wall

A repair can hold up perfectly and still look wrong. When a new mortar sits next to old and the color or shape is off, the eye goes straight to the patch. A skilled brick mason treats mortar matching as an essential part of brick masonry, not an afterthought. The goal is a repair that blends in so well most people never spot it. Getting there takes the right reference, some patient testing, and real attention to how the joint gets finished.

Pull Your Reference From Inside the Joint

The mortar you see on the wall surface has been through a lot. Sun, rain, dirt, and biological growth all change how it looks over the years. Cleaning products and simple age shift the color further. Matching to that weathered face means matching to a color the original mortar never actually was.

A better reference comes from mortar taken from inside the joint, where the weather never reached. That protected material sits closer to the original mix and gives a truer starting color. A mason who chips out a small hidden sample has something honest to match against.

Working from the faded surface almost guarantees a mismatch once the new mortar cures and shows its real tone. The inside of the joint is the closest thing to a time capsule the wall has. Starting there points the whole match in the right direction from the first batch.

Separate the Mortar Color From the Sand

Mortar color isn’t one simple thing. Cement, lime, and any added pigment all feed into it, but the sand does heavy lifting too. Sand color, particle size, and how the grains spread through the mix all shape the finished look. Two mortars can share a recipe and still land in different places because their sand differs.

This is why matching by color alone falls short. A mason who picks a mix that looks close in a bucket can still end up with joints that read as off once they dry. Studying the sand in the original mortar, its shade and its grain, points toward the right blend.

The sand often decides the match more than the cement ever does. A coarse, warm sand and a fine, gray one will finish as different joints even with the same cement and lime. Getting the sand right is half the battle, and it’s the half people skip most.

Test Small Batches and Let Them Cure

Wet mortar and cured mortar are two different colors. Fresh mix looks darker and richer than it will once it dries out and sets. Judging a match while the mortar is still wet leads to joints that turn too light or too gray days later. The cured color is the only one that counts.

The fix is to mix a few trial batches and let each one dry fully before choosing. A mason then holds the cured samples right against the existing wall and compares them in daylight. The closest cured match wins, not the one that looked best wet.

That patience up front prevents a repair that only reveals its mismatch after everything is set and hard to undo. A few test batches cost a little time and almost nothing in material. That small effort saves a joint that would otherwise stand out on the wall for good.

Copy the Shape and Finish of the Old Joints

Color is only half the match. The original joints have a certain depth, width, profile, and surface texture, and all of that reads as strongly as the tone does. A joint tooled to a different shape stands out even when the color is dead on. The light hits it differently, and the eye catches the change.

Reproducing the old joint means matching how it was struck and finished. A joint that sits too smooth, too deep, or shaped with the wrong tool breaks the pattern of the wall. A mason studies the existing profile and works the new joints to the same depth and finish.

Matching the tooling method ties the repair into the surrounding brickwork instead of framing it. The way a joint catches shadow depends on its shape, so a matched profile blends where a mismatched one glares. Small details in the tooling carry more weight than most people expect.

Blend the Edges of the Repair

The last thing you want is a neat rectangle of new mortar announcing itself on the wall. A repair that stops in a clean box draws the eye no matter how good the color is. A brick mason instead picks logical stopping points that follow the natural lines of the brickwork. Feathering the boundary into the surrounding joints softens where old meets new.

Careful work at the edges holds the entire mortar repair together. That means removing the old mortar cleanly, protecting the brick faces during the work, and cleaning the area without harsh scrubbing. Curing the new joints at an even pace helps them settle to a consistent color across the whole repair.

When the boundary disappears into the wall, the patch stops looking like a patch and starts looking like the wall always did. A repair done this way rewards the extra care with something you have to search for to find. That’s the mark of a match done right.

Retaining Wall Height Can Change the Permit Plan Earlier Than Expected

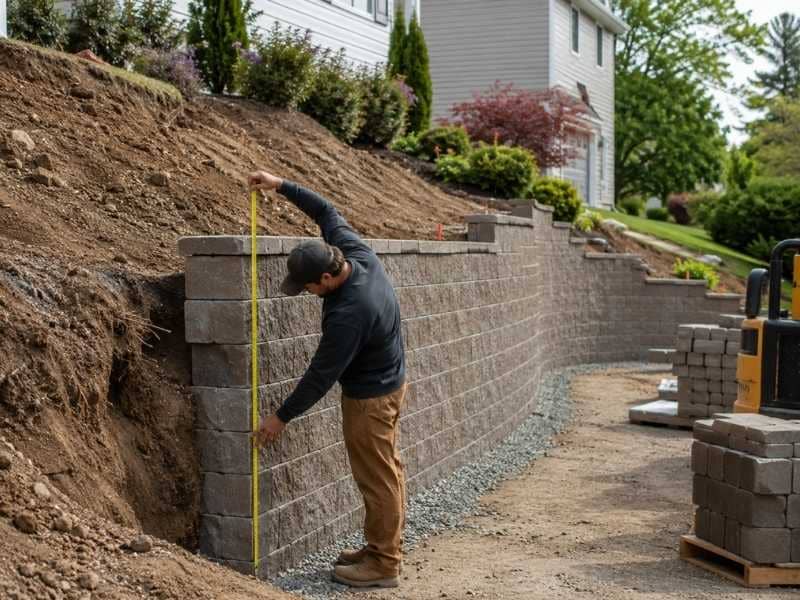
 Retaining wall height being measured from finished grade to the top of a stepped wall on a sloped residential site

A retaining wall project can shift from simple to reviewed based on one number, its height. Many owners plan a low wall, assume no paperwork applies, and start digging before checking the measured height against local rules. The height that decides permit status often isn’t the height people picture in their heads. Getting that measurement right at the planning stage saves a redesign after materials and labor are already committed. A short review early keeps the project from stalling once the work is underway.

Measure Height From the Right Point

Wall height gets measured from the finished grade at the base up to the top of the wall. It isn’t a count of how many visible courses stack up. Two walls with the same number of blocks can measure very differently once the ground around them changes. The grade at the bottom is the reference point that matters most.

Ground rarely runs perfectly level along a wall. As the grade rises and falls, the measured height changes from one end to the other. A wall that reads low where the ground is high can read much taller where the ground drops away.

Measuring at several points, rather than eyeballing one spot, gives the real picture of how tall the wall actually stands. This is easy to get wrong by guessing from the block count alone. A quick set of measurements along the run tells you what the wall truly measures where it counts.

Watch the Line Where a Low Wall Becomes a Reviewed One

Many areas exempt short walls from a permit, often up to a set height in the range of two feet, though the exact figure depends on local code. A wall that stays under that mark may qualify for the exemption. A design that rises above it usually needs a review before work starts. Confirming the local threshold is the first real step, since the number varies from one place to the next.

A few common changes can push a wall past the line without anyone noticing. Adding caps raises the top. Changing the grade at the base lowers the reference point and grows the exposed face. Increasing how much of the wall shows can tip a borderline design over the limit.

Because those tweaks happen during planning, checking the final measured height after every change keeps the permit status accurate. A wall drawn just under the limit can quietly cross it once a cap or a grade change goes in. Rechecking the number after each design decision catches that before it becomes a problem on site.

Judge the Whole Wall, Not Its Average

One short stretch of wall doesn’t set the status for the entire project. People sometimes measure the lowest section, see a comfortable number, and assume the rest clears the same bar. That shortcut misses the sections that climb higher than the plan intended.

Slopes, stepped runs, corners, and low points all pull the height around across a single wall. Part of a wall can cross the threshold even when most of it stays well under. The height that triggers a review is the tallest measured section, not the average of the whole run.

Checking the full length end to end catches the spots that would otherwise get missed until an inspector points them out. It’s the tall corner or the low dip in the grade that usually causes the trouble. Walking the whole wall with a tape, section by section, keeps a single high point from turning the whole job into a surprise.

Look at Site Conditions That Invite a Closer Look

A height exemption isn’t a green light for every part of the design. Even a short wall can run into conditions that call for more review. Nearby structures, property lines, and utility easements all shape what’s allowed in a given spot. Fences, driveways, and any added weight sitting above the wall change the picture too.

Water plays a role here as well, since a wall that blocks or redirects runoff can create problems for a neighbor or for the wall itself. Passing the height test says nothing about whether the placement clears these other conditions. Treating the exemption as full approval is where owners get caught.

A quick look at the surrounding site tells you whether height is the only question or just the first one. A short wall in a tight spot near a property line or an easement can still need a closer review. Checking those conditions early keeps the plan from running into a rule no one thought to look up.

Lock the Design Before Excavation Changes the Site

Once digging starts, the site changes in ways that are hard to walk back. Confirming the full design before that point protects the schedule and the budget. Wall dimensions, drainage details, footing or base preparation, material choice, and the overall retaining wall design all deserve a check while changes are still inexpensive.

An early review catches trouble before it costs real money. Redrawing a wall after the trench is open means throwing away time, and sometimes materials, that already went into the wrong plan. A design confirmed on paper, with the height verified against local rules, lets the crew dig once and build once. That order of operations turns a permit surprise into a quiet non-event.

Brick Pavers That Complement Traditional and Modern Homes

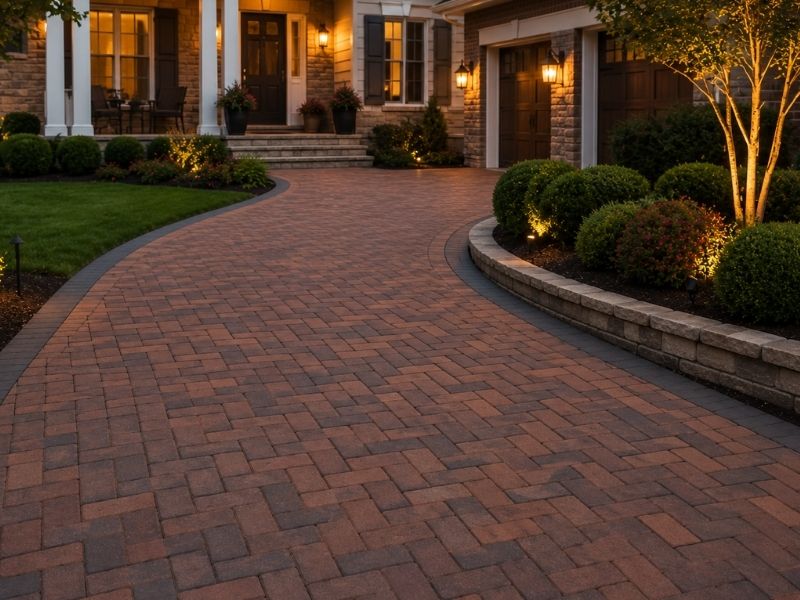
Brick paver driveway in a herringbone pattern complementing a traditional-style home with landscaped front yard in Frisco, TX.

Most people pick brick pavers off a display board in a fluorescent-lit showroom. Then the pallet arrives and the color is wrong. The unit was never the problem. The house was standing right there the whole time, telling you what it wanted, and nobody looked up from the sample.

Start With the Home’s Existing Style and Color Palette

Every house already has a color story. Roof, trim, siding or brick, and the front door all sit in a fixed range you didn’t choose today. Pavers join that group or fight it, and there’s no middle ground.

Stand at the curb and look at your house for a minute. Note the two or three colors that dominate. Those are your limits, and everything below is about working inside them.

Architecture style pushes the same way. A hundred-year-old colonial and a flat-roofed modern box want different units, and the difference is measurable. It comes down to color range, unit size, pattern and edge.

Choose Between Blended and Single-Tone Brick Pavers

Traditional homes take blended color well. A blend mixes several fired shades in one pallet, so the finished surface has depth and slight variation across it. That variation reads as age, and it sits comfortably next to older brick and painted wood trim.

Modern homes want the opposite. A single tone, or a very tight blend, gives a flat even field that matches clean lines and big glass. Charcoal, gray and buff-toned units do this well, and heavy red blends usually don’t.

Here’s the part that catches people. Clay color comes from the clay and the kiln, not from a pigment coat, so what you see is what you get for the life of the unit. That’s a real advantage over dyed concrete, and it also means you can’t adjust it later.

Look at every sample wet. Brick darkens when it rains and the blend shifts, sometimes a lot. A pallet that looked warm and soft in the yard can go dark and busy in the first storm.

Match Paver Size and Proportion to the Space

Unit size changes how big your paving looks. Standard 4 by 8 pavers create a lot of lines in a small area, and all those lines read as detail. Detail suits traditional homes with detailed facades.

Large format units do the reverse. Fewer joints across the same square footage means a quieter surface, and quiet is what a modern facade is after. Long thin plank shapes push that even further.

Scale has to match the space too. Small units on a huge driveway look busy and cheap. Big units on a narrow front walk look clumsy, because you end up cutting half of them.

Use the Paver Pattern to Reinforce the Home’s Design

Pattern is the single most underused decision on this list. Two people can buy the same pallet and get completely different results depending on how it’s laid.

Herringbone reads traditional and it’s the strongest pattern for anything cars drive on, because the interlocking angles resist shifting under load. A 45 degree herringbone reads more formal than a 90 degree one. Basketweave is the most old-fashioned pattern in common use, and it belongs on colonial and cottage homes.

Running bond is the neutral choice and it goes with almost anything. Stack bond, where the joints line up in both directions, is the modern move. It looks deliberate and slightly severe, which is the point.

Select a Pattern That Fits the Architectural Style

Colonial, cottage, farmhouse: basketweave or 45 degree herringbone

Craftsman, tudor, traditional brick: 90 degree herringbone or running bond

Transitional: running bond in a blended color

Modern, contemporary: stack bond or long running bond in a single tone

Treat that as a starting point rather than a rule. A stack bond in a soft red blend can work on a transitional house, and it looks better than either style does alone.

Consider Edge Details, Surface Texture, and Traction

A tumbled paver has been tumbled to knock the corners off, so it looks worn before it’s installed. That works on older homes and it looks silly on a modern one.

Wire-cut units have a rough dragged face with a matte grip. Clean-edge units have crisp corners and a smooth top. The crisp edge is the modern choice, and it also shows every bad cut, so the install has to be sharp.

Texture affects more than looks. Smooth surfaces get slick when wet and wire-cut faces hold traction better. That matters at a step or on a slope, and it’s worth trading a little style for.

Compare Clay Brick Pavers With Concrete Alternatives

Concrete pavers shaped like brick cost less and come in more sizes. They’re pigmented, and pigment fades under sun over the years while fired clay color doesn’t.

Clay brick pavers cost more up front and hold color for decades. On a house where the paving sits next to real brick, the difference shows quickly. On a modern home with no brick anywhere, a good concrete unit is a fair call.

Say it plainly to whoever’s selling you the job. Ask which one you’re being quoted, because “brick pavers” gets used loosely and the two products age nothing alike.

Check Samples and Installation Details Before Ordering

  • Get full-size samples, not chips, and bring them home
  • Lay them against the house wall and the trim, outside, in daylight
  • Wet them with a hose and look again
  • Check them at noon and at dusk, because both light conditions matter
  • Confirm clay or concrete in writing on the quote
  • Confirm the pattern in writing too, since it changes labor cost and waste
  • Order extra units from the same run for future repairs

That last one saves you later. Color runs vary between batches, and a patch from a different lot never quite disappears.

Frequently Asked Questions

What Color Brick Pavers Work With a Modern Home?

Single tones and tight blends suit modern homes best, in charcoal, gray or buff ranges. Heavy multi-color red blends read traditional and fight clean lines. Fired clay color comes from the clay and the kiln rather than a pigment coat, so it holds up over decades without fading.

Do Brick Pavers Work With Contemporary Architecture?

Yes, when the unit and pattern are chosen for it. Use large format or long plank shapes, a single tone and a stack bond or long running bond layout. Crisp clean edges suit modern facades, while tumbled units look worn on purpose and clash with them.

What Paver Pattern Suits a Traditional Home?

Basketweave and 45 degree herringbone read the most traditional, and both suit colonial, cottage and farmhouse styles. Standard 4 by 8 units in a blended color add the visual detail that older facades carry. Herringbone also resists shifting under vehicle loads better than any other common pattern.

Are Clay Brick Pavers Better Than Concrete Pavers?

For color life, yes. Clay gets its color from firing, and concrete pavers are pigmented, so they fade under sun over the years. Concrete costs less and offers more shapes. Ask any contractor to state on the quote which product they’re pricing, because the term gets used loosely.

How Do I Choose Pavers That Match My House?

Take full-size samples home and set them against the house in daylight, then wet them and look again. Pick from the two or three colors already dominant on the facade. Match unit size to the scale of the space, and pick the pattern to suit the architecture style.

How Seasonal Weather Affects a Brick Patio

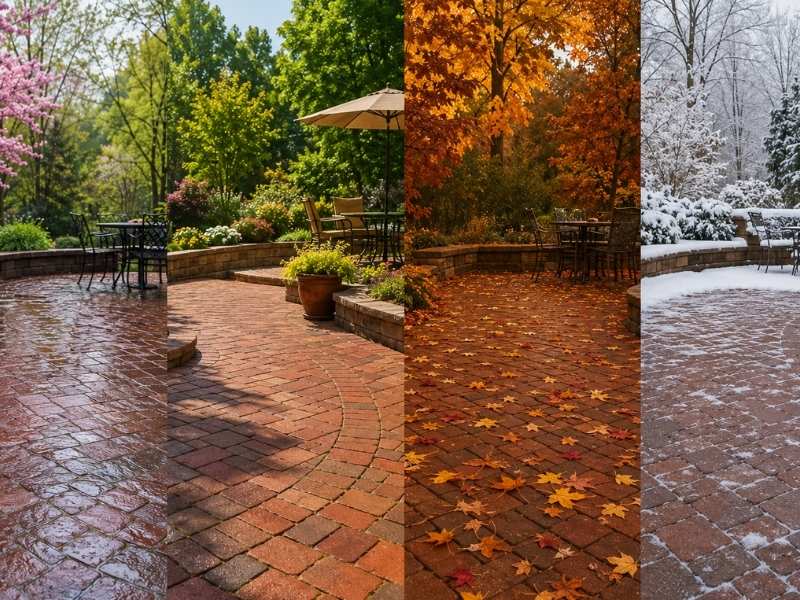
Brick patio shown through spring rain, summer sun, fall leaves, and winter snow, illustrating how seasonal weather affects brick pavers in Frisco, TX.

Your brick patio moves every single day, and you’ll never see it happen. It swells in July. It shrinks in January. The ground beneath it does the same thing on its own schedule, and the two rarely agree. Watch the right things at the right time of year and you’ll catch problems while they still cost twenty dollars.

The soil is running the show

Brick is stable. The dirt under it is anything but. Proper brick patio installation starts with a stable base and good drainage, helping the surface perform better as soil conditions change over time. Clay soil swells when it takes on water and shrinks when it dries out, and that movement lifts and drops whatever sits on top. A wet spring followed by a dry August is a full cycle of up and down.

You can’t stop that. What you can do is control how much water reaches the soil and how fast it leaves. Every seasonal habit below traces back to that one idea. Keep the moisture steady and the patio stays put.

Spring: water finds the weak spot

Rain is the first test each year. Heavy runoff pulls joint sand out of the seams, and once a joint empties, water gets deeper into the setting bed. That’s a small problem in March and a real one by fall.

Look at your patio during a storm, not after one. Water should run off the surface and away from the house within a few feet. If it pools, sheets toward a wall or cuts a channel through the joints, you’ve found the thing to fix.

What spring actually asks of you

Sweep the joints and see what’s missing. Refill any seam you can push a finger into, and use polymeric sand if the patio was built for it. Clear the downspout that dumps a roof’s worth of water onto one corner, because that corner will fail first.

Weeds show up now too. They grow in the joint sand, not through the brick, so weeds are a signal that your joints are open. Pull them and refill rather than spraying and forgetting.

Summer: heat pushes and the sun fades

Brick expands when it heats up. A wide patio in full sun grows a small amount across its width, and it has to push somewhere. Tight edges and a hard wall on one side turn that push into a lifted or chipped brick.

Heat also bakes the color. Red brick holds up well, but darker units and any pigmented jointing will lighten over a few hard summers. That’s cosmetic and it’s worth knowing before you blame the mason.

Watch for the dry-out sag. Late summer pulls water out of clay soil and the ground shrinks away, so a patio that was flat in May can develop a low spot in September. Note where it drops. That low spot will tell you where water has been collecting all year.

Fall: the season everyone skips

Leaves look harmless. Wet leaves left on brick for weeks release tannins that stain the surface a rusty brown, and that stain sinks in. Blow them off before the first long rain and you skip the whole problem.

Debris also clogs drainage. A patio edge packed with leaf mulch turns into a small dam, and water backs up onto the surface instead of running off. Clear the perimeter, not just the middle.

Fall is the smart window for sealing if you seal at all. The surface is dry, the temperatures are mild and the patio goes into winter protected. Sealing a damp patio traps moisture underneath and creates a cloudy mess.

Winter: freeze, thaw and the salt mistake

Water in a joint or a pore expands when it freezes. That expansion breaks the face off the brick over repeated cycles, and the damage is called spalling. Mixed climates do more of this damage than cold ones, because they freeze and thaw over and over instead of staying frozen.

De-icing salt makes it worse. Rock salt drives more freeze-thaw cycles and attacks the brick face, and it’s the fastest way to ruin a good patio. Use sand for traction instead, then sweep it up in spring.

Metal shovels are the other winter mistake. They chip edges and scar the surface, and the damage is permanent. Plastic works fine.

Reading the damage

Not every crack means the sky is falling. A single hairline in one brick is usually the brick, and it’s cosmetic. A line of cracks running across several bricks in a row means something under the patio moved, and that’s worth a call.

Spalled faces mean water got in and froze. Look for the source before you replace the unit, because a new brick in a wet spot spalls too. The pattern tells you more than any single brick does.

A four-season check that takes ten minutes

  • Spring: watch it rain, refill open joints, aim downspouts away from the slab
  • Summer: mark any new low spot, check the edges for lifted or chipped brick
  • Fall: clear leaves before the first soaking rain, open up the drainage at the perimeter
  • Winter: no rock salt, no metal shovels, sand for traction only
  • Any season: photograph cracks with a coin next to them and compare year over year

That last one is the trick nobody uses. A photo log turns “I think it’s worse” into a fact, and it’s the difference between a repair and a rebuild.

Frequently Asked Questions

Why is my brick patio uneven after a wet season?

Clay soil expands when it absorbs water and shrinks as it dries, causing the patio surface above it to rise and settle. A wet spring followed by a dry summer often repeats this cycle each year. If the same low spots appear seasonally, poor drainage is usually the underlying cause rather than a failed patio.

Can weather crack brick patio pavers?

Yes. Water can enter the brick or mortar joints, then freeze and expand during cold weather. Repeated freeze-thaw cycles may cause the surface of the brick to break apart, a condition known as spalling. Areas with fluctuating winter temperatures are especially vulnerable.

Is rock salt safe on a brick patio?

No. Rock salt can accelerate damage by increasing freeze-thaw activity and breaking down the surface of brick pavers. Sand is a safer option for improving traction during icy conditions, and using a plastic shovel instead of a metal one helps prevent chipped edges.

When is the best time to seal a brick patio?

Fall is often the ideal time because mild temperatures and dry conditions allow the sealer to cure properly before winter arrives. Always make sure the patio is completely dry before sealing, as trapped moisture can reduce the sealer’s performance.

How often should joint sand be replaced?

The frequency depends on rainfall, drainage, and overall patio use, but many brick patios benefit from replacing joint sand each spring. Maintaining full joints helps prevent water infiltration, weed growth, and movement of the pavers over time.

Fireplace Repair Before Winter Is Worth Planning

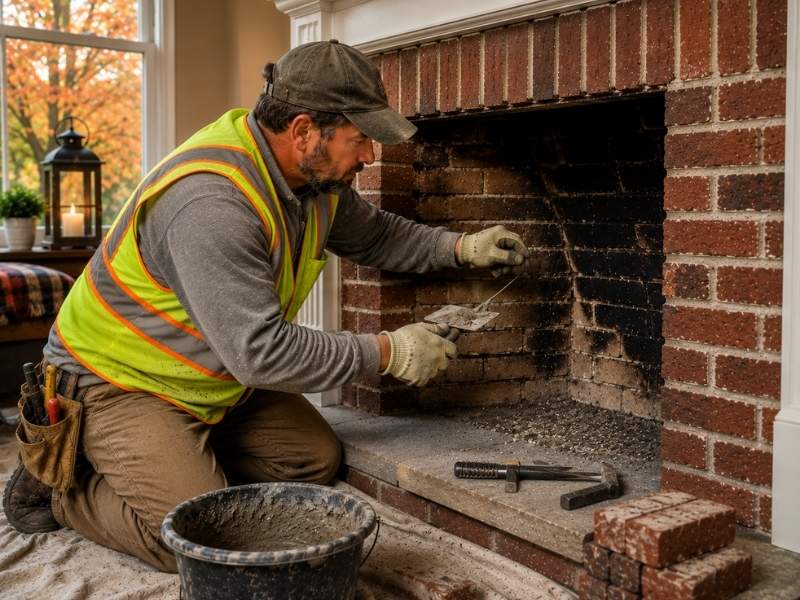
Fireplace repair by a skilled mason restoring mortar joints inside a brick fireplace before winter to improve safety and performance.

The best time to handle fireplace repair is before the cold weather arrives, not in the middle of it. A fireplace sits unused for months, and small problems can hide until the first fire of the season exposes them. Planning repairs in early fall gives you time to fix issues before you rely on the fireplace for warmth. It also means you’re not scrambling for help during the busy winter rush. A little planning now buys a safe, worry-free heating season.

Here’s why it pays to get ahead of it.

Look for Damage Before You Use It

A careful look before the first fire can catch trouble early. Months of sitting idle, plus summer humidity, can loosen brick and open small cracks you didn’t notice in spring. Scan the firebox, the surround and the visible mortar for anything that looks off.

Cracked mortar is the most common find. Thin gaps in the joints let heat and gas reach places they shouldn’t, so they deserve attention before you light a fire. Loose or chipped brick is another red flag worth marking down.

Don’t rush the inspection. Good light and a slow look turn up problems that a quick glance misses. Spotting damage now, before heavy use, is far better than discovering it once the fire is roaring.

Fix Small Repairs Early

Timing is everything with fireplace repairs. A small crack or a bit of loose mortar is quick to fix in the fall, but the same problem grows once you’re running fires through winter. Heat and cold work on small flaws and make them spread.

Early repairs also cost less. Repointing a few joints or resetting a loose brick is minor work compared to rebuilding a firebox later. Waiting until a small issue becomes a structural one turns a cheap fix into an expensive one.

There’s a safety reason to move early too. Cracks and gaps near the fire can let heat or fumes escape where they shouldn’t. Closing those up before the season starts keeps the fireplace both efficient and safe to use.

Check the Parts That Get the Most Heat

The areas that take the most heat are the ones most likely to need repair. The firebox, where the fire actually burns, faces extreme temperatures that slowly break down brick and mortar. Look closely here for cracked joints, gaps or crumbling spots.

The chimney and flue carry heat and smoke up and out, so they take a beating too. Cracks in the flue or a damaged chimney crown can let heat or water reach places that cause real damage. These spots are worth a professional look, since much of the chimney hides from view.

Mortar joints throughout the firebox earn special attention. They expand and contract with every fire, which slowly works them loose. Solid joints here keep the firebox sealed and the heat where it belongs.

Keep Your Fireplace in Good Shape

Steady care through the season keeps a fireplace working well. Clearing out ash and soot after fires keeps the firebox clean and makes problems easier to spot. A buildup of soot can hide a forming crack until it’s worse.

Watch for changes as you use it. A fire that suddenly smokes into the room, a strange smell or fresh staining can signal a developing problem. Catching these signs early lets you handle a repair before the next cold spell.

Keep the area around the fireplace clean and clear too. Wiping down the surround and hearth keeps soot from settling into the brick. A clean fireplace is easier to inspect and simply more pleasant to use.

Make Repairs Part of Home Care

The simplest way to avoid winter surprises is to make fireplace care a yearly habit. Booking a professional inspection once a year, ideally before heating season, catches hidden problems in the chimney and firebox. Safety guidelines call for at least one inspection a year for exactly this reason.

Pair that yearly check with your own seasonal look. A quick inspection each fall, plus attention to any change during use, covers most issues between professional visits. Together they keep small repairs small.

Treated this way, fireplace repair becomes routine instead of an emergency. You head into winter knowing the fireplace is ready, and you skip the stress of a breakdown on the coldest night. That peace of mind is worth the small effort.

Frequently Asked Questions

What are the signs I need fireplace repair?

Watch for cracked or crumbling mortar, loose or chipped brick and white staining on the surface. Smoke pushing into the room or a strong odor when you light a fire are warning signs too. Any of these means it’s worth a closer look before regular use.

Can cracked mortar be repaired?

Yes, a mason repairs cracked mortar by repointing, which means removing the damaged material and packing in fresh mortar. Done early, it seals the joint and stops heat or water from spreading the damage. It’s a routine fix when handled before the cracks grow.

Why should the chimney be inspected?

The chimney hides much of its length from view, so problems like cracks, blockages or creosote buildup go unseen. An inspection checks that smoke and heat can exit safely and that nothing flammable has collected inside. This is as much a safety step as a repair one.

How often should a fireplace be checked?

Have a fireplace inspected at least once a year, ideally before you start using it for the season. A fall check leaves time to fix anything found before the cold sets in. Add your own quick look whenever you notice a change while using it.

Can small repairs prevent bigger damage?

Absolutely, since most major fireplace damage starts as a small, ignored crack. Sealing a minor gap or resetting one brick stops heat and water from working deeper. Handling little repairs early is the cheapest way to avoid a major rebuild.

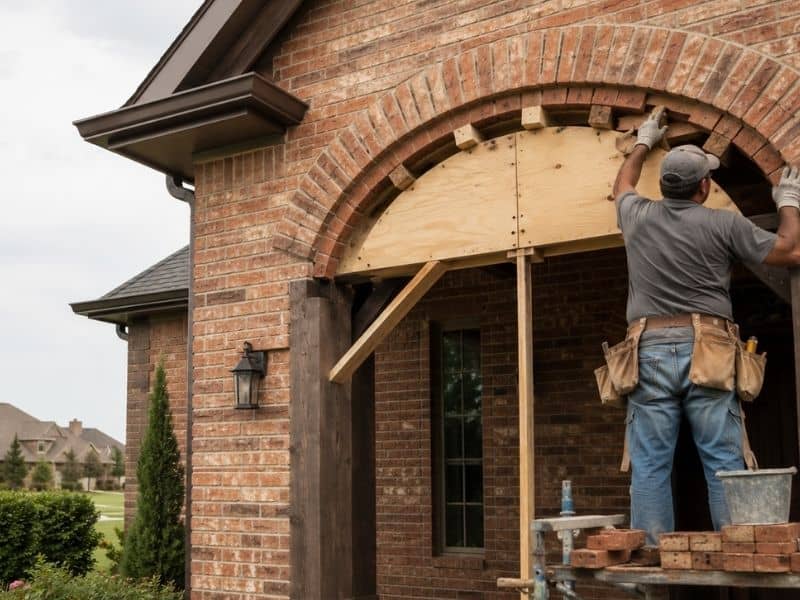
Why a Skilled Brickmason Delivers Better Results

Skilled brickmason wearing a safety vest laying brick with mortar and a string line to build a strong, level masonry wall.

Two brick walls can look alike on day one and tell very different stories ten years later. The difference is the brickmason who built them. A skilled brickmason builds masonry that stays strong, sheds water and holds its shape for decades, while rushed work cracks and leaks long before its time. Good masonry is mostly invisible craft, since the careful choices happen inside the wall where you can’t see them. That hidden skill is what you’re really paying for.

Here’s where an experienced hand makes the difference.

Plan the Job the Right Way

Strong masonry begins long before the first brick is set. A good brickmason starts by reading the plans and checking the foundation, since brick is heavy and needs solid, level support underneath. A weak or uneven base will telegraph cracks straight up through the finished wall.

Layout comes next. The mason measures and dry-lays a course to work out spacing, so the brick pattern lands evenly and cuts fall in sensible spots. This planning avoids awkward slivers of brick and keeps openings for doors and windows square.

Weather and timing factor in too. Mortar needs the right temperature to cure properly, so a skilled mason plans around cold snaps and heavy rain. Setting brick in bad conditions weakens the bond before the wall ever bears a load.

Choose Quality Materials

The right materials decide how long masonry lasts. A brickmason matches the brick grade to the job, since brick rated for severe weather holds up outdoors far better than softer, indoor-rated brick. Using the wrong grade is a common cause of flaking and crumbling down the road.

Mortar is just as important as the brick. The mason mixes the correct mortar type and strength for the wall, because mortar that’s too hard or too soft works against the brick instead of with it. The proportions of sand, cement and lime all affect how the joint performs.

Quality also means consistency. A good mason keeps each batch of mortar mixed the same way, so the whole wall cures and ages evenly. Mismatched batches can leave some joints weaker than others.

Build with Care

Careful building gives a brick wall its strength, not just its looks. The work that keeps a wall standing for generations comes down to three things a skilled brickmason never rushes.

  • Keeping every course level and the whole wall plumb, since a wall that leans even slightly carries its load unevenly. Constant checking with a level and line keeps the structure true from bottom to top.
  • Filling each mortar joint completely and tooling it so the joint sheds water instead of trapping it. Hollow or sloppy joints let water sit, and trapped water is what cracks masonry over time.
  • Laying the bricks in a proper bond so they overlap and spread weight across the wall. Stacking them in weak vertical lines invites cracks, while a solid interlock helps brickwork stand for decades.

That care turns a plain stack of bricks into a wall that lasts.

Handle Problems with Skill

Real job sites rarely go exactly to plan, and experience keeps small surprises from becoming big ones. When a foundation comes in slightly off, a seasoned brickmason adjusts the first courses to bring everything back to level. A beginner might build the error straight up the wall.

Tying new brick into an existing structure takes skill too. The mason matches heights and locks the new work into the old so the two move as one. Done poorly, the seam between old and new becomes a crack waiting to open.

Moisture problems call for know-how as well. A good mason builds in weep holes and flashing where needed, so water that gets behind the brick has a way out. Handling these details quietly prevents the leaks and stains that plague rushed jobs.

Help Masonry Last Longer

Great workmanship is the biggest reason masonry lasts, but a little care extends it further. Walls built with full joints and the right materials already shed water well, which is the single most important factor in a long life. Good work up front saves years of repairs later.

Simple upkeep protects that investment. Keeping plants and sprinklers from soaking the brick, and clearing debris from weep holes, helps the wall stay dry. A quick look each year catches any cracked joint early, while it’s still a small fix.

The payoff is masonry that holds strong for generations. Brick built well by a skilled hand can outlast the people who built it. That long life is the real return on hiring someone who knows the craft.

Frequently Asked Questions

What does a brickmason do?

A brickmason builds and repairs structures using brick, block and stone held together with mortar. The work ranges from walls and chimneys to walkways and home exteriors. A skilled mason handles layout, material choice and the building itself, all with an eye on strength and a clean finish.

Why is good workmanship important?

Workmanship decides whether masonry lasts decades or fails early. Full mortar joints, level courses and the right materials keep water out and spread weight evenly. Poor work might look fine at first, but it tends to crack, lean or leak within a few years.

How do I know if brick work is well done?

Look for straight, plumb walls and mortar joints that are even and fully packed. Quality brickwork has consistent spacing, clean tie-ins and no early cracks or bulges. Water draining away from the wall rather than pooling against it is another good sign.

Can a brickmason repair damaged brick?

Yes, repairing brick is a core part of the trade. A brickmason can replace cracked bricks and repoint crumbling mortar so the fix blends with the surrounding wall. Calling the mason early, while the damage is small, keeps the repair quick and affordable.

What helps brick last a long time?

Solid workmanship is the foundation, since well-built joints keep damaging water out. Beyond that, keeping the brick dry helps most, so manage sprinklers, drainage and gutters around it. A yearly glance for cracked mortar lets you fix small issues before they spread.