Stone Pavers Around a Pool Need More Than a Slip-Resistant Finish

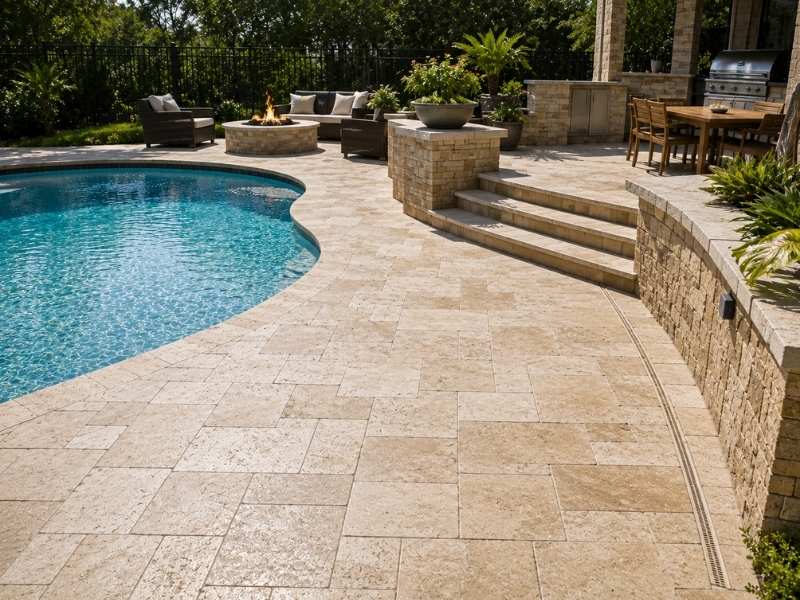
Stone pavers around a pool with a linear drain, textured surface, and smooth transitions to steps and masonry walls

Stone pavers for a pool deck should do more than provide a slip-resistant surface. They also need to support proper drainage, remain comfortable underfoot in warm weather, and perform well under the site’s climate and expected use. The installation should include a stable base, durable jointing materials, and smooth transitions to surrounding hardscape or masonry features. Planning these details before construction begins helps create a pool deck that remains functional, attractive, and easier to maintain over time.

Drainage Protects the Pool and Everything Near It

Water leaves a pool deck constantly, and it has to go somewhere on purpose. A deck sloped back toward the pool sends dirt, sunscreen and debris into the water and loads the filtration system. A deck sloped toward the house sends the same water at the foundation. The right answer sends it away from both, generally at a gentle grade that people won’t feel underfoot.

Several factors decide whether the deck sheds water properly:

  • consistent slope away from the pool coping and the home, typically around one to two percent
  • deck drains or channel drains where the grade can’t run out to open ground
  • a base that drains rather than trapping water beneath the stone
  • landscaping and planting beds that accept runoff instead of sending it back
  • downspouts and irrigation kept from discharging onto the deck surface

Standing water is the visible symptom, and the invisible damage matters more. Water sitting under pavers softens the base, and water reaching adjacent walls or fireplaces migrates into that masonry and stains it. Planning the drainage while the deck is still on paper costs nothing compared to cutting a finished surface later.

Surface Temperature Is a Real Selection Criterion

Stone absorbs heat at different rates depending on its density and color, and the difference between materials on a hot afternoon is large enough to matter. Dark, dense stones store heat and hold it well past sunset. Lighter, more porous stones reflect more and release heat faster, which is why they show up so often around pools in hot climates.

The practical test is simple. Anyone who’s crossed a pool deck barefoot in July knows within two steps whether the material was chosen with that in mind. Travertine, certain limestones and light colored granites tend to perform reasonably, while dark slate and dense dark granite can become uncomfortable. Texture plays into it as well, since a slightly rough or tumbled finish gives skin less contact area than a smooth polished one. Shade structures, trees and the orientation of the deck all change the equation, so a material that works on a shaded north side may not work on the open south side of the same pool.

Joints and Edges Decide How Long It Stays Flat

A paver deck holds together through its joints and its edges, and both need to be built for movement. Joint spacing and the material filling those joints control how the surface handles expansion, contraction and the small shifts that happen in any soil. Polymeric sand, mortar and open sand joints each behave differently, and each suits a different installation method.

Edge restraint is where many decks quietly fail. Without something holding the perimeter, the outermost pavers creep outward under foot traffic and freeze cycles, and the joints behind them open one after another. Base preparation carries just as much weight, because a properly compacted base of the right depth prevents the settling that produces uneven surfaces and tripping edges near a pool. Loose or washed out joints also invite weeds and let water reach the base directly, which accelerates everything. Getting these details right during installation is far cheaper than lifting and resetting sections later.

Where the Deck Meets Other Masonry

Pool decks rarely stop at the water. They connect to retaining walls, outdoor kitchens, steps, seating walls, fire features and the house itself, and every one of those connections involves two materials that move at different rates. A rigid connection between a flexible paver field and a solid masonry structure will crack, and it usually cracks along the most visible line.

Good transitions plan for that movement. Expansion joints, soft joints filled with a flexible sealant, and slight changes in elevation or coursing all give the materials room to work without splitting. Appearance deserves attention at the same points, since a paver pattern that dies awkwardly into a wall face looks unfinished no matter how well it performs. Coordinating coursing, joint lines and color between the deck and adjacent masonry during design produces transitions that read as intentional. Steps and coping get extra scrutiny because people touch them constantly and any movement there becomes a safety issue rather than a cosmetic one.

Treating the Pool Area as One Project

The best results come from planning the whole space together rather than solving the deck by itself. Drainage, grading, lighting, irrigation, electrical for equipment, gas for a grill or fire feature and any future improvements all interact, and most of them belong underground before a single paver gets set.

Sequencing saves real money here. Sleeves and conduit installed during excavation cost a small fraction of what trenching through a finished deck costs, and future additions become simple when the rough work already exists. Material choices benefit from the same coordination, since selecting deck stone, wall stone and coping at once produces a match that later purchases rarely achieve. Owners who take the wider view end up with a pool area where the pieces belong to each other, and they spend the following years using the space instead of repairing it.

A Stone Mailbox Can Lean Long Before the Mortar Starts Cracking

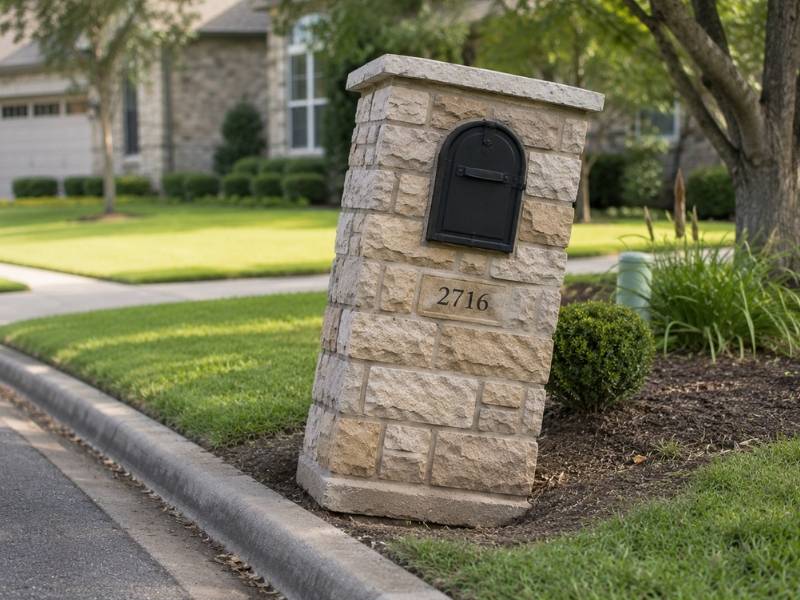
stone mailbox leaning slightly before mortar cracks appear in a residential curbside setting

A stone mailbox can begin showing signs of movement before cracks appear in the mortar or masonry. Changes in the foundation, soil conditions, drainage, or normal settlement may cause the structure to lean gradually over time. Because these early signs can be easy to overlook, identifying the cause of the movement before visible damage develops allows property owners to evaluate the condition of the mailbox and determine whether repairs or foundation improvements are needed. 

Small Changes in Alignment Come First

A mailbox that leans slowly rarely looks wrong from any single angle. Standing directly in front of it, a two degree tilt disappears, and the eye adjusts to what it sees every day. The lean shows itself against a straight reference instead, so comparing the mailbox to a fence line, a driveway edge, a light post or a neighbor’s mailbox works far better than a casual glance.

A few simple checks catch movement early. Sighting along the front face from a few feet to the side reveals tilt the front view hides, and holding a level against a vertical edge takes about ten seconds. Gaps opening between the mailbox base and the surrounding soil, mulch pulling away from one side, or a door that suddenly binds all point to the same thing. Homeowners who check once or twice a year usually find movement while stone mailbox repair may still involve resetting the footing rather than rebuilding the entire structure.

The Footing Moves Before the Masonry Does

The stonework you see sits on a footing you don’t, and that footing depends entirely on the soil around it. Soil that swells when wet and shrinks when dry moves the footing with it, and the mailbox rides along. Ground that wasn’t compacted during the original build settles under the weight of the masonry over the first few years, which produces the classic slow lean toward whichever side gave way first.

Depth is the other common failure. A footing poured too shallow sits within the zone where frost and moisture changes have the strongest effect, so it lifts and settles seasonally until the structure loses plumb. Erosion works the same way from a different direction, washing soil out from one side of the footing until support becomes uneven. Rebuilding the stonework on a footing that still moves simply resets the clock, and the same lean returns. Any real repair has to start below the masonry.

What’s Happening Around the Mailbox

The conditions near a mailbox often explain what the footing is doing. Driveway runoff, roof downspouts and street drainage all send concentrated water toward the curb, and mailboxes sit right in that path. Water moving repeatedly past one side of a footing carries soil with it, and the structure follows the loss.

Irrigation is a frequent and overlooked culprit. A sprinkler head that soaks the same patch of ground several times a week keeps the soil beneath the footing saturated, which softens support and encourages swelling in clay soils. Tree roots create a different problem by growing beneath and beside the footing, lifting it gradually and drying the soil as they draw moisture. Landscape changes matter too, since adding a bed, regrading a lawn or installing edging alters where water goes. Anyone planning a repair should look at these conditions first, because fixing the mailbox without addressing the water simply schedules the next repair.

Repairs That Address the Base and the Structure

An effective repair works from the ground up. That usually means excavating around the existing footing, evaluating whether it can be stabilized or needs replacement, and correcting the soil conditions before rebuilding anything above. Compacting properly, adding a gravel base for drainage, and pouring a footing sized for the mailbox mass and set below the local frost depth give the structure something reliable to sit on.

Once the base is sound, the masonry work becomes straightforward. Sometimes the stone can be reset with new mortar, and sometimes the upper courses need to be taken down and relaid, particularly where the lean has stressed joints. Owners occasionally ask whether the structure can simply be pushed back and braced, and that approach almost never lasts, because the underlying support hasn’t changed. Redirecting water away from the base with grading or a small drain during the same work keeps the repair from becoming a recurring expense.

Neighborhood Rules Can Shape the Repair

Many neighborhoods with stone or brick mailboxes established those standards on purpose, and the rules often survive in the association documents long after the original builder left. Requirements can cover stone type, mortar color, height, address numbering, overall dimensions and even whether replacement is allowed at all.

Checking those documents before ordering material avoids an unpleasant conversation later. Some associations require written approval before work begins and ask for a description of the materials, and a repair completed without it can be ordered redone at the owner’s expense. Postal placement standards apply as well, since the box height and setback from the curb face need to stay within the accepted range after the repair. Owners who confirm both sets of requirements early can hand a clear scope to a mason and get one repair rather than two.

How a Stone Mason Creates Seamless Natural Stone Installations

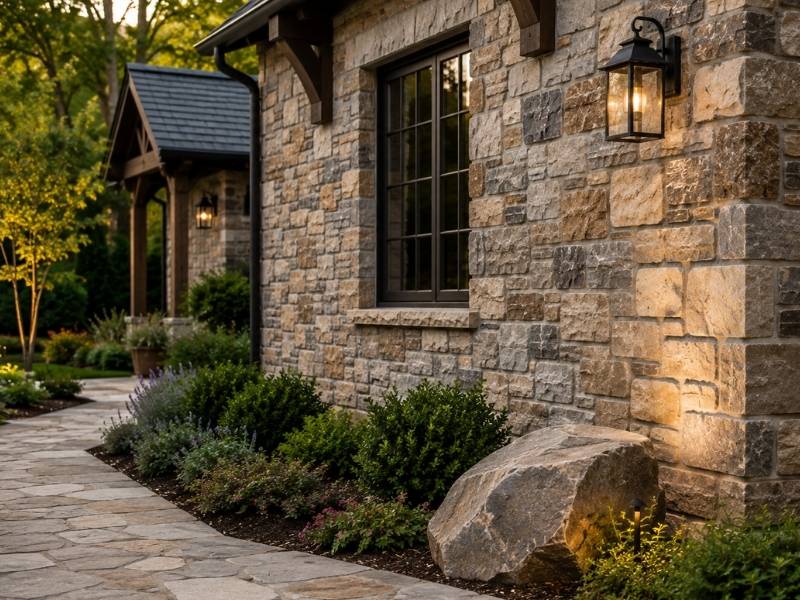
Professionally installed natural stone veneer with blended stone patterns and consistent joints on a residential home exterior in Fort Worth, TX.

Look at a bad stone wall and you’ll spot the problem in two seconds without knowing why. Something repeats. A stone mason spends most of a job fighting that, because the human eye catches pattern faster than it catches anything else. The work that makes stone look like it grew there happens before the mortar comes out, and most of it happens on the ground.

Breaking Up Repetition Across the Stone Surface

Real stone comes in whatever sizes and shades the quarry hands over. That variation is the point, and it’s also the trap. Set two similar stones near each other and the eye locks onto the pair, then follows the rhythm across the whole wall.

The goal is a surface where nothing draws attention to itself. No stripe of light stones. No column of same-size blocks marching up one side, and nothing that says a person placed these in a hurry. That’s an eye job rather than a math job, and it’s the difference between a mason with fifteen years in and a guy with a wet saw.

Blending Stone From Several Pallets

Stone arrives on pallets, and each one gets loaded from a different part of the quarry face. Color and thickness shift between them, sometimes a lot. This natural variation is one of the reasons well-built natural stone walls look balanced instead of repetitive. Working straight off one pallet at a time builds a wall with visible bands in it.

Good masons open several pallets at once and pull from all of them. It’s called blending, and it costs time and space on a job site. A crew with one pallet cracked open and a wall going up fast is the thing to worry about.

Order enough stone up front too. A second delivery weeks later comes from a different part of the quarry, and that late material rarely blends with the first batch. Ten to fifteen percent extra is normal, and the leftovers cover future repairs.

Dry-Laying the Stone Before Installation

Before anything gets set, a good mason lays the stone out on the ground in front of the wall. Same shape, same size as the finished area, just flat. Stones get moved, swapped and turned until the layout stops repeating.

Sitting there on the dirt, a bad rhythm is obvious and free to fix. Once it’s mortared up, that same problem costs a chisel and a bad afternoon. Dry-laying looks like the crew is standing around doing nothing, and it’s the most productive hour of the job.

Checking the Layout From a Distance

Stand back fifteen feet and squint at the layout. Squinting drops the detail and leaves the pattern of light and dark. Anything your eye jumps to at that distance is a problem, and it’ll be worse on the finished wall.

Do the same with a phone photo in black and white. Color hides value problems, and stripping it out reveals them. It takes two seconds and almost nobody does it.

Hiding Saw Cuts and Preserving Natural Edges

Every stone has a face, which is the weathered or split surface meant to be seen. Cut through it with a saw and you expose fresh interior, which is a different color and dead flat. That saw cut screams from across the yard.

Skilled masons cut from the back and break to the front, so the visible edge is a natural fracture. Where a saw cut can’t be avoided, it goes at the bottom, at the top or against a corner where nothing sees it. Cut edges facing out at eye level are the mark of a crew in a hurry.

Chisel work matters here too. A hammer and chisel leaves an edge that reads like the rest of the stone, and it takes far longer than a saw. That labor is what you’re paying for on a good job.

Keeping Stone Joints Consistent

Joint width is a design decision and it gets made once. Tight joints mean more shaping and more time, and they make the stone the star. Wide joints go faster and put mortar in the picture.

Either choice works. What kills a wall is inconsistency, where joints run half an inch in one spot and two inches in another because the stones didn’t fit. That’s a fitting failure showing up as a mortar problem.

Watch for stacked joints too. When the gaps line up vertically across two or three courses, you get a running joint, and the eye follows it straight up. Masons break those on purpose by shifting the stone above, and pointing style then decides the finish. Mortar raked back into shadow makes stones look thicker and more separate, while mortar brought flush makes the wall read as one mass.

Finishing Corners and Exposed Edges Properly

A corner is where two faces meet and the fiction has to hold on both sides. Real stone corners need units with two finished faces, and those cost more and come in limited quantity. Skimping here produces a visible seam, and that seam undoes the entire wall.

Terminations matter as much. Where the stone stops at a window, a door or an open edge, something has to close it out honestly. A wall that just quits, showing its thin cut edge, tells the viewer it’s a skin instead of a structure. Wrapping the corner and returning the stone past the sight line fixes most of it, and so does a proper sill or cap.

Questions to Ask Before Hiring a Stone Mason

  • How many pallets will be open at once during setting?
  • Will the stone be dry-laid before it’s set, and where?
  • How are saw cuts hidden, and what happens at exposed edges?
  • What joint width and pointing style are you quoting?
  • Do the corners use two-faced units, and are they in the price?
  • Can I see a wall you built three years ago, not last month?

That last one is the whole interview. New work always looks fine. A three-year-old wall shows whether the joints held, the corners stayed shut and the blend still reads as natural.

Frequently Asked Questions

What Makes a Natural Stone Installation Look Seamless?

Blending stone from several pallets at once, dry-laying the pattern before setting, hiding saw cuts and keeping joint width consistent. The eye catches repetition faster than anything else, so the work is about breaking up rhythm. Most of it happens on the ground before mortar goes near the wall.

Why Does My Stone Wall Look Patchy or Striped?

Stone was likely set straight off one pallet at a time. Color and thickness shift between pallets because they come from different parts of the quarry face, and working through them in order builds visible bands. Opening several pallets and pulling from all of them prevents it.

Should Stone Be Dry-Laid Before Installation?

Yes, on any visible wall. The mason lays the stones flat on the ground in the finished shape, then moves and swaps them until no pattern repeats. Fixing a bad layout on the dirt is free, and fixing it after the mortar sets means a chisel and a lost day.

How Can You Tell Good Stonework From Bad?

Look for saw-cut edges facing out at eye level, joints that jump from narrow to wide, gaps that line up vertically across courses, and corners with a visible seam. Then step back fifteen feet and squint. Anything your eye jumps to at that distance is a flaw.

Do I Need Extra Stone for a Natural Stone Project?

Order ten to fifteen percent over. Stone from a later delivery comes from a different part of the quarry and rarely blends with the first batch, so a shortage mid-job shows up permanently in the wall. Keep the leftovers on site for future repairs.

Stone Mailbox Design Ideas That Hold Up in Any Front Yard

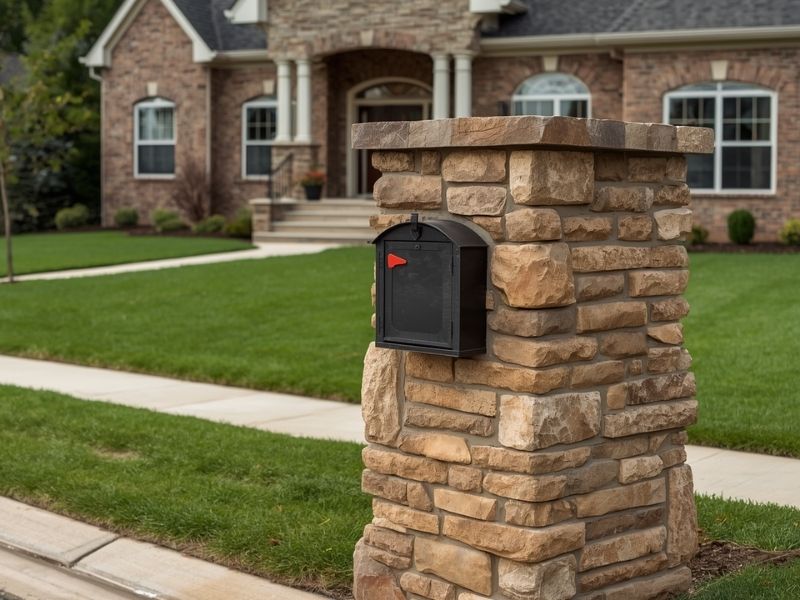
Custom stone mailbox design in a Frisco Texas residential front yard with natural stone masonry and matching home exterior

A stone mailbox does more than hold your letters. It sets the tone for your whole front yard before anyone even reaches your door. A flimsy metal post looks tired fast. A well built stone mailbox can last decades and still look sharp.

Here is the real issue most homeowners run into. They pick a design based on looks alone, then find out later it cracks, leans, or clashes with the house once it is built. A good stone mailbox needs to match your home and survive the weather in Frisco.

The best stone mailbox designs balance good looks with real durability. Get both right, and it becomes a small feature that adds lasting value to your property.

Why Stone Beats Other Mailbox Materials

Wood rots. Metal dents and rusts. Brick alone can look plain without the right accents. Stone holds up to sun, wind, and the heavy rain that hits North Texas a few times a year.

A stone mailbox also needs almost no upkeep. No painting. No sealing every year. Just an occasional rinse to keep dust and pollen off the surface.

What Makes Stone Last Longer Than Brick or Wood

Stone resists moisture better than wood, which means less risk of rot or insect damage over time. It also holds its color far longer than painted brick or wood posts, which fade and chip within a few years.

Popular Stone Mailbox Styles That Fit Different Home Types

Not every stone style matches every house. Picking one that fits your home’s look keeps the whole yard feeling put together instead of mismatched.

Rustic Fieldstone Design

Fieldstone gives a natural, uneven look that works well with country style homes or properties with a lot of landscaping. The rough texture stands out without needing anything fancy around it.

Clean Cut Limestone Design

Limestone blocks with sharp, even edges suit modern or traditional brick homes. This style looks tidy and matches well with homes that already use limestone accents on the exterior.

Mixed Stone and Brick Design

Combining stone with a strip of matching brick ties the mailbox directly to the house. This works especially well if your home already has brick as the main exterior material.

Stacked Stone Column Design

A tall, narrow stacked stone column gives a more formal look. This style suits larger front yards where the mailbox needs to hold its own visually from a distance.

Design Choices That Affect How Long It Lasts

Some choices matter more for durability than looks. Skipping these steps is where most stone mailboxes start failing within a few years.

A Solid Concrete Footing

Every stone mailbox needs a footing set below the frost line, even in a place like Frisco where freezing is less common than up north. A shallow footing lets the whole structure shift and crack over time.

Proper Mortar Joints

Wide, sloppy mortar joints trap water and crack faster in freeze and thaw cycles. Tight, even joints shed water instead of holding onto it.

A Sealed Cap Stone

The top of the mailbox needs a cap stone that sheds water away from the structure. Without one, water seeps down into the stone and mortar, weakening it from the inside out.

Reinforced Mailbox Post Inside the Stone

Many stone mailboxes fail because the metal post holding the actual mailbox rusts or bends inside the stone shell. Using a rust resistant post, and securing it properly before the stone gets built around it, prevents this common failure point.

Local Factors That Affect Stone Mailbox Durability in Frisco

Frisco sees hot summers, occasional hard freezes, and heavy spring storms. Each of these puts stress on an outdoor structure over time.

Heat and UV Exposure

Long stretches of intense summer sun can fade certain stone colors faster than others. Lighter limestone tends to hold its color better under heavy sun than darker sandstone varieties.

Sudden Freeze and Thaw Cycles

Even a handful of freezing nights each winter can cause water trapped in stone or mortar to expand and crack the surface. A solid footing and tight mortar joints protect against this.

Heavy Rain and Drainage

Without proper grading around the base, water can pool at the bottom of a stone mailbox and slowly weaken the footing. Sloping the ground slightly away from the base helps water drain instead of collecting.

Questions to Ask Before Building a Stone Mailbox

A few questions upfront can save you a rebuild a few years down the road.

  • Does the design include a footing set below typical frost depth for this area?
  • What kind of cap stone will be used, and does it fully shed water?
  • Is the mailbox post inside rust resistant, and is it secured before the stone goes up?
  • Does the stone style match the home’s existing exterior materials?

Getting clear answers before construction starts means fewer surprises and a mailbox that holds up for years, not just for the first season.

Frequently Asked Questions 

Why Does a Stone Mailbox Need a Concrete Footing?

A concrete footing provides stability and helps prevent shifting, cracking, or leaning over time. Without a properly designed foundation, soil movement and moisture changes can weaken the structure.

Which Stone Type Works Best for Mailboxes in Hot Climates?

Stone selection matters in areas with intense sun exposure. Lighter-colored materials such as limestone often resist heat absorption and fading better than darker stones, helping maintain appearance over time.

Can a Stone Mailbox Be Designed to Match a Brick Home?

Yes. Stone mailboxes can incorporate brick accents, matching colors, or complementary masonry details to create a cohesive connection with the home’s exterior design.

How Much Maintenance Does a Stone Mailbox Require?

Stone mailboxes typically require minimal maintenance. Regular cleaning with water to remove dirt, dust, and pollen is usually sufficient, and stone does not require frequent repainting like some other materials.

What Causes Stone Mailboxes to Crack or Fail Prematurely?

Common causes include inadequate footing depth, improper mortar joints, and missing or poorly installed cap stones. These issues can allow water intrusion and increase damage from weather cycles over time.

Stone Hearth Ideas That Make a Fireplace Feel More Finished

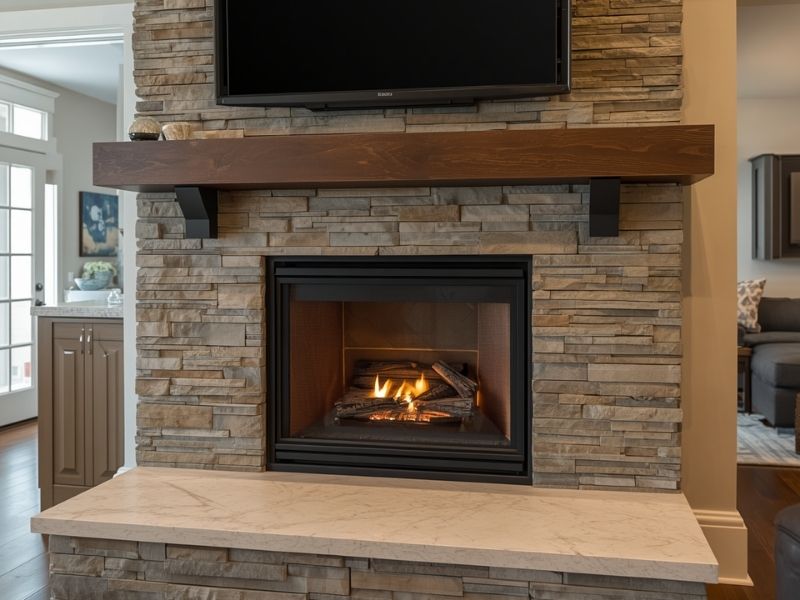
Custom stone hearth fireplace design in a Frisco Texas home featuring a natural stone surround and finished masonry details

A fireplace without the right hearth looks unfinished, even if the firebox itself is beautiful. A stone hearth ties the whole feature together, giving it the weight and presence that makes a room feel complete.

For homeowners in Frisco planning a new build or a fireplace update, the hearth often gets less attention than it deserves during the design phase.

The right stone hearth depends on room style, fireplace size, and how the space gets used daily. A hearth that fits these details well makes the whole fireplace look intentional instead of an afterthought.

The Overlooked Slab That Ties the Whole Room Together

The hearth is the stone or masonry surface extending out from the base of the fireplace. It serves a real safety purpose, protecting the floor from heat and stray embers. It also plays a huge role in how finished the fireplace looks overall.

A fireplace with a small, plain hearth can look unbalanced next to a large stone surround. A hearth sized and styled to match the rest of the fireplace pulls the whole feature together instead of looking like two separate pieces.

Letting the Room Set the Tone for Stone Choice

Stone hearths come in a wide range of finishes, and the right choice depends heavily on the room around it.

For modern spaces, consider:

  • Large format stone slabs with minimal seams
  • Honed or matte finishes rather than heavily textured stone
  • Simple, clean edge profiles without ornate detailing

For traditional or rustic spaces, consider:

  • Natural fieldstone with varied texture and color
  • Rougher cut edges that show the stone’s natural character
  • Warmer tones that complement wood beams or exposed brick nearby

Picking a style that clashes with the room’s overall feel is one of the most common reasons a hearth looks out of place, even when the stone itself is high quality.

Deciding Between a Step Up and a Level Surface

One of the first decisions in hearth design is whether it sits flush with the floor or raises up as its own platform.

Flush hearths work well when:

  • The room has limited space and a raised platform would feel bulky
  • The homeowner wants a more minimal, streamlined look
  • Furniture will sit close to the fireplace

Raised hearths work well when:

  • The fireplace serves as a major focal point in a larger room
  • Extra seating on the hearth’s edge is part of the design plan
  • The homeowner wants more visual presence without expanding the fireplace’s width

Neither option is universally better. It depends on the room’s proportions and how the space actually gets used.

Getting the Scale Right So Nothing Looks Off

A hearth that’s too small looks stingy next to a large fireplace. One that’s too large can overwhelm a smaller room.

General guidelines to think through with your mason:

  1. The hearth should extend far enough from the firebox opening to meet local safety clearance requirements
  2. Width should generally match or slightly exceed the width of the fireplace surround above it
  3. Depth needs to account for how the space in front of the fireplace gets used, whether for seating, walking through, or keeping furniture at a distance

Getting these proportions right is often the difference between a hearth that looks planned and one that looks like it was added as an afterthought.

Squeezing More Use Out of the Stone Without Cluttering the Look

A stone hearth doesn’t have to be purely decorative. Several functional additions can blend into the design without disrupting the finished appearance.

Options worth considering:

  • A slightly raised hearth edge that doubles as extra seating during gatherings
  • Built-in storage niches nearby for firewood, styled to match the stone
  • A wider hearth extension that provides a stable surface for holiday decorations or seasonal displays

The key is choosing additions that feel like part of the original design, not something bolted on afterward.

Small Choices That Quietly Undercut a Good Design

Some choices consistently make a hearth look less finished rather than more.

Watch out for:

  • Mismatched stone between the hearth and the surround above it
  • A hearth that’s noticeably thinner or thicker than the visual weight of the fireplace above
  • Skipping proper edge detailing, leaving raw or unfinished looking cuts visible
  • Choosing a finish that doesn’t hold up well to foot traffic if the hearth sits in a walkway

Avoiding these issues usually comes down to planning the hearth and the surround together, rather than treating them as separate decisions.

What to Bring to Your First Design Conversation

Bring these details to your first conversation with a mason:

  • Photos or examples of stone finishes you like for the room’s style
  • Whether you want a flush or raised hearth
  • Any functional needs, like extra seating or firewood storage
  • The general layout of furniture near the fireplace, so proportions work with the space

A mason who understands both the safety requirements and the visual goals can usually suggest adjustments that improve the design before construction even starts.

Final Questions Worth Settling Before Work Begins

  • What stone finish will best match the room’s existing style?
  • Should this hearth be flush or raised, given the room’s layout?
  • What size and depth does local code require for safety clearance?
  • Can we add functional features like seating or storage without disrupting the design?
  • How will this stone hold up to daily foot traffic in this specific spot?

Frequently Asked Questions 

How Much Does a Stone Hearth Cost Compared to the Rest of a Fireplace Project?

The cost of a stone hearth depends on the material, size, design, and whether it is flush or raised. In most fireplace projects, the hearth represents a smaller portion of the overall budget compared to the surround, firebox, and installation work.

Can an Existing Hearth Be Resurfaced Instead of Fully Replaced?

In some cases, yes. If the existing hearth structure is stable and undamaged, a mason may be able to install a new stone veneer or surface layer without removing the entire hearth.

Does Stone Type Affect Heat Performance Around a Fireplace?

Yes. Different stone materials have different heat resistance and durability characteristics. A qualified mason can recommend stone options and finishes that are suitable for areas exposed to heat near the firebox.

Is a Raised Stone Hearth More Difficult to Maintain Than a Flush Hearth?

Not necessarily. Raised hearths may require additional cleaning around edges and visible surfaces, while flush hearths integrate more closely with the surrounding floor and may be easier to clean with regular maintenance.

Can Different Stone Types Be Combined in a Custom Hearth Design?

Yes. Combining stone types can create a unique layered appearance, but the materials should be selected carefully to ensure they complement each other in color, texture, and overall fireplace design.

Stone Masonry Design Ideas for Modern and Traditional Homes

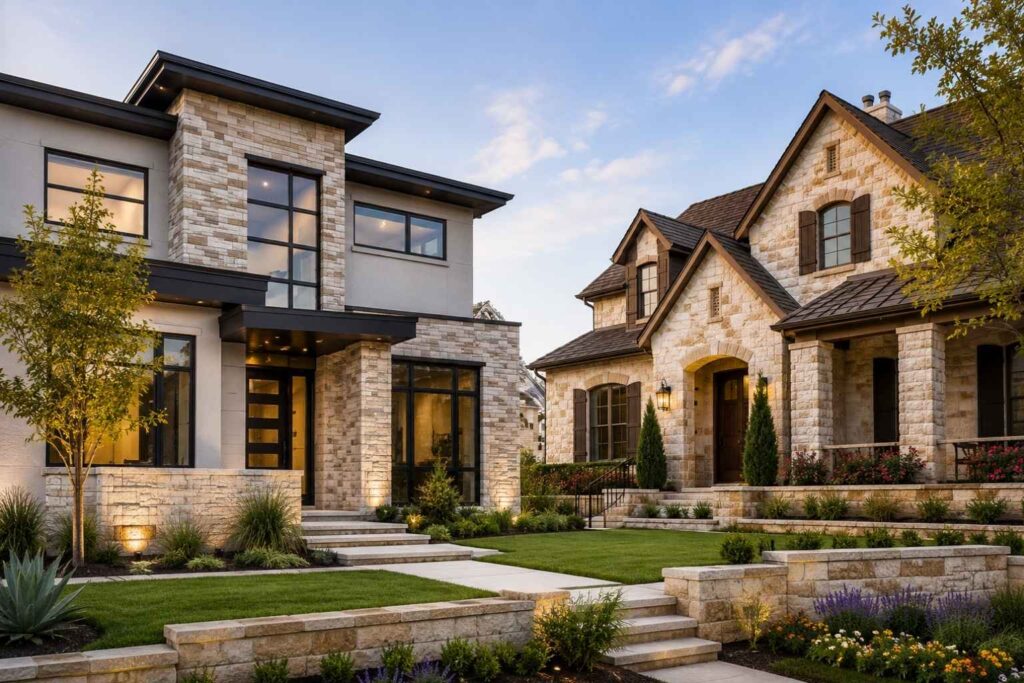
Modern and traditional luxury homes in Frisco, Texas featuring natural stone masonry facades, stone columns, and landscaped front yards.

Stone masonry does something few materials can do. It makes a house look like it belongs to the land it sits on. Stone isn’t just a finish choice. It shapes how a home looks from the street. It shapes how the home ages over the years. It also shapes how the home fits in with the houses around it.

This article covers how stone masonry shapes a home’s look. It shows how to blend stone with modern design. And it covers how to use stone well, both as structure and as decoration.

How Stone Masonry Shapes Architectural Identity in Homes

A home’s identity starts with its materials. Stone carries more visual weight than siding, brick, or stucco. It signals that a home is built to last.

Here’s how stone shapes that identity:

  • Texture and color change give a home a one-of-a-kind look. No two stones cut exactly the same.
  • Heavy stone at the base of a home creates a solid, grounded feel. Lighter materials can’t match that feel.
  • Stone details around doors and windows draw the eye. They show where the important architectural points are.
  • The way stone catches light changes how a home looks throughout the day, from morning to evening.

Frisco has a lot of new construction near older, established neighborhoods. Stone masonry often bridges the gap between the new builds and the older homes nearby.

Blending Raw Stone Textures With Contemporary Home Design

Modern homes and raw stone might seem like an odd match. But they work well together when done with care.

Here are a few ways to blend the two:

  • Pair rough-cut stone with clean, flat stucco or metal panels. This creates contrast instead of visual clutter.
  • Use large stone pieces instead of small, busy patterns. Large pieces feel more modern.
  • Keep stone to certain areas, like a fireplace wall or an entry feature. Don’t cover the whole front of the house.
  • Pick one stone tone that matches the home’s other materials. Avoid mixing several competing colors.

The goal is balance. Too much raw texture can overwhelm a modern design. Too little loses the character stone is meant to add.

Regional Stone Masonry Styles That Influence Residential Design Choices

Stone styles change by region. Those regional habits still shape what homeowners expect today.

Here are a few styles that show up often in home design:

  1. Hill Country stone is common across Central Texas. It uses tan and cream limestone with a rugged, natural face.
  2. Fieldstone was popular in older East Coast homes. It uses uneven, rounded stones set with visible mortar lines.
  3. Ashlar stone is cut into rectangular blocks with tight joints. It gives a more formal, structured look.
  4. Dry-stack stone is laid without visible mortar. It creates a cleaner, more modern look.

Frisco mixes new development with Texas Hill Country style. Because of this, both rugged limestone looks and clean dry-stack styles show up often in home design requests.

Structural vs Decorative Stone Masonry Applications in Home Design

Stone plays two very different roles in home building. Mixing up the two can lead to costly mistakes.

Structural Stone Masonry

Structural stone actually carries weight. This includes:

  • Foundation walls built from solid stone or stone-faced concrete block.
  • Retaining walls that hold back soil on sloped lots.
  • Load-bearing exterior walls in traditional stone homes.

These uses need engineering review. They also need proper footings and drainage planning behind the wall.

Decorative Stone Masonry

Decorative stone is a veneer. It gets applied over a wall that’s already doing the structural work. This includes:

  • Thin stone veneer over a home’s outside wall.
  • Stone accents around fireplaces, entries, or feature walls.
  • Stone caps on columns or low garden walls.

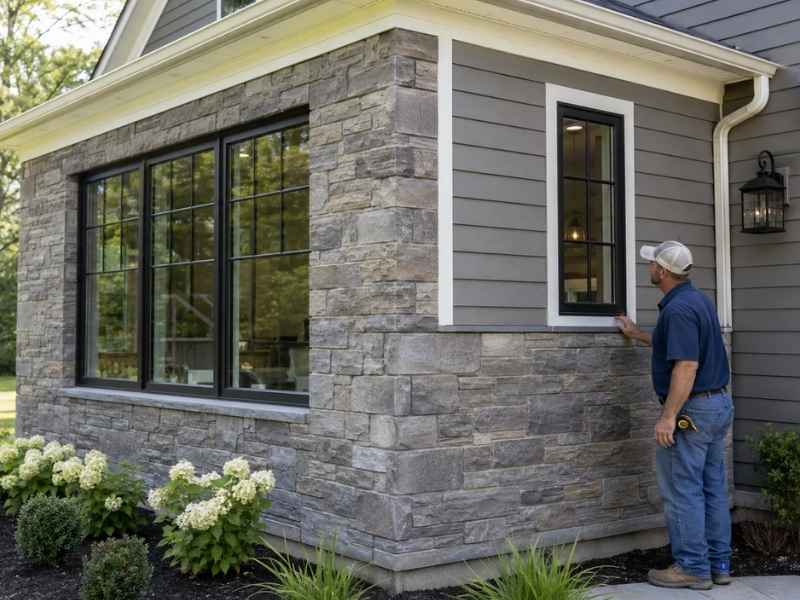
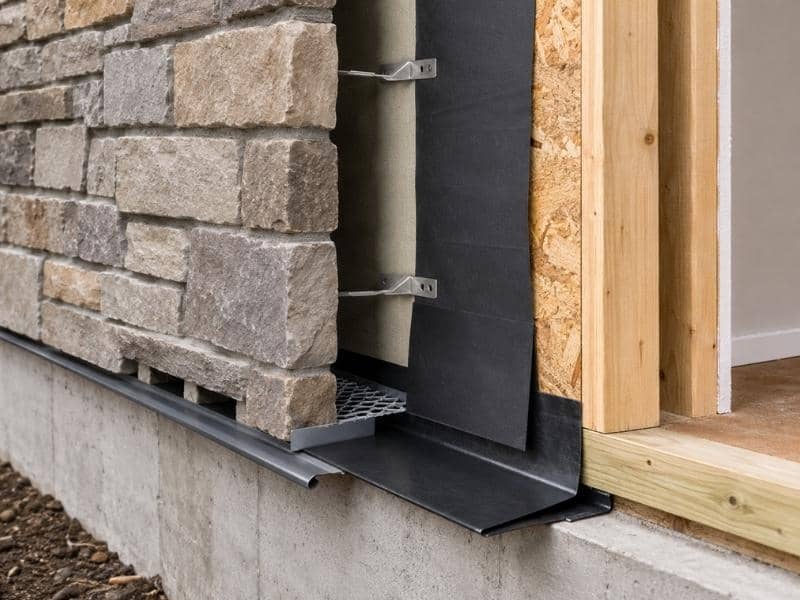
Decorative stone is lighter. It installs faster. It also costs a lot less than full structural stone. But it still needs proper flashing and moisture barriers to hold up well over time.

Designing Visual Balance With Stone Masonry Across Exterior Surfaces

Stone works best with a clear plan. It shouldn’t get scattered across a home’s front without a reason.

Here are a few rules that keep stone balanced on a home’s exterior:

  • Anchor stone at the base of the home. Let lighter materials carry the upper floors.
  • Use stone to frame key features, like an entry. Don’t spread it evenly and lose its impact.
  • Keep stone coverage steady on all visible sides. This stops the home from looking unfinished from certain angles.
  • Match the mortar color to the stone tone. This avoids a busy, distracting grid pattern on the surface.

A home with stone placed with care looks intentional. A home with stone placed carelessly looks unfinished, even when the stone itself is high quality.

Frequently Asked Questions

Is stone veneer as strong as full structural stone?

Stone veneer is durable when installed correctly with proper backing and moisture protection, but it is not load-bearing like full structural stone masonry.

How much of a home’s exterior should use stone for a balanced look?

There is no fixed rule, but many designs use stone as an accent at the base, entry points, or key architectural features to maintain visual balance without overwhelming the façade.

Can stone masonry work on a modern minimalist home?

Yes. Modern designs often use large-format stone, neutral tones, and clean joint patterns to achieve a minimal, contemporary appearance.

Does stone masonry require more maintenance than brick or siding?

Stone masonry generally requires less maintenance than siding, but mortar joints should still be inspected periodically for cracking or weather-related wear.

What is the most common mistake homeowners make when choosing stone?

Using too many colors, textures, or stone types is a common mistake, as it creates visual clutter instead of a cohesive and unified architectural look.