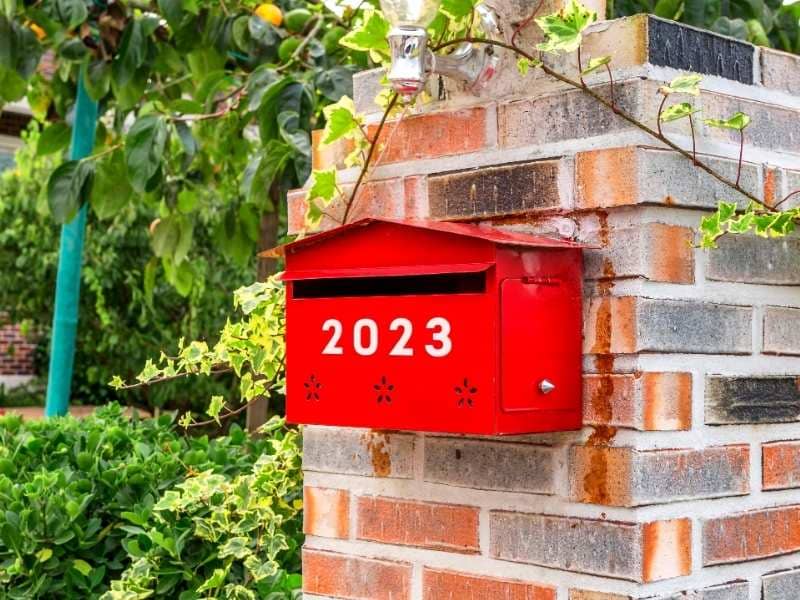
A mailbox is usually the first piece of masonry anyone sees at your property. Delivery drivers, guests, and emergency crews all look for it when they’re trying to find your home. A masonry mailbox that looks sharp in daylight but hides its address numbers after dark falls short on its most basic job.
The fix starts with planning. Decide where the numbers go, how the light will reach them, and how the column connects to your driveway and walkways before a single brick is set. Getting those three decisions right early keeps you from tearing out finished work later.
Planning Address Number Placement on a Masonry Mailbox
Address numbers should face the street, sit where a driver can read them from the road, and contrast sharply with the masonry behind them. That sounds simple, but many columns get built first and the numbers get squeezed in wherever there’s room. The result is often numbers that are too small, too low, or lost against a busy stone face.
Start by standing at the curb and looking back at the spot where the mailbox will go. Picture a car approaching from each direction. If traffic comes both ways on your street, plan numbers on two sides of the column so they’re visible no matter which way someone drives in. Also consider mailbox leaning when choosing the placement, since a tilted column can make address numbers harder to read from the street.
Before building, check these points with your mason:
- Which faces of the column will hold numbers
- How large the numbers need to be to read from the street
- Whether numbers will sit on a flat plaque, a cast stone panel, or directly on the masonry
- What color gives the strongest contrast against your brick or stone
- Any mailbox height or setback guidance from the U.S. Postal Service, your HOA, or local rules
Contrast matters more than style. Dark numbers read well on light limestone. Light or brass numbers stand out on deep red or dark brick.
Choosing Brick or Stone Masonry for the Mailbox
Brick and stone both make excellent mailbox columns, and neither is always the better pick. The right choice depends on your home’s exterior, your existing masonry, your budget, and how much texture you want. Matching the materials already on your house usually gives the cleanest result.
Brick masonry lays up in even courses, which creates flat, predictable surfaces. That makes it easy to set a number plaque flush with the face. It’s also simpler to match brick from the house, a brick patio, or a nearby retaining wall.
Stone masonry brings natural texture and depth. The tradeoff is that irregular stone faces can make numbers hard to mount and hard to read. Many masons solve this by setting a smooth cut stone or cast stone panel into the column just for the numbers. That gives you the rugged look of stone with a clean, readable spot for the address.
Integrating Lighting Without Hiding Address Numbers
Good mailbox lighting washes across the numbers without shining into drivers’ eyes or casting shadows over them. The most common mistake is a cap light that sits above an overhanging cap. The cap blocks the light, and the numbers end up in shadow right where you need them most.
There are a few lighting approaches to compare. A lantern on top of the column adds a classic look and lights the area around the mailbox. Recessed lights set into the column face can aim directly at the numbers. Low-voltage landscape lights placed in the ground can wash the whole column from below. Backlit or illuminated number plaques are another option when you want the address itself to glow.
Whatever you choose, plan the wiring before construction starts. Conduit needs to run through the core of the column and back to a power source, which is far easier during the build than after. Wiring should be handled by a licensed electrician. If running power isn’t practical, solar fixtures can work, though they’re usually dimmer and depend on how much sun the spot gets.
Connecting the Mailbox to Walkways and Outdoor Masonry
A masonry mailbox looks best when it feels like part of the property instead of a lone column by the road. Tying it into your driveway edge, front walk, or planting beds helps it belong. It also makes the area more practical to use every day.
A small pad of brick pavers or stone pavers at the base gives you and the mail carrier a firm place to stand. It keeps shoes out of mud and protects the grass around the column from wear. If you walk to the mailbox from the house, a narrow paver path connecting to the front walk makes that trip cleaner and safer.
Repeating materials across the property pulls the design together. A brick mailbox can echo the brick of your front steps, a brick patio, or a retaining wall along the beds. A stone mailbox can match a stone patio, a stone veneer on the house, or even an outdoor kitchen or outdoor fireplace in the backyard.
Pay attention to transitions and grades. Paver edges should sit flush with the lawn so they don’t become trip hazards or catch the mower. If the mailbox sits on a slope, the footing may need to be stepped, or a short retaining wall may be needed to create a level spot.
Managing Drainage, Durability, and Long-Term Maintenance
A mailbox column holds up best when water moves away from it and the footing suits the soil. Footing size and depth depend on your soil, slope, column height, and design. Areas with expansive clay soil can shift as they wet and dry, so a proper footing helps limit leaning and cracking.
Grade the ground around the base so water drains away from the column. The paver pad needs a compacted base under it, the same as a patio or walkway. A cap with a slight overhang and drip edge helps shed rain off the masonry faces instead of letting it run down the joints.
Upkeep is light but worth doing on a schedule. Check mortar joints once a year and repoint any that are cracked or crumbling. Clean the number plaque so dirt and mildew don’t dull the contrast. Keep shrubs trimmed back from the lights and numbers. If the column starts to lean, the cap loosens, or cracks keep growing, it’s time for a mailbox repair before the damage spreads.
Frequently Asked Questions
How big should address numbers be on a masonry mailbox?
Numbers should be large enough to read easily from a car on the street. Larger numbers are easier to read from a distance, especially at night. Your HOA or local authorities may have their own guidance, so check before ordering a plaque. A mason can mock up the placement so you can see the size before it’s set in the column.
Can lighting be added to an existing brick mailbox?
Yes, lighting can often be added to an existing brick mailbox. Surface-mounted fixtures, solar lights, and ground-level landscape lights are the simplest options. Recessed lights are harder because they may require cutting into the masonry to run wire. An electrician and a mason can review the column together to find the cleanest approach.
Is brick or stone better for a mailbox?
Neither material is always better, since each has its own strengths. Brick gives flat, even surfaces and is easier to match to a brick home. Stone offers natural texture but may need a smooth panel for readable numbers. The best choice depends on your home’s exterior, existing masonry, maintenance preferences, and budget.
Do I need a paver pad around my masonry mailbox?
A paver pad isn’t required, but it’s a practical upgrade for most homes. It gives a firm, clean place to stand when getting the mail. It also protects the turf around the column from wear and mud. Brick pavers or stone pavers can be chosen to match the mailbox and nearby walkways.
Why is my masonry mailbox cracking?
Cracks often come from soil movement, poor drainage, or a footing that isn’t suited to the site. Water getting into the masonry through failed joints or a damaged cap can make cracks worse over time. Impacts from vehicles or mowers are another common cause. A mason can inspect the column and recommend repair or rebuilding based on what’s causing the damage.
