Brick Pavers Around Steps Need a Clean Elevation Transition
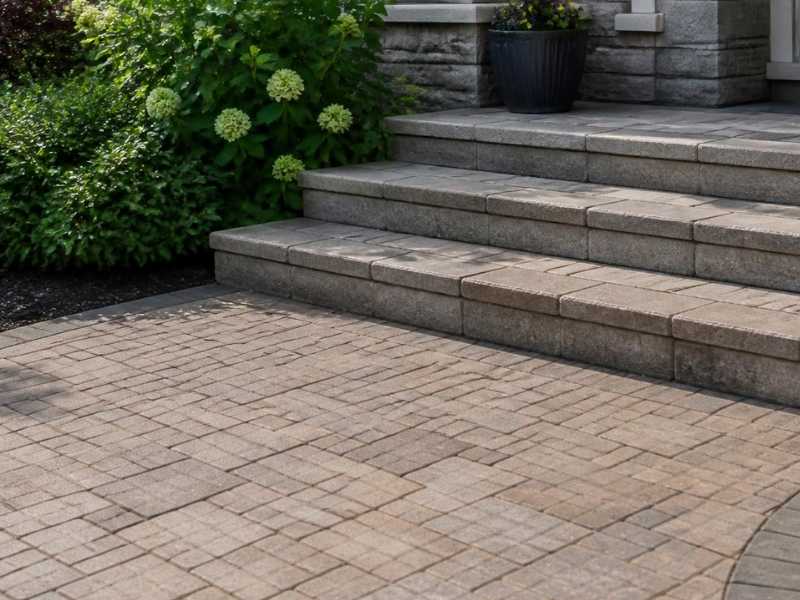
Brick pavers forming a clean elevation transition at masonry steps in Frisco, Texas.

Brick pavers around a set of steps can look sharp or feel wrong, and elevation decides which. Get the heights right, and the walk flows and feels safe underfoot. Get them wrong, and people trip on the first step every time.

The trouble spot is where the pavers meet the step. Pavers set too high or too low throw off the step height. That changes the riser, the part of the step you climb, and an uneven riser is a trip hazard. It also looks off, with pavers that seem to sink or bulge at the transition.

Brick pavers around steps need a clean elevation transition to stay safe and look right. Elevation is simply the height of a surface at a given point, and the surrounding wall layout can also influence how the pavers meet nearby steps and structures. The sections below explain how to set paver heights from the steps, keep risers even, and check the work before it is done.

Why Elevation Changes Matter Around Masonry Steps

Steps exist to handle a change in height. Each step raises or lowers you by a set amount called the riser. When pavers meet those steps, their height has to respect that riser. A small error there changes how the step feels. Where nearby built-in features are involved, the layout should also preserve clear equipment access without disrupting the step transition.

The risk is real at the transition. A paver set too high shrinks the top step, and one set too low stretches it. Either way, that step no longer matches the others. People expect every step to be the same, so the odd one catches a foot.

Looks suffer too when the heights are off. A clean transition has the pavers meeting the step at a consistent line. A sloppy one shows gaps, lips, or a surface that dips near the step. Planning the elevation keeps both safety and appearance intact.

Setting Paver Heights From the Finished Step Elevation

The steps set the rule, so the pavers follow them. A mason starts from the finished step elevation and works the paver heights to match. That order keeps the transition clean.

The finished elevation is the final height of the step once it is built. Pavers are set so their surface lines up correctly with that height. At the base of the steps, the top of the pavers should meet the bottom step at the planned riser. Working from the steps outward keeps everything aligned.

This approach beats guessing. A few key heights guide the work:

  • The finished height of each step
  • The riser height between steps
  • The paver surface height at the bottom step
  • The slope of the pavers moving away from the steps

Setting these first prevents a mismatch later. It also gives the crew clear targets to build to.

Maintaining Consistent Risers at Paver Transitions

Consistent risers are the mark of safe steps. Every riser in a flight should be close to the same height. The paver transition must not break that rule at the bottom step.

People climb stairs on muscle memory. Their feet expect each step to rise the same amount. When the bottom riser is off because of paver height, that expectation fails. A too-tall or too-short bottom step is where many trips happen.

This is why paver height at the base is so important. The pavers set the surface that the bottom riser is measured from. If they sit high, the bottom step becomes shallow, and if they sit low, it becomes tall. A mason checks this closely to keep every riser even.

Coordinating Paver Slopes With Step Drainage

Pavers need a slight slope to shed water, and steps need water carried away too. These have to work together at the transition. A good plan moves water off the steps and across the pavers without pooling.

Brick pavers are set with a gentle slope, often called a fall, so water runs off. That slope should carry water away from the steps, not toward them. Water pooling at the base of steps makes them slick and can damage the masonry over time. Directing the flow keeps the steps safe and dry.

Local conditions shape the plan. The Frisco area sees heavy downpours that test any drainage setup. Pavers and steps should move that water to a safe outlet, away from the house and the walk. Drainage rules can vary by city and county, so confirm any local requirements before building.

Checking Final Elevations Before Paver Installation Is Complete

The final check happens before the last paver is locked in. Once the surface is set and joints are filled, fixing a height problem means pulling it apart. A review at the end saves that work.

A mason should confirm the paver heights match the steps. They should check that the bottom riser is even with the rest. They should also verify the slope carries water away from the steps. Catching an issue now is quick, while fixing it later is not.

This step is worth it on every job with steps. A clean, level transition is what makes the walk safe and good-looking. Ask your mason to confirm the final elevations before wrapping up. That last look protects the whole installation.

Frequently Asked Questions

Why do brick pavers around steps need careful elevation?

Steps rely on even risers to feel safe underfoot. Pavers set too high or too low change the bottom riser and create a trip hazard. Careful elevation keeps every step the same height. It also gives the transition a clean, finished look.

What is a riser on a set of steps?

A riser is the vertical height between one step and the next. It is the part of the step you climb with each stride. Consistent risers let people walk stairs safely without looking down. Paver height at the base directly affects the bottom riser.

How do masons set paver heights near steps?

They start from the finished step elevation and match the pavers to it. The paver surface is set so it meets the bottom step at the right riser height. From there, the pavers slope gently away to drain water. Working from the steps outward keeps the transition aligned.

Should pavers slope away from steps?

Yes, pavers should slope gently to carry water away from the steps. Water pooling at the base makes steps slick and can harm the masonry. A proper slope directs runoff to a safe outlet. This keeps both the steps and the pavers in good shape.

When should paver elevations be checked?

Check them during planning and again before the job is finished. Early planning sets the right heights from the start. A final check confirms the risers are even and the slope drains correctly. Catching a problem before the last paver is set avoids a costly redo.
Brick Mailboxes Designed Around Modern Package Delivery

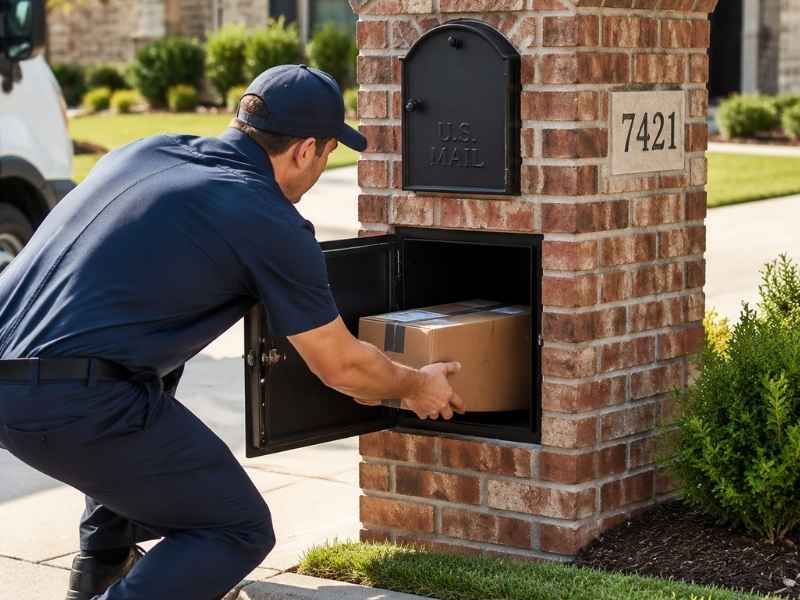
Brick mailboxes designed around modern package delivery in Frisco Texas with a custom masonry mailbox holding a package compartment for residential deliveries

Package delivery has changed how homes work. Trucks stop at driveways every day, not just once a week. That’s why more homeowners are looking at brick mailboxes built for real life, not just letters and bills. A good brick mailbox can hold packages, keep them dry, and even keep them safe from porch pirates. This isn’t a small upgrade. It’s a smart response to how people actually shop and receive goods now. In this article, we’ll walk through what makes a brick mailbox work for today’s delivery habits, from size and placement to security features that matter.

Why Traditional Mailboxes Are Not Built for Today’s Delivery Needs

Most standard mailboxes were made for one job: holding envelopes. A stack of mail, maybe a magazine or two. That’s it.

But shopping has changed. Online orders show up almost daily at many homes. Small boxes, medium boxes, sometimes oversized ones too. A regular mailbox can’t hold any of that. So packages get left on the ground, on porches, or shoved halfway into a box that was never meant for them.

This creates real problems. Boxes get rained on. Packages get stolen. Delivery drivers sometimes leave items in odd spots just to get them off the truck.

A masonry mailbox flips this problem around. Instead of a small metal box on a post, it’s a solid structure. It can be built with real storage in mind, not just a slot for letters. The goal shifts from “hold the mail” to “handle whatever shows up today.”

This shift matters because delivery isn’t slowing down. Homes need structures that match how people actually receive their goods, not how mail worked decades ago.

Features That Make a Brick Mailbox More Practical for Package Storage

Not every brick mailbox is built the same way. The difference comes down to what’s inside, not just what it looks like from the street.

Here are features that turn a brick mailbox into something genuinely useful for deliveries:

  • Larger interior compartments. A bigger space means more than one box can fit at a time.
  • Separate storage areas. One section for letters, another for packages. This keeps small items from getting buried.
  • Weatherproof design. A sealed compartment keeps rain and snow off cardboard boxes.
  • Wide, accessible openings. Delivery drivers need room to slide boxes in without struggling.
  • Sturdy shelving inside. Shelves stop boxes from piling on top of each other and getting crushed.

These features work together. A big compartment doesn’t help much if it floods every time it rains. A weatherproof door doesn’t help if the opening is too small for a shoebox. Good design means every part supports the others.

The point isn’t to make the mailbox look impressive. It’s to make daily deliveries less of a hassle.

Planning Mailbox Size and Placement Before Building a Custom Masonry Structure

Before any brick gets laid, homeowners need to think through a few basics. Size and location matter just as much as the features inside.

Start with size. How many packages does your home typically get in a week? A household that orders often needs more room than one that gets a box once a month. Building too small means the upgrade won’t solve the problem it was meant to fix.

Next, think about placement. The mailbox needs to sit somewhere delivery trucks and mail carriers can reach without trouble. A spot too far from the road, or blocked by landscaping, can slow drivers down or lead to missed drop-offs.

Driveway location plays a role too. Mailboxes near the end of a driveway often work better than ones tucked around a curve. Drivers should be able to see the box clearly and reach it without backing up or stopping in an awkward spot.

Accessibility also matters for the homeowner. If the box sits too far from the house, checking it daily becomes a chore. A short walk is fine. A long trek across the yard isn’t.

Getting these details right before construction begins saves time and money later. Fixing placement after the brick is set isn’t simple.

Combining Brick Masonry With Secure Delivery Solutions

A solid brick structure gives homeowners something a plastic or metal mailbox can’t: a strong base for real security features.

Locking compartments are one option. Instead of an open slot anyone can reach into, a locked door keeps packages inside until the homeowner opens it. This cuts down on theft, especially in neighborhoods where package pickup happens fast.

Some designs include separate locked sections for mail and packages. This way, a delivery driver can drop off a box without needing a key, while the homeowner still controls access to sensitive mail.

Reinforced doors and frames add another layer of protection. Brick already resists damage well. Pairing that with a solid door means the whole structure holds up against tampering.

Placement plays into security too. A mailbox visible from the house, or under a porch light, discourages people from messing with it. Combine that with a locked compartment, and packages sit safer than they would on a doorstep.

None of this requires a giant, complicated build. Small security upgrades, built into a solid masonry frame, go a long way.

How a Custom Brick Mailbox Can Support Long-Term Home Upgrades

Delivery habits keep shifting. What works for a household today might not fit in five years. A well-planned brick mailbox can adjust to that without needing to be torn down and rebuilt.

Extra interior space, even if it’s not fully needed right away, gives room for growth. Families expand. Shopping habits change. A structure with a bit of extra capacity handles those shifts without a struggle.

Design choices also matter for the property as a whole. A brick mailbox that matches the home’s exterior, or fits the layout of the driveway, adds to the overall look of the property. It’s not just a delivery point. It becomes part of the home’s structure.

Some homeowners plan mailboxes that can support small additions later, like extra locking units or added shelving. Thinking ahead during the planning stage makes future changes easier and cheaper.

A brick mailbox built with care isn’t just solving today’s delivery needs. It’s setting up the property to handle whatever comes next, without starting from scratch. Regular maintenance and timely brick repair can help preserve the mailbox’s appearance and keep the masonry structure in good condition as it ages. 

Brick Patio Installation Around Existing Porch Columns

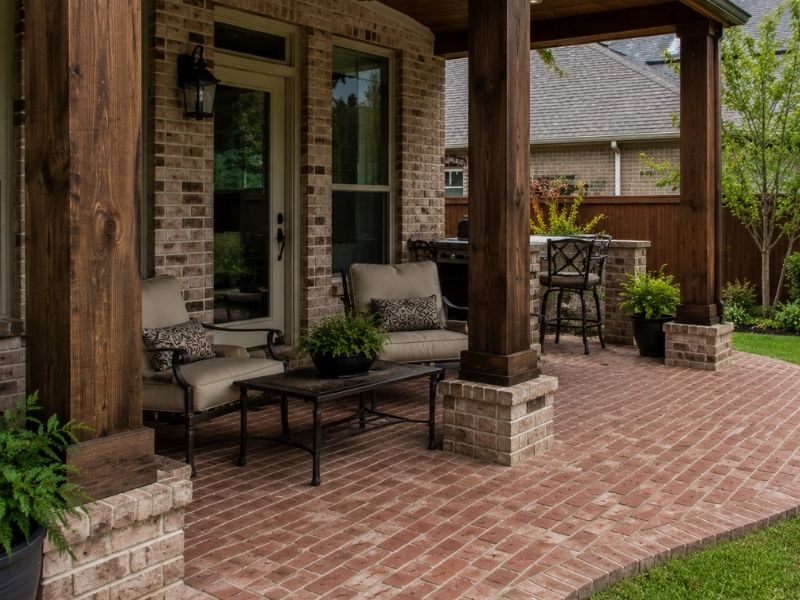
Brick patio installation around existing covered porch columns in a residential backyard in Frisco, TX.

Homeowners often compare brick to natural stone walls when they plan a new patio near a covered porch. Brick tends to fit tight spaces better, and it usually costs less to install than stone. Before any digging starts, a construction survey marks the porch columns, footings, and drainage lines, so the crew knows exactly where the new patio can go. This step matters most when a patio has to wrap around fixed columns, because one small measuring mistake can leave you with narrow brick strips or odd angles at each post. 

Planning Brick Patio Installation Around Existing Porch Columns

Porch columns don’t move, so the patio has to work around them. That starts with measuring the exact spot where each column meets the ground, then marking a buffer zone so the brick doesn’t press right up against the base. Skip this step and you’ll end up with skinny slivers of brick that look like an afterthought.

Next comes the usable footprint. Draw a rough outline of the patio space and note where each column sits inside it. Some columns land near the edge. Others sit closer to the middle of the planned area. Either way, the layout should treat them as fixed points, not obstacles to work around at the last minute.

Avoid narrow sections wherever you can. A strip of brick less than a foot wide between a column and the patio edge looks cramped and it’s hard to keep clean. Widen the footprint slightly or shift the border line instead.

Creating Clean Brick Transitions at the Base of Porch Columns

The spot where new brick meets an old column is where sloppy work shows up fastest. Even spacing around the base makes a big difference. Most installers leave a small consistent gap, often filled with sand or mortar, so the brick isn’t locked tight against the column.

Cutting bricks to fit a curved or square column base takes patience. Rounded columns need curved cuts on several bricks in a row, and those cuts should match each other closely. A jagged, uneven cut around one post stands out, even if the rest of the patio looks great.

A clean transition also means picking a border style and sticking with it at every column. Whether it’s a soldier course, a simple straight edge, or a rounded detail, using the same treatment at each post makes the whole patio look planned rather than patched together.

Setting Patio Elevations Without Creating Problems at Column Bases

Height matters as much as layout. If the finished brick surface sits too high near a column base, water can pool against the wood or stone and cause damage over time. The patio should slope gently away from the house and from each column, not toward it.

Thresholds are another spot to watch. Where the patio meets a porch step or door, the elevation change needs to stay small enough to walk safely, but low enough that it doesn’t trap water against the column footings. A quarter inch of drop per foot is a common starting point, though the exact number depends on the site.

Getting this wrong doesn’t always show up right away. Poor drainage near a column base can take a season or two to cause visible damage, which is why elevation planning happens before the first brick goes down, not after.

Designing Brick Patterns That Work Around Multiple Fixed Supports

A herringbone or basketweave pattern looks great on an open patio, but columns interrupt the flow. The fix is picking a starting point that keeps full bricks near the columns and pushes the smaller cut pieces toward the edges of the patio, where they’re less noticeable.

Border planning helps too. A soldier course border around the whole patio, including around each column, gives the eye a clean line to follow even when the interior pattern has to bend or shift near a post. Without a border, cuts near columns can look scattered and random.

Pattern direction should stay consistent across the whole space. Switching directions partway through, just to dodge a column, usually makes the layout look disjointed instead of solving the problem it was meant to fix.

Planning Frisco Covered Patio Upgrades as One Connected Outdoor Space

A new brick patio can tie a covered porch to the rest of the backyard instead of leaving it as a separate slab. Matching the patio footprint to the porch width, rather than stopping short at the columns, makes the transition feel natural.

Access paths matter here too. A walkway that lines up with the porch steps, rather than one that cuts across at an angle, keeps the whole layout feeling connected. Seating areas placed just past the columns can use the porch roof for shade while still feeling like part of the open patio.

The goal is a single outdoor space that happens to have a covered section and an open section, not two separate projects sitting next to each other.

Frequently Asked Questions

Can brick patio installation be completed around existing porch columns? 

Yes. The layout can be planned around existing columns so the brick surface fits cleanly around their bases while keeping the overall design balanced.

How close can patio bricks be installed to porch columns? 

The spacing depends on the column material, the base design, and how much movement or transition space the site needs. Measurements should be settled before the brick layout begins.

Should the brick pattern be planned before installation starts around porch columns? 

Yes. Working out the pattern and the starting point ahead of time helps avoid small, uneven cuts around each column.

Can a brick patio be added to an existing covered porch? 

Yes. A brick patio can extend around or beyond an existing covered porch as long as the layout and the finished surface height are planned to work with the structure that’s already there.

How do existing porch columns affect the size and shape of a brick patio? 

Columns can interrupt the usable footprint and shape where borders, seating areas, walkways, and pattern transitions end up.

Brick Masonry Around Windows Requires Careful Transition Planning

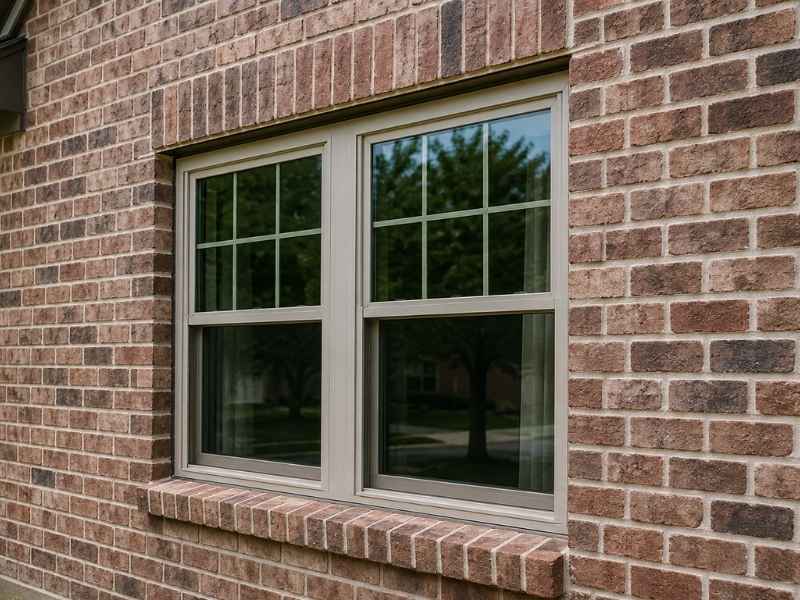
Brick wall in Frisco Texas showing careful masonry transitions around a residential window.

A brick wall looks solid and simple until you reach a window. That’s where things get tricky. Brick masonry has to stop, make room for the window, and then pick back up cleanly on the other side. Getting that spot right takes real planning. The window frame, the opening in the brick, the trim, and the surrounding wall all have to fit together with no last-minute guessing. That planning, and crews end up making decisions on site that don’t always turn out well. Plan it ahead of time, and the window becomes a clean, solid part of the wall instead of a rough patch job.

Plan the Brick-to-Window Transition Before Masonry Installation Begins

Every window opening needs enough room for the frame, the brick around it, and the trim that ties them together. If that space isn’t planned before the brick goes up, someone ends up trying to force a fit later. That rarely goes smoothly.

Coordinating these dimensions early gives everyone working on the project a shared target. The mason knows exactly where the brick should stop. The window installer knows exactly what space they’re working with. Nobody has to improvise once the wall is already built. That kind of planning saves real time and avoids awkward gaps or tight squeezes at the opening.

Detail Flashing at Window Heads to Direct Water Away From the Opening

Right above a window is one of the more vulnerable spots on a brick wall. Water that gets into the wall assembly needs a way back out, and flashing at the window head is what makes that happen. Without it, water can end up trapped right where the window meets the brick.

This isn’t about the wall’s whole moisture system. It’s specifically about the detail right above the window opening. Getting this flashing placed and lapped correctly keeps water moving toward the outside instead of settling in behind the brick, which is exactly where problems tend to start.

Coordinate Brick Sills With Window Frames and Drainage Paths

The bottom of a window needs just as much attention as the top. A brick or masonry sill has to line up with the window frame, project out far enough, and slope in a way that actually moves water away from the opening.

Get the slope wrong, or leave an awkward gap at the joint, and water sits right where it shouldn’t. Planning the sill alongside the window frame from the start avoids that problem. It also keeps the joint at the bottom of the window looking clean instead of pieced together after the fact.

Allow for Movement Where Brick Masonry Meets Window Materials

Brick and window frames don’t move the same way. Temperature swings and moisture changes push and pull each material differently. A rigid connection between the two, with no room to move, tends to crack or fail over time.

That’s why the perimeter joint around a window needs real thought. Properly placed sealant and a joint sized for movement give both materials room to expand and contract without damaging each other. This isn’t a full lesson on expansion joints across a building. It’s specifically about the small, critical gap that lets the window and the brick coexist without fighting each other.

Keep Jamb and Corner Details Consistent Around the Entire Window Opening

The sides of a window opening, known as the jambs, need to line up cleanly with the brick coursing, the trim, and the flashing running around the rest of the opening. When these details don’t match up, the whole window can look slightly off, even if nobody can quite say why.

Keeping the jambs and corners consistent all the way around the opening is what makes the finished window read as one coordinated piece. It’s a detail that matters more than it seems, since a mismatched corner or an uneven jamb draws the eye in a way that plain brick never does.

Frequently Asked Questions

Why does brick masonry need special detailing around windows? 

Windows break up the smooth run of a brick wall, creating spots where the brick, flashing, sealants, trim, and the window itself all have to work together properly.

What is the purpose of flashing above a window in a brick wall? 

It redirects water that gets into the wall assembly, moving it back toward the outside instead of letting it stay trapped around the window opening.

Should a brick window sill slope away from the house? 

Generally, yes. Sills are usually designed to push water outward rather than let it sit against the window frame, though the exact detail depends on the wall system and the project.

Why are joints needed between brick masonry and window frames? 

Brick and window materials expand and contract at different rates. A properly sized joint gives them room to move without cracking or breaking the seal around the opening.

When should window and masonry transition details be finalized? 

Before the brick installation reaches that part of the wall. That way, the mason, the window installer, and other trades can all follow the same planned dimensions and flashing sequence.

Why Brick Selection Should Come Before Exterior Remodeling

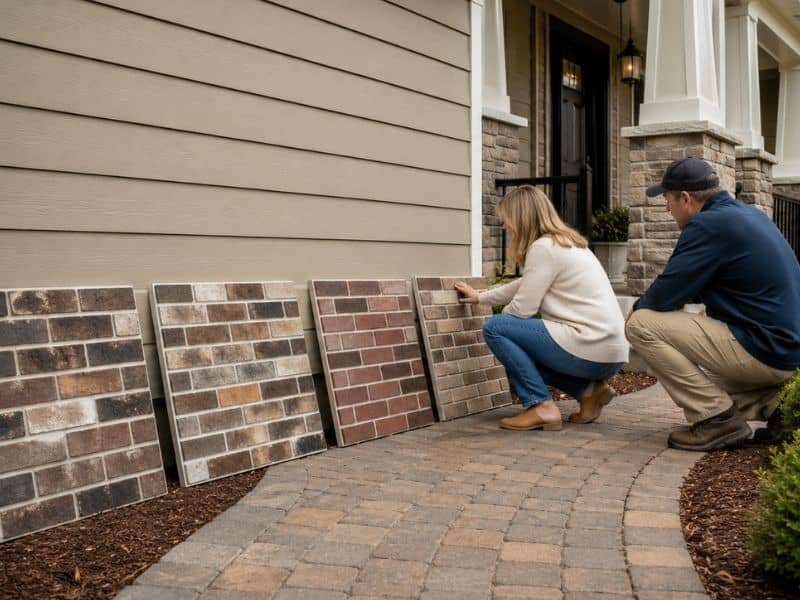
Homeowners comparing brick sample panels before coordinating an exterior remodeling project.

For exterior remodeling projects, brick is often the material that ties an updated entry, façade accent, porch, or outdoor feature back to the home. Choosing it early makes the rest of the design easier to plan and coordinate.

Most homeowners work backward. They pick a paint color, a trim style, or a roofing accent first, then go looking for brick that matches. This usually causes problems. Paint and trim colors can be mixed to order. Brick can’t. Once a batch is made and fired, that color and texture are set. It makes more sense to lock in the brick first and build the rest of the exterior around it.

This matters just as much for property owners planning a resale as it does for a family staying put for twenty years. A mismatched exterior can sit on the market longer. A well-coordinated one photographs better and reads as finished, not patched together.

Brick Sets the Visual Direction Before Other Exterior Choices Multiply

Brick color, texture, size, and joint style set the tone for the whole exterior. A warm red brick with a rough, tumbled texture reads completely differently than a smooth gray brick with tight, dark joints. Once that choice is made, everything else has a starting point.

Here’s how it plays out in practice:

  • Siding color needs to sit next to the brick’s undertone, not fight it. A brick with warm orange tones will clash with a cool blue-gray siding.
  • Trim color should either pick up the mortar shade or contrast against it on purpose. Guessing at this before the brick is chosen almost always ends in a repaint.
  • Roofing accents, like dark shingles or metal flashing, look intentional when they pull a color that already exists in the brick.
  • Metal finishes on doors, railings, and light fixtures should lean warm or cool depending on the brick tone next to them.

Pick brick first, and these decisions come together on their own. Pick brick last, and you end up trying to match five separate materials to a wall you haven’t chosen yet.

A Sample Panel Can Answer Questions a Screen Image Cannot

A photo on a website, or a small chip handed over at a supply yard, does not tell the full story. Brick looks different indoors under store lighting than it does outdoors on a wall.

Ask for a full sample panel, not a single brick. Set it against the actual house, not on its own against a fence or a table. Look at it in the morning, again at midday, and once more near sunset. Shade from a tree, a neighboring roofline, or the direction your house faces can shift how a brick reads by several shades over the course of one day.

Pay attention to what sits next to the sample, too. Existing stone, siding, or a driveway color can pull a brick warmer or cooler than it looks on its own. A brick that seems perfect in a showroom can look off once it’s next to the rest of the property.

This one step, standing outside with a real panel, prevents most of the regret homeowners feel after a brick order arrives.

Brick Dimensions Shape Corners, Openings, and Remodel Transitions

Size matters as much as color. Brick dimensions affect how courses line up around windows, doors, columns, additions, and new accent walls.

If a new brick is even slightly taller or shorter than the existing brick, every course line where new work meets old work gets thrown off. That shows up as visible seams, awkward cuts near corners, and mortar joints that don’t line up from one section to the next.

Before adding a porch, an entry feature, or a small addition, check that the brick size and course height match the existing brick, or plan an intentional contrast instead of an accidental one. A mason can walk the project early and point out any spot where an odd cut or an uneven line is likely to show up later.

Skipping this step is one of the most common reasons a remodel ends up looking stitched together instead of built as one piece.

Selecting Brick Early Helps Coordinate the Materials That Meet It

Brick rarely stands alone on a wall. It meets flashing, trim boards, ledgestone, cladding, pavers, and light fixtures at dozens of points around a home.

Each of those meeting points needs a plan:

  • Flashing has to match the brick’s reveal and keep water moving away from the wall, not behind it.
  • Trim boards need a reveal depth that looks planned next to the brick, not squeezed in as an afterthought.
  • Ledgestone or stone accents should sit at a height and tone that pairs with the brick instead of competing with it.
  • Pavers and walkways near an entry look better when they pick up a tone already present in the brick.

Choosing brick before ordering these other materials means each one gets picked to work with it. Choosing brick last means reworking, or living with, pieces that were already ordered and don’t quite fit.

Early Brick Decisions Keep a Remodel From Looking Like Several Separate Projects

Remodels often happen in stages. A porch this year, a façade refresh next year, an addition after that. Without a shared brick decision made up front, each phase can end up looking like its own separate project instead of one home.

Pick the brick early, and it becomes the thread that ties every phase together. An entry update, a new porch, a façade refresh, and a small room addition all read as one plan carried out over time, not a string of unrelated projects stapled onto the same house.

For land developers and builders working on multiple properties, this same logic scales up. Setting a brick standard early, before trim, stone, and paving get ordered project by project, keeps a whole street or subdivision looking cohesive instead of mismatched lot to lot.

That’s the real value of choosing brick first. Not just a wall that looks good on its own, but a property that reads as one finished place, built with a plan, rather than a set of separate decisions made months or years apart.

Brick Masonry Expansion Joints Only Work If the Seal Holds

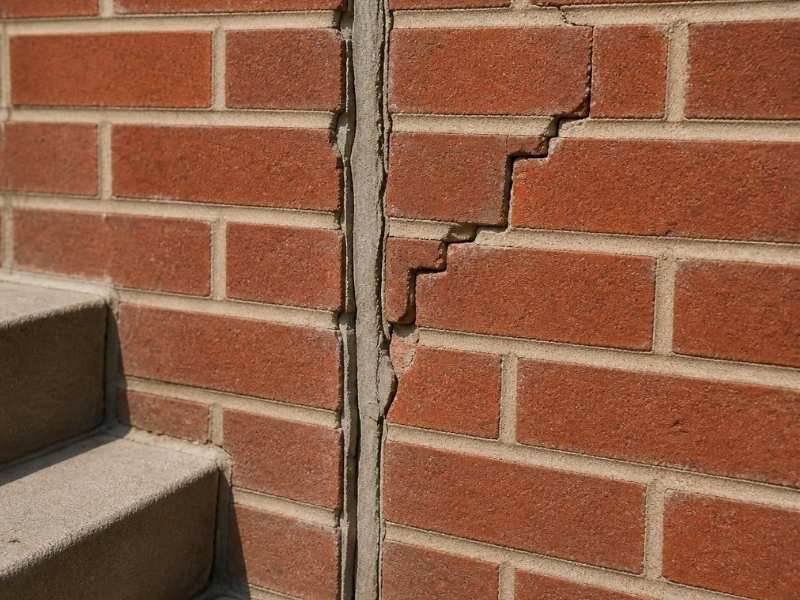
Failed brick masonry expansion joint with cracked sealant and stair-step cracking in Frisco, Texas.

Run your eye down a long brick wall and you will find a thin vertical line filled with soft sealant. That line is one of the brick masonry expansion joints, and it does a quiet but big job. It gives the wall room to grow and shrink as the weather changes. When the seal in that joint hardens, cracks or gets filled with mortar, the wall loses that room and starts to crack on its own. For developers building long walls around Frisco, where summers bake the brick and winter nights drop below freezing, that back-and-forth movement never stops. A joint that cannot move is a wall that will crack.

What an Expansion Joint Is Doing

A brick wall does not sit still. It takes in moisture, warms in the sun and cools at night. Each change makes it swell or shrink a hair, and those small moves add up over a long run. An expansion joint is a planned soft gap that swallows that movement, so the growth lands in the gap instead of the brick.

An expansion joint is different from a mortar joint. A mortar joint is hard and holds brick together. An expansion joint stays open and flexible, filled with backer rod and sealant, so the two sides can move without pushing on each other. Mix those two up and you get the most common mistake on this whole topic.

How to Spot a Joint That Has Failed

The best time to check is twice a year, once in the heat and once in the cold, since a stressed joint shows it most in the extremes. Walk the wall slow and look at each vertical line up close.

  • Sealant that has gone hard, brittle or chalky instead of soft and springy
  • Sealant cracked down the middle or pulled away from the brick on one side
  • A joint packed with mortar or painted over, so it can no longer move
  • A lumpy, wrong-color caulk line where someone patched it fast
  • A long straight wall with no soft joint at all

Press the sealant with a key or screwdriver. Good sealant gives a little. Bad sealant feels like rock or crumbles. A gap that looks dry, split or stuffed with something hard has failed.

What a Bad Joint Does to the Wall

A joint that cannot move pushes the problem into the brick. The wall still wants to grow, but now it has nowhere to go. So it cracks, often near corners, windows or where the wall changes height. Brick edges along the stuck joint can chip and flake off as they grind together. A long run with no joint can even bow out.

Water is the part that turns a small problem into a big one. A split seal lets rain sit in the open joint. On a cold night that water freezes, swells and pries at the brick and mortar around it. Do that a few dozen times over a winter and the edges start to crumble. Caught early, this is a reseal. Left alone, it can turn into brick replacement or a wall that needs rebuilding at one end.

How to Reseal an Expansion Joint the Right Way

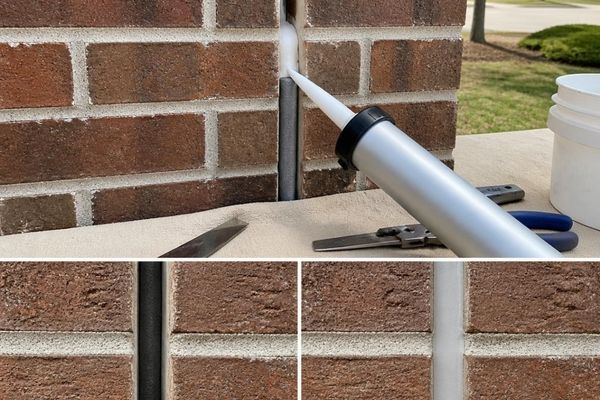
Brick masonry expansion joint repair with backer rod and fresh sealant in Frisco, Texas.

Start by clearing the joint, not covering it. Rake out the old, dead sealant all the way down with a hand tool or an oscillating tool. Brush the joint faces clean so the new sealant can grab bare, dry brick. Do not smear fresh caulk over a cracked line, since it will fail again in a season.

Push in the backer rod to set the right depth. The rod also keeps the sealant from sticking to the back of the joint, which is what lets it stretch. Then fill the joint with a flexible sealant made for masonry. Tool the bead smooth so it presses into both faces and sheds water. Match the joint width the wall was built for, and keep the sealant soft and slightly recessed so it can move. Give it time to cure before rain hits it, which the product label will spell out. Plan the work for a dry day at mild temperature, since wet or freezing brick will not let the sealant grip.

What Never to Do

Never fill an expansion joint with mortar. Hard mortar locks the wall and starts the cracking all over again. Never paint the joint shut, since a coated joint cannot move and the paint hides it from the next person. And never caulk over old dead sealant, because the fresh bead only grips the failure underneath.

When to Bring in a Pro

One clean joint is a steady weekend job. A long wall with many failed joints, a joint packed solid with mortar or a wall built with no joint at all is a different story. Those need a mason, and a missing joint on a tall or load-bearing wall needs an engineer to place it right. Call before the cracks spread, not after.

Frequently Asked Questions

What is the difference between an expansion joint and a mortar joint?

A mortar joint is the hard line that bonds brick to brick. An expansion joint is a soft, open gap built to move. One holds the wall together, the other lets it flex. Filling an expansion joint with hard mortar cancels the whole point of it.

Can I just caulk over a cracked expansion joint?

No. Caulk laid over dead sealant only sticks to the old failure, so it splits again fast. Rake the joint clean, set the backer rod for depth, then apply fresh masonry sealant. Doing it right once beats patching it every year.

How often do expansion joint seals need replacing?

Most joint sealant lasts several years before it hardens or pulls loose, often in the range of ten to twenty. Sun, heat and weather wear it faster. Check the joints once a year and reseal the ones that have gone stiff or cracked before water gets in.

What happens if a long brick wall has no expansion joint?

The wall has no room to grow, so it makes its own room by cracking. You will see cracks near corners and openings, chipped brick edges and sometimes a bow in the wall. Adding a proper joint later takes a mason or engineer, so it is best planned early.

Can a mortar-filled expansion joint be fixed?

Yes, but it takes real work. A mason cuts the mortar back out of the joint, cleans the edges and rebuilds it as a soft joint with backer rod and sealant. Once it can move again, the cracking around it usually stops.

How Seasonal Weather Affects a Brick Patio

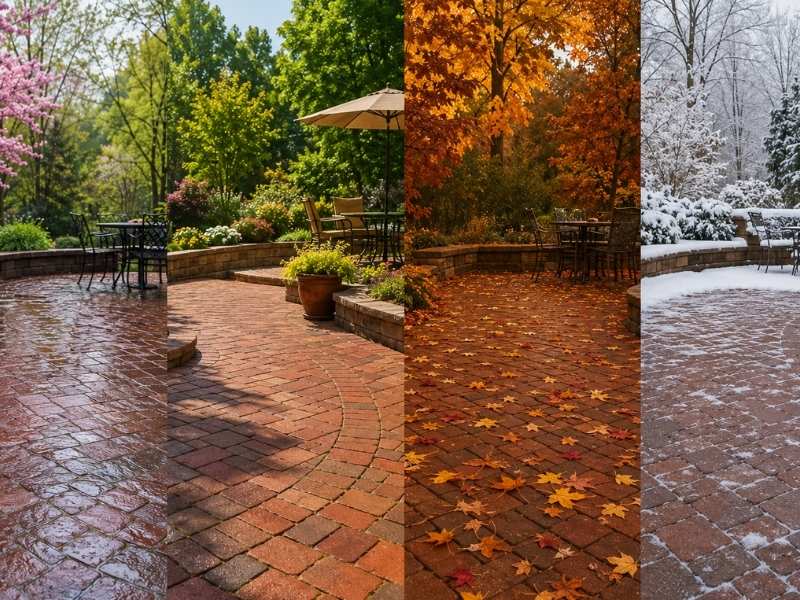
Brick patio shown through spring rain, summer sun, fall leaves, and winter snow, illustrating how seasonal weather affects brick pavers in Frisco, TX.

Your brick patio moves every single day, and you’ll never see it happen. It swells in July. It shrinks in January. The ground beneath it does the same thing on its own schedule, and the two rarely agree. Watch the right things at the right time of year and you’ll catch problems while they still cost twenty dollars.

The soil is running the show

Brick is stable. The dirt under it is anything but. Proper brick patio installation starts with a stable base and good drainage, helping the surface perform better as soil conditions change over time. Clay soil swells when it takes on water and shrinks when it dries out, and that movement lifts and drops whatever sits on top. A wet spring followed by a dry August is a full cycle of up and down.

You can’t stop that. What you can do is control how much water reaches the soil and how fast it leaves. Every seasonal habit below traces back to that one idea. Keep the moisture steady and the patio stays put.

Spring: water finds the weak spot

Rain is the first test each year. Heavy runoff pulls joint sand out of the seams, and once a joint empties, water gets deeper into the setting bed. That’s a small problem in March and a real one by fall.

Look at your patio during a storm, not after one. Water should run off the surface and away from the house within a few feet. If it pools, sheets toward a wall or cuts a channel through the joints, you’ve found the thing to fix.

What spring actually asks of you

Sweep the joints and see what’s missing. Refill any seam you can push a finger into, and use polymeric sand if the patio was built for it. Clear the downspout that dumps a roof’s worth of water onto one corner, because that corner will fail first.

Weeds show up now too. They grow in the joint sand, not through the brick, so weeds are a signal that your joints are open. Pull them and refill rather than spraying and forgetting.

Summer: heat pushes and the sun fades

Brick expands when it heats up. A wide patio in full sun grows a small amount across its width, and it has to push somewhere. Tight edges and a hard wall on one side turn that push into a lifted or chipped brick.

Heat also bakes the color. Red brick holds up well, but darker units and any pigmented jointing will lighten over a few hard summers. That’s cosmetic and it’s worth knowing before you blame the mason.

Watch for the dry-out sag. Late summer pulls water out of clay soil and the ground shrinks away, so a patio that was flat in May can develop a low spot in September. Note where it drops. That low spot will tell you where water has been collecting all year.

Fall: the season everyone skips

Leaves look harmless. Wet leaves left on brick for weeks release tannins that stain the surface a rusty brown, and that stain sinks in. Blow them off before the first long rain and you skip the whole problem.

Debris also clogs drainage. A patio edge packed with leaf mulch turns into a small dam, and water backs up onto the surface instead of running off. Clear the perimeter, not just the middle.

Fall is the smart window for sealing if you seal at all. The surface is dry, the temperatures are mild and the patio goes into winter protected. Sealing a damp patio traps moisture underneath and creates a cloudy mess.

Winter: freeze, thaw and the salt mistake

Water in a joint or a pore expands when it freezes. That expansion breaks the face off the brick over repeated cycles, and the damage is called spalling. Mixed climates do more of this damage than cold ones, because they freeze and thaw over and over instead of staying frozen.

De-icing salt makes it worse. Rock salt drives more freeze-thaw cycles and attacks the brick face, and it’s the fastest way to ruin a good patio. Use sand for traction instead, then sweep it up in spring.

Metal shovels are the other winter mistake. They chip edges and scar the surface, and the damage is permanent. Plastic works fine.

Reading the damage

Not every crack means the sky is falling. A single hairline in one brick is usually the brick, and it’s cosmetic. A line of cracks running across several bricks in a row means something under the patio moved, and that’s worth a call.

Spalled faces mean water got in and froze. Look for the source before you replace the unit, because a new brick in a wet spot spalls too. The pattern tells you more than any single brick does.

A four-season check that takes ten minutes

  • Spring: watch it rain, refill open joints, aim downspouts away from the slab
  • Summer: mark any new low spot, check the edges for lifted or chipped brick
  • Fall: clear leaves before the first soaking rain, open up the drainage at the perimeter
  • Winter: no rock salt, no metal shovels, sand for traction only
  • Any season: photograph cracks with a coin next to them and compare year over year

That last one is the trick nobody uses. A photo log turns “I think it’s worse” into a fact, and it’s the difference between a repair and a rebuild.

Frequently Asked Questions

Why is my brick patio uneven after a wet season?

Clay soil expands when it absorbs water and shrinks as it dries, causing the patio surface above it to rise and settle. A wet spring followed by a dry summer often repeats this cycle each year. If the same low spots appear seasonally, poor drainage is usually the underlying cause rather than a failed patio.

Can weather crack brick patio pavers?

Yes. Water can enter the brick or mortar joints, then freeze and expand during cold weather. Repeated freeze-thaw cycles may cause the surface of the brick to break apart, a condition known as spalling. Areas with fluctuating winter temperatures are especially vulnerable.

Is rock salt safe on a brick patio?

No. Rock salt can accelerate damage by increasing freeze-thaw activity and breaking down the surface of brick pavers. Sand is a safer option for improving traction during icy conditions, and using a plastic shovel instead of a metal one helps prevent chipped edges.

When is the best time to seal a brick patio?

Fall is often the ideal time because mild temperatures and dry conditions allow the sealer to cure properly before winter arrives. Always make sure the patio is completely dry before sealing, as trapped moisture can reduce the sealer’s performance.

How often should joint sand be replaced?

The frequency depends on rainfall, drainage, and overall patio use, but many brick patios benefit from replacing joint sand each spring. Maintaining full joints helps prevent water infiltration, weed growth, and movement of the pavers over time.