
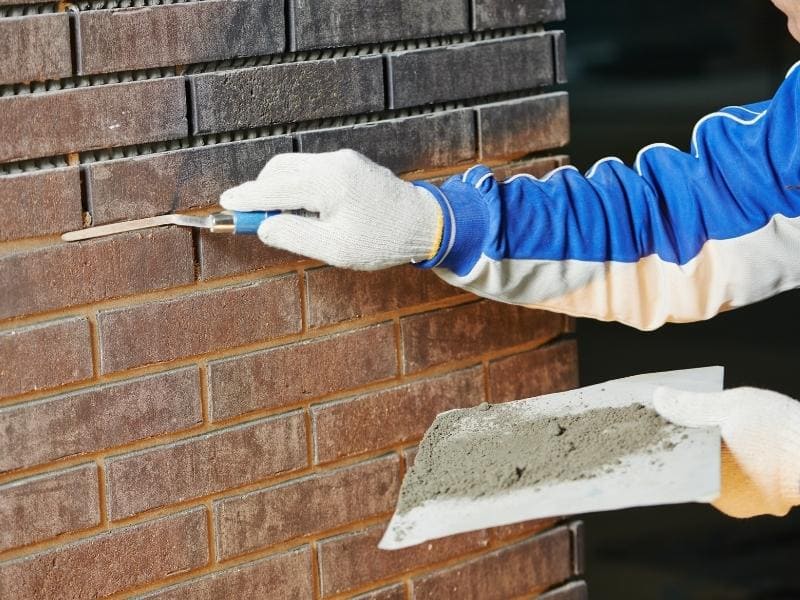
You can usually spot a tacked-on addition from across the street. The brick is a shade off, the mortar joints are a different width, and a crooked seam runs where the old wall stops. Finished masonry details are what close that gap, tying new walls to old ones so the addition looks like it was always there. Plan those details before construction starts, because they’re hard to fix once the walls are up.
This guide is for homeowners planning a room addition, garage, or covered porch with brick masonry or stone masonry, with builders and architects in mind. It covers connections, material matching, transitions, drainage, and upkeep. Exact methods depend on the house, the foundation, and the design, so review details with your mason and builder early.
How Finished Masonry Connects New Additions to Existing Walls
Finished masonry connects an addition to the existing house where the new wall meets the old. That seam is the hardest part to get right, both for looks and for performance. How it’s handled depends on the foundations, the wall type, and how much movement is expected. Masonry transitions need to be planned around those differences.
Toothing in means removing alternating bricks along the old wall’s edge so new courses can interlock with it. It can create a blended look with no straight seam. It works best when the old and new walls are expected to move together.
When an addition sits on its own foundation, the new and old sections may settle differently. A vertical movement joint, which is a gap filled with flexible sealant, lets them move without cracking. Placed carefully, often at an inside corner or along a trim line, the joint can be hard to notice.
Your mason and builder should agree on the approach before work starts. The right choice depends on the foundations and structure, and in some cases an engineer may weigh in. Ask to see examples of each method on past projects.
Matching Brick, Stone, and Mortar for a Consistent Appearance
Matching brick, stone, and mortar is the most visible part of finished masonry on an addition. Even a small difference in color, size, or texture stands out on a long wall. Start the matching process early, since sourcing the right material can take time.
Check brick size first, since modular, queen, and king brick have different dimensions and course heights. Then compare color blends, texture, and how the old brick has weathered. For stone, match the type, cut, and laying pattern, such as coursed or random.
Mortar affects the look more than most people expect. Color, sand, joint width, and the tooled profile of the joint all need to match. A mason can build small test panels so you can compare them against the existing wall in daylight.
An exact match isn’t always possible on older homes. Salvaged brick, custom blends, or placing the addition where it’s seen at an angle can help. Some owners also choose a deliberate accent, like a stone base, so a slight difference looks planned.
Planning Masonry Transitions Around Windows, Doors, and Rooflines
Transitions around windows, doors, and rooflines are where finished masonry shows its quality. These areas need clean lines and proper water control. Plan them with the window, door, and roofing crews before masonry begins.
Match the sill style, head details, and any decorative courses, like a soldier course of upright bricks above openings. Lintels, the supports over openings, should be sized and flashed correctly. Lining up head and sill heights with the existing house helps the addition read as one building.
Where a new roof meets an existing masonry wall, flashing directs water away from the joint. Step flashing and counterflashing are common, and kickout flashing at the bottom of the roof edge helps keep water from running down the wall. Poor roof-to-wall flashing is a frequent source of leaks and stained brick.
Using Finished Masonry Details to Improve Durability and Drainage
Good finished masonry does more than look clean. It sheds water, lets trapped moisture escape, and protects the wall over time. Those functions are built into small details that are easy to skip.
Weep holes are small openings near the base of brick veneer that let water behind the brick drain out. Through-wall flashing above them directs water toward those openings. Both need to be included on the new walls and kept clear.
Several details help an addition shed water. Ask about each one during planning. Key details include:
- Sloped sills and caps that carry water off the wall
- Drip edges that keep water from running back under sills
- Flashing at roof-to-wall and window-to-wall joints
- Proper clearance between the brick and finished grade
- Grading that moves water away from the new foundation
Drainage around the addition matters as much as the wall itself. If grading sends water toward the new foundation or a nearby brick patio or retaining wall, problems can follow. Evaluate grading and downspout placement early.
Maintaining Masonry Details After the Addition Is Complete
Maintenance after the addition keeps the new masonry and the connection looking good. The first year matters most, since new work settles and cures. Plan a walk-around a few months after completion and again after the first year.
New masonry sometimes shows white efflorescence as moisture leaves the wall. It often fades with time and gentle cleaning. Avoid harsh acids or high-pressure washing, which can damage brick and mortar.
Check movement joint sealant, weep holes, and flashing regularly. Sealant ages and may need replacement over the years. Note any cracks along the old-to-new seam and have a mason look if they grow.
Frequently Asked Questions
Can new brick match my existing brick exactly?
Sometimes, but not always. Brick colors and sizes change over time, and older brick has weathered. Matching size first, then color and texture, gets the closest result. Test panels help you judge before committing.
Should new brick be tied into the old wall or separated?
It depends on the foundations and expected movement. Toothing in can work when both sections move together. A movement joint is often the better choice when the addition has its own foundation. Your mason and builder should decide based on your structure.
Why does mortar color matter so much?
Mortar covers a large share of a brick wall’s surface. A different color or joint profile can make even well-matched brick look wrong. Matching sand, color, and tooling helps tie the addition together. Ask for samples next to the existing wall.
What causes leaks where an addition meets the house?
Common causes include missing or poor flashing, failed sealant, and roof-to-wall joints without kickout flashing. Blocked weep holes can trap water too. Grading that sends water toward the foundation adds risk. Plan these details before construction.
Is white residue on new brick a problem?
White residue is often efflorescence, which appears as moisture leaves new masonry. It usually fades over time. Gentle brushing and mild cleaning help. If it keeps returning, check for a water source.
