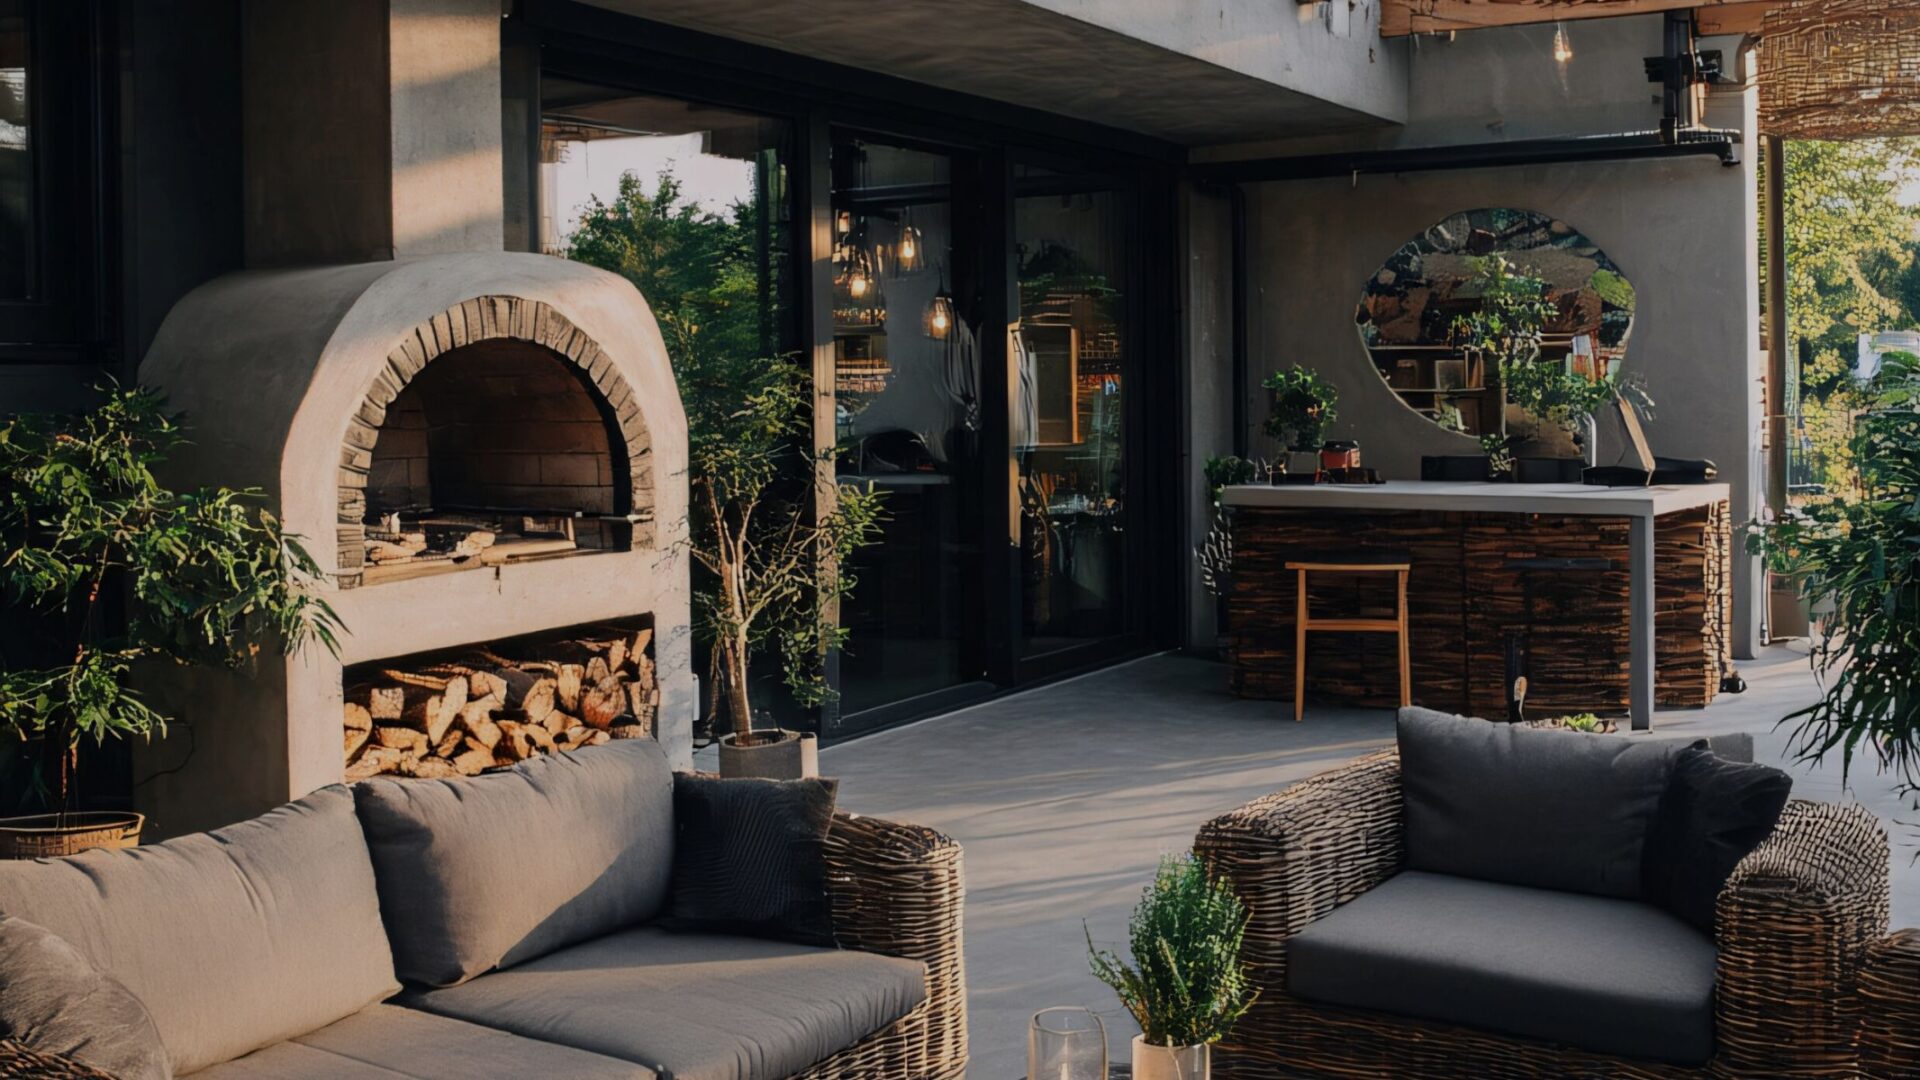
Stone Patio Layouts Around Irregular Backyard Boundaries
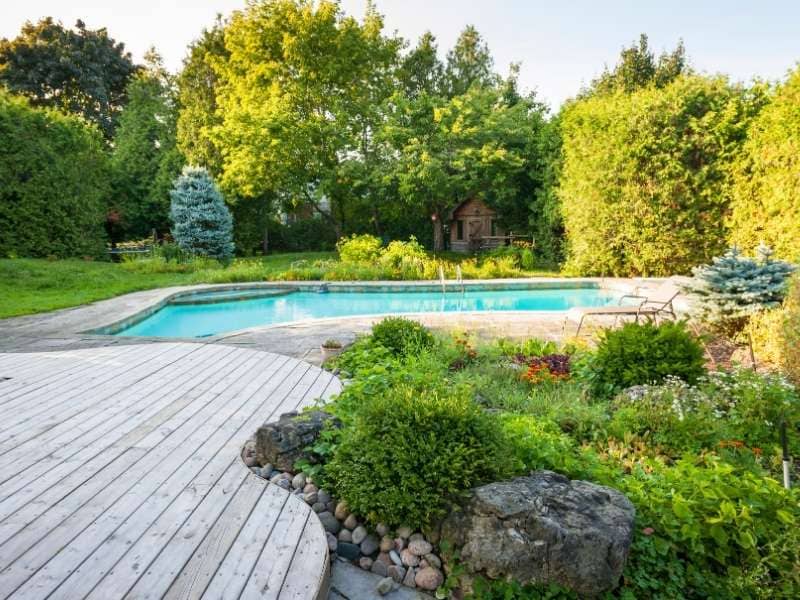
Stone patio layout following irregular backyard boundaries with curved and angled edges.

Few backyards come as clean rectangles. Fence lines jog at odd angles, corners pinch inward, and old trees or slopes squeeze the usable space into shapes no stock plan covers. A stone patio can handle all of that well, as long as the layout follows the yard instead of fighting it.

The best results come from planning the shape, the stone, and the water flow together before anyone digs. Get those three right, and the odd corners often become the most interesting part of the space. Skip them, and you’ll likely see gaps, puddles, and loose edges within a few seasons.

Planning a Stone Patio Around Irregular Boundaries

The smartest way to plan a stone patio on an irregular lot is to map the boundary first, then shape the patio around how you’ll actually use the space. Start with accurate measurements of fence lines, property corners, the house wall, and any trees or utilities. A rough sketch with real dimensions beats guessing from memory every time.

Next, check what limits the footprint. Easements, setbacks, HOA rules, and underground lines can all affect where cardsharp can go, and those rules vary by property and local code. If you’re unsure where the property line sits, an existing survey or plat is worth pulling before the design gets too far along.

Once you know the limits, think in zones instead of one big slab. A dining area near the back door, a lounge spot by a future outdoor fireplace, and a path to the gate can each take their own shape. Here are a few things to settle early:

  • Where people will walk most often
  • Which corners stay in shade or full sun
  • How far the patio should stay from the fence for mowing or maintenance
  • Whether any existing brick masonry or walls should tie in

Leaving a planting strip between the patio and an angled fence usually looks better than chasing the fence line with stone. It also gives you room for drainage and avoids tiny, hard-to-fill wedges.

Choosing Stone Pavers for Angled and Curved Layouts

The right paver for an irregular layout is the one that handles cuts and curves cleanly while matching your style and budget. Natural flagstone works well along curves because its uneven shapes can be fitted piece by piece. It takes more skilled labor, but the edges can follow almost any line without obvious cut marks.

Cut stone pavers in squares or rectangles give a cleaner, more formal look. They need more cutting along angled edges, so the layout should avoid thin slivers that tend to crack or loosen. A good stone mason will adjust the pattern so edge pieces stay a reasonable size.

Brick pavers are another strong option, especially on homes with brick exteriors. Their small size bends around gentle curves fairly easily, and patterns like herringbone hold together well under foot traffic. No material is always better than another, and the choice usually depends on appearance, traffic, maintenance needs, climate, existing masonry, and budget.

Connecting Walkways and Outdoor Living Areas

Walkways turn an odd-shaped yard into a space that feels planned. A path can link the patio to an outdoor kitchen, a fire feature, a garden bed, a side gate, or a seating nook tucked into an awkward corner. Each connection should follow the route people already take, since shortcuts across the lawn tell you where traffic wants to go.

Width matters more than most people expect. Many walkways land around 3 to 4 feet wide for one person, and wider paths make sense where two people walk side by side or carry trays from the kitchen. Main routes deserve more width than quiet garden paths.

Transitions should feel intentional. Switching from stone pavers on the patio to a brick border along the walkway can tie both areas to the house. Where the yard changes height, steps or a low retaining wall can create a clean break between levels, and the design should account for the soil, slope, and load behind any wall.

Managing Drainage Along Uneven Patio Edges

Drainage is the issue that most often ruins patios on irregular lots. Odd corners and low spots tend to collect water, and standing water can wash out joint sand or soften the base below. The patio should carry a slight fall away from the house, often around a quarter inch per foot, though the right pitch depends on the site.

Pay close attention to where water exits the patio. On a curved or angled edge, runoff can spill toward a fence, a neighbor’s yard, or a planting bed that can’t handle it. Grading, gravel strips, or a drain at the low point can help, depending on how much water the area sees.

Base preparation matters just as much. A compacted gravel base helps spread loads and lets water move through instead of sitting under the stone. Soils that swell when wet and shrink when dry can shift pavers over time, so base depth and compaction should match the soil conditions and the planned use.

Building Durable Transitions and Easier-to-Maintain Edges

Edges are where irregular patios usually fail first. Without proper edge restraint, pavers along curves and angles can creep outward and open gaps. Common restraint options include concrete edging hidden below grade, a mortared soldier course of brick, or metal or plastic edging pinned into the base.

A mortared border also makes edges easier to live with. It gives the mower a firm line to follow and keeps mulch or soil from spilling onto the stone. Where the patio meets grass, setting the edge slightly above the soil line helps keep dirt and water from washing over the surface.

Maintenance stays simpler when the design avoids tiny cut pieces and tight pockets. Refilling joint sand, clearing debris from drains, and checking edges after heavy storms will keep most patios in good shape. Sealing is optional for many stones, and whether it helps depends on the material and how the space gets used.

Frequently Asked Questions

Can a stone patio follow a curved or angled fence line?

Yes, a stone patio can follow almost any boundary shape with careful layout and cutting. Flagstone and small brick pavers handle curves especially well. Many designs leave a planting strip between the patio and the fence instead of running stone right up to it. That gap makes mowing, drainage, and fence repairs much easier.

Are brick pavers or stone pavers better for irregular layouts?

Neither one is always better, since each has strengths. Brick pavers bend around gentle curves easily and often match brick homes. Natural stone fits organic shapes and gives a more rugged look. The best choice depends on your style, budget, traffic, and existing masonry.

How do I keep water from pooling in patio corners?

Start with a slight slope that moves water away from the house and toward a safe outlet. Low corners may need a gravel strip, a small drain, or regrading of nearby soil. A well-compacted gravel base also helps water pass through instead of sitting below the stone. Planning the outlet before construction is much easier than fixing a puddle later.

Do I need a retaining wall for a sloped backyard patio?

Not always, because gentle slopes can often be handled with grading alone. Steeper yards may need a retaining wall to create a level patio area. The wall height, soil, drainage behind the wall, and local code all affect what’s required. A taller wall may need engineering input, so it’s worth asking early.

How much maintenance does a stone patio need?

Most stone patios need only light upkeep once they’re built well. Sweeping, refilling joint sand, and clearing drains will handle most of it. Edges should be checked after big storms for any shifting. Sealing is optional and depends on the stone type and how much you use the space.
Outdoor Fireplace Placement Decisions to Make Before the Patio Is Built

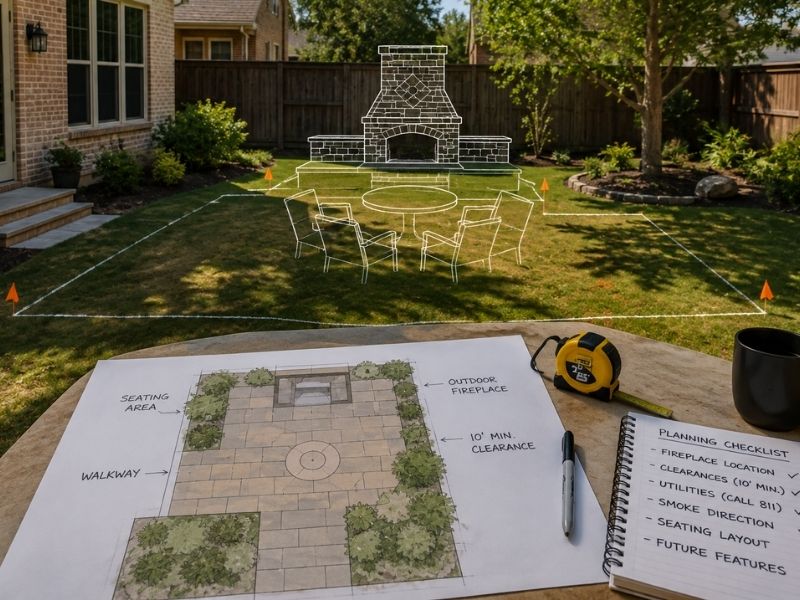
Outdoor fireplace placement planning before patio construction in Frisco, TX, showing a backyard layout with seating, utility planning, and future patio design.

An outdoor fireplace changes how a backyard feels, but where it sits matters as much as how it looks. In Frisco, plenty of homeowners pour the patio first. Then they try to fit a fireplace into the space that is left. Once the concrete sets, moving it means breaking up the slab. So pick the fireplace spot early, before any patio work begins. A few good calls now save you money, time and stress later.

Choose a Fireplace Location That Fits the Patio Layout

The best fireplace spot fits how you use the patio, so pick it before you draw the final shape. A fireplace pulls chairs toward it, so it needs open floor space in front. Set it along an edge or in a corner. That way it anchors the space without blocking foot traffic. Keep the walking paths clear so people can move from the back door to the yard. Sketch the seating and paths first. Then set the fireplace where it earns its place.

Plan Safe Distances From Structures, Fences and Combustible Materials

A fireplace needs room from anything that can catch fire, so measure your clearances first. Heat and sparks travel farther than people expect. Keep it away from the house wall, the roof overhang, wood pergolas, porch posts and wood fences. Dry shrubs, mulch beds and low tree branches need the same care. In Frisco, permanently installed recreational fire pits must sit at least 10 feet from a structure or anything that can burn. That comes from the city fire code. Outdoor fireplaces built to the International Building Code get an exception. Rules like these change, so check the current ones with the city before you build.

Account for Underground Utilities Before Finalizing the Fireplace Location

A permanent fireplace sits on a footing that reaches into the ground, so find the buried lines first. Lots of things run under a normal yard. A footing can land right on top of them. In Texas, calling 811 gets public utilities marked for free, usually within a couple of business days.

Here’s what often hides below a backyard:

  • Gas lines feeding the home or a future grill
  • Water and sewer pipes
  • Irrigation and sprinkler lines
  • Buried electrical for lights or outlets
  • Drainage pipes and downspout runs

If a line sits where you want the fireplace, shift the fireplace a few feet. Or move the line before the patio goes in. Both are easy now and painful later.

Position Seating Areas With Heat and Smoke Direction in Mind

Comfort comes down to wind and smoke, so aim the fireplace and seating with the local breeze in mind. Smoke drifts wherever the wind pushes it. If the usual breeze blows toward your main seating, guests get watery eyes all night. Watch which way the wind moves across your yard. Then set the fireplace so smoke carries away from the chairs and the back door. A tall fence or the house wall can trap smoke in a pocket, so leave room for air to move.

Coordinate the Fireplace With Future Outdoor Living Features

The fireplace shares the yard with everything you might add later. So plan those features now, even if you build them in stages. Many homeowners add an outdoor kitchen, string lights, a pergola or a new walkway later. Place the fireplace without a plan for those, and you can box yourself in. Leave room for the grill run. Mark where lighting and outlets should go. Keep walkways clear. Route any gas or electric stubs while the ground is still open.

Frequently Asked Questions

When should I decide where to place an outdoor fireplace?

Decide before the patio is designed or poured. The fireplace needs a footing in the ground, so its spot shapes the patio layout and the seating plan. Lock it early and the whole patio gets built around it.

How far should an outdoor fireplace be from my house or other structures?

Keep it well clear of walls, roof overhangs, wood fences and dry landscaping. Frisco’s fire code sets a 10-foot minimum from structures or anything that can burn for permanently installed recreational fire pits, with an exception for outdoor fireplaces built to code. Confirm the current rules with the city before you build.

Why should underground utilities be located before building a patio fireplace?

A fireplace footing digs into the soil. Buried gas, water, sewer, electrical and irrigation lines often run through a backyard. Marking them first, with a free 811 call in Texas, lets you place the fireplace clear of the lines and avoid a struck pipe.

How does wind direction affect outdoor fireplace placement?

Wind carries smoke, so the usual breeze in your yard should push smoke away from seating and away from the back door. Set the fireplace and the chairs with that flow in mind. Then the heat reaches the seating without the smoke following it.

Can I add an outdoor fireplace after my patio has already been built?

You can, but it costs more and limits your choices. A finished patio often needs cutting or partial removal to pour a proper footing. Planning it before the patio saves money and gives you far more freedom.

Outdoor Kitchen Masonry Openings Must Fit More Than the Grill

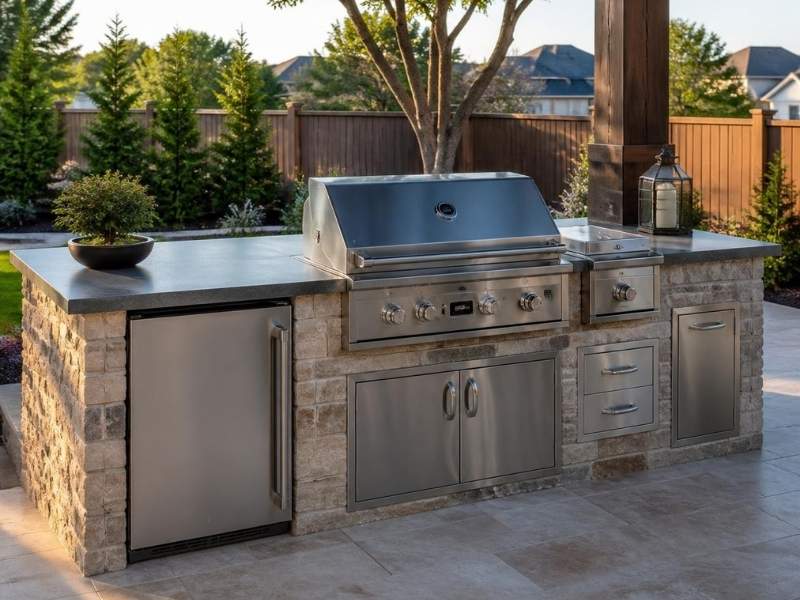
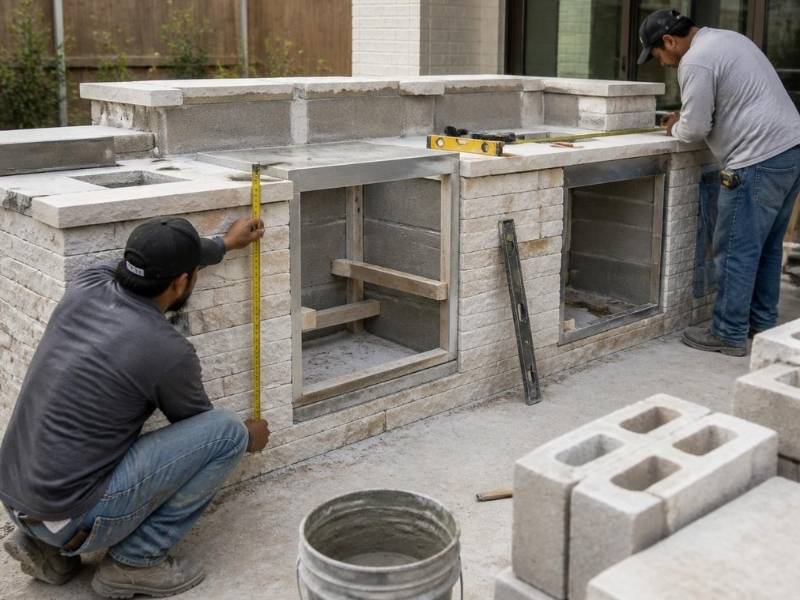
Masonry contractor planning appliance openings for an outdoor kitchen island in Frisco Texas

Most people plan an outdoor kitchen around the grill and stop there. That is where builds go wrong. Outdoor kitchen masonry has to hold a whole set of openings, not one, and each opening has to fit a specific piece of equipment down to the fraction of an inch. For developers building in Frisco, where stone and block islands are a common backyard upgrade, that fit matters even more, since masonry does not move once it sets. Get the openings right on paper first. Fix one after the block is up and you are cutting stone and eating the cost.

The Grill Is Only One of the Openings

An island looks like one big box, but it is really a row of holes waiting for parts. Each part has its own opening. Plan for every one, or you end up short a spot on install day.

  • The grill cutout in the countertop
  • Side burners or a griddle, each with its own cutout
  • A built-in fridge or ice bin
  • Storage doors under the counter
  • Drawers and a trash or recycling pullout
  • An access door for the gas shutoff and connections
  • Vent openings the island needs for safe airflow

Miss one and you are cutting into finished masonry later. That is slow, messy and easy to avoid.

A Cutout Is Not the Same as the Grill Size

A thirty-inch grill does not drop into a thirty-inch hole. That number is a category name, not a build spec. Every built-in comes with a maker’s cut sheet, and the cut sheet lists three things you need. It gives the overall size, the cutout size and the clearances the unit needs around it. The cutout is the hole you build. It is often wider and deeper than the name suggests, and it changes from brand to brand. The same grill in a wider size often needs a different hole, so match the sheet to the exact model you buy.

So pick the exact appliance first, then build to its cut sheet. Order the grill, the burner, the fridge and the doors before anyone lays block. Guess the size and hope, and the parts will not fit the holes you already built.

Openings Need Room for Depth, Overhang and Swing

Width is the easy number. The one people miss is everything else around it. A grill needs depth behind it for the gas line and connections, so the island has to be deep enough to hold the unit and its hookups. The lid needs room to open, which means clearance at the back before it hits a wall or a raised bar. Doors and drawers need space in front to pull out without banging the one next to them. A fridge or ice bin brings its own depth, and its door has to clear the counter edge when it opens. Even a trash pullout needs its drawer to clear the face fully.

The countertop steals room too. If the counter has an overhang, it has to be notched back flush with the cabinet face, or the grill will not seat right. And if you size the opening before the counter goes on, remember the counter adds height and eats into the gap. Measure with the finished surfaces in mind, not the bare block.

Custom stone masonry outdoor kitchen with grill and appliance openings in Frisco Texas

Frame the Openings Before the Masonry Goes Up

Masonry is permanent, so every opening has to be planned and framed before the block goes up and the stone goes on. This is the step that saves the whole job. Before the crew starts, confirm each cut sheet is the current one, since makers change sizes between models. A number that was right last year may be off on this year’s unit. Lay out each opening on the plan with real numbers from each cut sheet. A quick mockup of the openings on the slab, marked in chalk, catches a bad size while it is still free to fix. Mark the grill, the burners, the doors, the drawers, the fridge, the access door and the vents. Build them all in from the start.

Adding an opening to a finished island is not a small fix. A mason has to cut through set block and matched stone, then patch it so it does not look like a scar. Do that once and you will plan every hole up front from then on. Pick all the appliances, get every cut sheet and hand the numbers to the crew before the first course goes down.

Frequently Asked Questions

Why can’t I just cut the opening to the size of my grill?

Because the grill size on the box is a label, not the hole size. The maker’s cut sheet gives a separate cutout number, plus the clearances the grill needs around it. Build to the cut sheet, not the advertised size, or the unit will not seat right.

Do I really need to pick every appliance before building?

Yes. Each one has its own cutout and clearance, and those numbers set the openings. If you build the island first and shop later, the parts you buy may not fit the holes you made. Choose the grill, burners, fridge and doors first.

What happens if a masonry opening comes out the wrong size?

A wrong opening means cutting into finished block and stone to fix it, which is slow and shows. Too small and the appliance will not go in. Too big and it will not seat or seal. Either way you pay twice, once to build and once to redo.

How much clearance does a built-in grill need?

That comes down to the model, so the cut sheet is the only real answer. Makers list clearance to nearby materials, room for the lid to open and depth for the connections. Follow those exact numbers, and use noncombustible material around the grill cavity.

Can I add openings to a finished masonry island later?

You can, but it is real work. A mason cuts through the set block, adjusts the structure and patches the stone to match. It costs more than building the opening the first time and rarely looks as clean. Plan every opening before the block goes up.