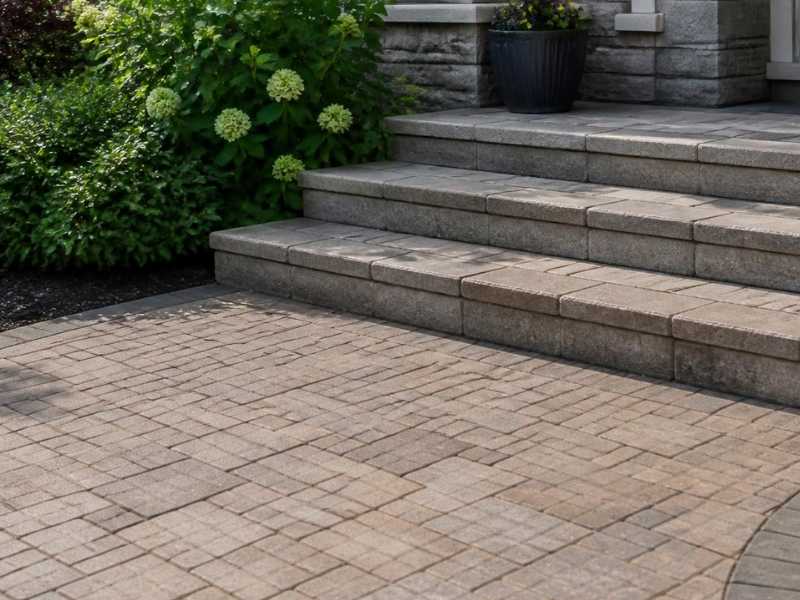
Brick pavers around a set of steps can look sharp or feel wrong, and elevation decides which. Get the heights right, and the walk flows and feels safe underfoot. Get them wrong, and people trip on the first step every time.
The trouble spot is where the pavers meet the step. Pavers set too high or too low throw off the step height. That changes the riser, the part of the step you climb, and an uneven riser is a trip hazard. It also looks off, with pavers that seem to sink or bulge at the transition.
Brick pavers around steps need a clean elevation transition to stay safe and look right. Elevation is simply the height of a surface at a given point, and the surrounding wall layout can also influence how the pavers meet nearby steps and structures. The sections below explain how to set paver heights from the steps, keep risers even, and check the work before it is done.
Why Elevation Changes Matter Around Masonry Steps
Steps exist to handle a change in height. Each step raises or lowers you by a set amount called the riser. When pavers meet those steps, their height has to respect that riser. A small error there changes how the step feels. Where nearby built-in features are involved, the layout should also preserve clear equipment access without disrupting the step transition.
The risk is real at the transition. A paver set too high shrinks the top step, and one set too low stretches it. Either way, that step no longer matches the others. People expect every step to be the same, so the odd one catches a foot.
Looks suffer too when the heights are off. A clean transition has the pavers meeting the step at a consistent line. A sloppy one shows gaps, lips, or a surface that dips near the step. Planning the elevation keeps both safety and appearance intact.
Setting Paver Heights From the Finished Step Elevation
The steps set the rule, so the pavers follow them. A mason starts from the finished step elevation and works the paver heights to match. That order keeps the transition clean.
The finished elevation is the final height of the step once it is built. Pavers are set so their surface lines up correctly with that height. At the base of the steps, the top of the pavers should meet the bottom step at the planned riser. Working from the steps outward keeps everything aligned.
This approach beats guessing. A few key heights guide the work:
- The finished height of each step
- The riser height between steps
- The paver surface height at the bottom step
- The slope of the pavers moving away from the steps
Setting these first prevents a mismatch later. It also gives the crew clear targets to build to.
Maintaining Consistent Risers at Paver Transitions
Consistent risers are the mark of safe steps. Every riser in a flight should be close to the same height. The paver transition must not break that rule at the bottom step.
People climb stairs on muscle memory. Their feet expect each step to rise the same amount. When the bottom riser is off because of paver height, that expectation fails. A too-tall or too-short bottom step is where many trips happen.
This is why paver height at the base is so important. The pavers set the surface that the bottom riser is measured from. If they sit high, the bottom step becomes shallow, and if they sit low, it becomes tall. A mason checks this closely to keep every riser even.
Coordinating Paver Slopes With Step Drainage
Pavers need a slight slope to shed water, and steps need water carried away too. These have to work together at the transition. A good plan moves water off the steps and across the pavers without pooling.
Brick pavers are set with a gentle slope, often called a fall, so water runs off. That slope should carry water away from the steps, not toward them. Water pooling at the base of steps makes them slick and can damage the masonry over time. Directing the flow keeps the steps safe and dry.
Local conditions shape the plan. The Frisco area sees heavy downpours that test any drainage setup. Pavers and steps should move that water to a safe outlet, away from the house and the walk. Drainage rules can vary by city and county, so confirm any local requirements before building.
Checking Final Elevations Before Paver Installation Is Complete
The final check happens before the last paver is locked in. Once the surface is set and joints are filled, fixing a height problem means pulling it apart. A review at the end saves that work.
A mason should confirm the paver heights match the steps. They should check that the bottom riser is even with the rest. They should also verify the slope carries water away from the steps. Catching an issue now is quick, while fixing it later is not.
This step is worth it on every job with steps. A clean, level transition is what makes the walk safe and good-looking. Ask your mason to confirm the final elevations before wrapping up. That last look protects the whole installation.
Frequently Asked Questions
Why do brick pavers around steps need careful elevation?
Steps rely on even risers to feel safe underfoot. Pavers set too high or too low change the bottom riser and create a trip hazard. Careful elevation keeps every step the same height. It also gives the transition a clean, finished look.
What is a riser on a set of steps?
A riser is the vertical height between one step and the next. It is the part of the step you climb with each stride. Consistent risers let people walk stairs safely without looking down. Paver height at the base directly affects the bottom riser.
How do masons set paver heights near steps?
They start from the finished step elevation and match the pavers to it. The paver surface is set so it meets the bottom step at the right riser height. From there, the pavers slope gently away to drain water. Working from the steps outward keeps the transition aligned.
Should pavers slope away from steps?
Yes, pavers should slope gently to carry water away from the steps. Water pooling at the base makes steps slick and can harm the masonry. A proper slope directs runoff to a safe outlet. This keeps both the steps and the pavers in good shape.
When should paver elevations be checked?
Check them during planning and again before the job is finished. Early planning sets the right heights from the start. A final check confirms the risers are even and the slope drains correctly. Catching a problem before the last paver is set avoids a costly redo.
