How a Masonry Contractor Can Transform a Plain Concrete Porch With Brick or Stone
Masonry Contractor- Front porch finished with decorative brick and natural stone masonry over a concrete slab at a residential entrance.

A masonry contractor can turn a plain concrete porch into a more attractive entryway with brick or stone. Most concrete porches are structurally fine but visually forgettable. A gray slab at the front door makes even a nice house look unfinished. Covering it with brick or stone gives the entry the same weight as the rest of the exterior. The catch is that an overlay adds height, can hide existing problems, and changes how water moves, so the planning matters more than the pattern.

Evaluating the Existing Concrete Porch for Masonry Upgrades

Brick and stone will only perform as well as the slab underneath them. Hairline shrinkage cracks are common and usually manageable. Wide cracks, sunken corners, or a porch pulling away from the house point to movement that an overlay won’t stop. Mortar-set brick or stone tends to crack right along the same lines once the slab moves again.

Check the slope too. A porch that tilts toward the front door is already sending water where it shouldn’t, and a new surface can make that worse if it isn’t corrected. Look for flaking concrete, old paint, or sealers, since coatings can keep new mortar from bonding. In areas with expansive clay soils, ask how much seasonal movement the porch has shown over the years.

Some slabs need repair before they get a finish. A few need replacement. If settlement looks structural, an engineer or foundation specialist should weigh in before any masonry goes down.

Choosing Brick or Stone Finishes to Complement the Home

The porch should look like it belongs to the house. Many owners match the brick on the facade or pick a stone that echoes an existing stone patio or outdoor fireplace. Contrast can work too, such as a stone porch on a brick home, as long as the colors relate. Bring samples outside and view them against the house in daylight before deciding.

Brick pavers give a clean, traditional look and come in thin and full-thickness options. Stone pavers, flagstone, and cut stone offer more variety in color and texture. Neither material is always better. The choice depends on appearance, foot traffic, maintenance, climate, existing masonry, and budget.

Think about feel and safety as well. Some polished or smooth stones get slick when wet, and dark materials can get hot in direct sun. Textured surfaces usually make more sense for front steps.

Planning Overlay Thickness Around Doorways, Steps, and Porch Edges With a Masonry Contractor

Every overlay raises the porch surface. Thin brick pavers set in mortar add less height than full pavers or thick stone, but they all add something. That extra height has to fit under the front door threshold and allow storm doors to swing freely. Measure the gap at the door before choosing a material, because the door won’t move to suit the porch.

Steps need extra care. Adding material to the porch and the treads can change riser heights, and uneven steps are a real tripping hazard. Building codes usually limit how much step heights can vary, so confirm local requirements before work begins. Sometimes the steps need to be rebuilt instead of covered.

Watch the walls where the porch meets the house. Raising the surface can bury weep holes in brick veneer or cover the bottom edge of siding. Those openings let moisture escape, and blocking them creates problems inside the wall. The edge of the porch also needs a finish plan, such as bullnose brick, a rowlock border, or stone treads with a slight overhang.

How a Masonry Contractor Installs Brick or Stone Over Concrete

Installation starts with prep. The slab is cleaned, coatings are removed, and cracks are repaired. The mason checks that the surface is ready to bond and corrects low spots or slope issues. Skipping prep is the fastest way to end up with loose pavers in two years.

Next comes the setting bed. Brick or stone is set in a mortar bed bonded to the concrete, laid in the chosen pattern, and checked for level and slope as the work moves along. Existing control joints in the slab should be carried up through the new surface. Ignoring them invites cracks right through the finished masonry.

Joints are filled and tooled once the units are set. Step risers are faced, treads are capped, and edges are finished. The porch then needs time to cure before heavy use. Ask your mason how long to wait before moving furniture or planters back.

Managing Surface Drainage and Long-Term Porch Durability: Advice From a Masonry Contractor

Water should leave the porch fast. The finished surface needs a slight slope away from the house so rain doesn’t pool at the door. Edges should drop water cleanly instead of trapping it against the slab. Check where downspouts and sprinklers send water, since a constant soak near the porch shortens its life.

Grade around the porch matters too. Soil and mulch should sit low enough that water runs away, not back under the slab. If the porch connects to a walkway, brick patio, or stone patio, those transitions should be level and drain in the same direction. Evaluate drainage early, because fixing it after the masonry is finished costs more.

Maintenance is simple but shouldn’t be ignored. Sweep debris from joints, clean stains with mild cleaners, and repoint damaged joints before water gets behind them. Sealers can help with stains in some cases, but they aren’t required for every material. Ask your mason whether your brick or stone would benefit from one.

Frequently Asked Questions

Can brick or stone go directly over an existing concrete porch?

Often, yes, if the slab is stable and properly prepared. Cracks, coatings, and slope problems need attention first. A moving or settling slab usually needs repair or replacement. Have the porch evaluated before choosing materials.

Will a brick or stone overlay affect my front door?

It can, because the overlay raises the porch surface. The new height has to fit under the threshold and allow doors to swing. Thin pavers add less height than full pavers or thick stone. Measure the door clearance during planning.

Is brick or stone better for a front porch?

Neither material is always better. Brick gives a uniform, classic look, while stone offers more texture and color variety. The right choice depends on your home’s style, budget, and maintenance preferences. Compare samples against your exterior before deciding.

Why a Masonry Contractor Should Inspect Brickwork Before a Home Exterior Remodel

 Masonry contractor inspecting a home's exterior brickwork before remodeling, showing mortar joints, window lintels, brick cracks, weep holes, and areas needing repair.

A masonry contractor inspection before the remodel starts finds those issues while they’re still easy to reach and fix. Do it first, and the new work sits on a wall that’s ready for it. Exterior remodels have a way of covering up masonry problems. New windows get sealed into cracked openings, fresh paint goes over crumbling mortar, and a patio cover gets bolted to brick that can’t handle it. 

Masonry Contractor Evaluating Existing Brickwork Before Exterior Remodeling Begins

Brick looks durable, and most of the time it is. Problems tend to develop slowly, often in places nobody looks closely, like the top of a wall under the eaves or the base near the soil. A remodel is the best chance in years to catch them.

Start with the scope of the remodel. New windows, doors, siding transitions, paint, lighting, gutters, and attached structures all touch the brick in different ways. Share the full plan with your mason so the inspection focuses on the areas that matter.

Walk the house with the inspector if you can. You’ll see what they see and hear why it matters. That conversation also helps you compare repair priorities with your remodel budget.

Identifying Cracks, Loose Mortar, and Hidden Masonry Damage

Some damage is easy to spot, and some takes a trained eye. The inspection usually looks for these conditions.

  • Stair-step or vertical cracks in mortar joints or through bricks
  • Mortar that’s soft, sandy, or recessed well behind the brick face
  • Spalling, where brick faces flake or pop off
  • White staining, called efflorescence, that signals moisture moving through the wall
  • Bulging, leaning, or bricks that sound hollow when tapped
  • Blocked or missing weep holes near the base of the wall

Each finding points to a different cause. Cracks may come from foundation movement, rusting lintels, or missing expansion room, while efflorescence and spalling usually trace back to water. If cracks suggest ongoing settlement, a structural engineer may need to look at the foundation before masonry repairs make sense.

Hidden damage often sits behind trim, shutters, or old light fixtures. When those come off during the remodel, have the mason check the brick underneath before anything new goes up.

How a Masonry Contractor Assesses Brickwork Around Exterior Openings

Windows and doors are where brick problems cluster. The brick above each opening rests on a lintel, and rust, short bearing, or missing flashing can crack the surrounding courses. Replacing windows without checking the lintel can seal a failing support behind brand-new trim.

The inspection covers lintels, sills, flashing, and the sealant joints between frames and brick. Sills should slope to shed water, and flashing should direct water out through weep holes. Any gap in that system lets water into the wall right where the new window will sit.

Changing an opening’s size is a bigger job. Widening a window or adding a door means cutting brick and installing a new lintel, and the wall needs temporary support during the work. Plan that with your mason and designer early, since it affects the schedule, cost, and possibly permits.

Masonry Contractor Planning Brick Repairs Before Installing New Exterior Features

Repairs should come before finishes. Repointing deteriorated joints, replacing damaged bricks, and fixing lintels all go faster without new windows, trim, or paint in the way. Doing it in the reverse order often means damaging new work to reach old problems.

Attached features deserve extra care. Patio covers, pergolas, awnings, and heavy light fixtures may not be suited to mounting directly on brick veneer. Some need independent support or specific attachment methods, so confirm the approach with your designer and mason before ordering materials.

Watch the ground level too. A new brick patio, stone patio, or walkway built against the house should stay below weep holes and flashing so water can still drain out of the wall. Raising the grade around brick is a common remodel mistake that leads to moisture problems later.

Coordinating Masonry Restoration With the Home Remodeling Schedule

Sequence matters. A typical order puts the inspection first, then structural and masonry repairs, then window and door installation, then sealants, paint, and finishes. Your project may differ, but masonry work almost always belongs ahead of anything that covers or attaches to the brick.

Mortar needs time to cure before paint, sealers, or heavy loads go on. Weather affects curing, so build some cushion into the schedule. Ask your mason how long to wait before the next trade starts.

Coordinate access and deliveries. Scaffolding set up for masonry repairs might also serve the painters or window installers if the timing lines up. One planning meeting between trades can save days of setup and teardown.

Frequently Asked Questions

Why should a masonry contractor inspect before my remodel?

New exterior work can hide brick problems that keep getting worse. An inspection finds cracks, failing mortar, and lintel issues while they’re easy to reach. Fixing them first protects the money you’re spending on the remodel. It also gives you a clear repair budget before the project starts.

Can I paint brick that has cracks or loose mortar?

Paint won’t fix those problems, and it can trap moisture in damaged brick. Repairs should come first. Some brick isn’t a good candidate for paint at all. Ask your mason about breathable coatings and whether painting suits your wall.

Do new windows require brick repair?

Not always, but window replacement is the right time to check lintels, sills, and flashing. Removing old frames often exposes damage. If the opening size changes, brick and lintel work will be needed. Plan the inspection before the windows are ordered.

Replacing a Worn Brick Walkway? How a Masonry Contractor Can Improve Your Front Entry

Masonry contractor Newly installed brick paver walkway leading to a home's front entrance, featuring a clean herringbone pattern, defined edges, and an improved entry path.

A masonry contractor will look below the bricks first and talk about materials second. This guide is for homeowners weighing a front walkway replacement. The takeaway is to find out why the old walk failed before choosing new brick, because the same base or drainage problem will ruin a new surface too. 

A front walk gets judged every time someone comes to the door. Sunken bricks, wobbly edges, and puddles by the porch make even a well-kept house look tired, and they’re a tripping hazard for guests. Replacing the walkway is a chance to fix the layout and the base along with the surface everyone sees.

Assessing Walkway Deterioration Before Removing Existing Bricks

Start by figuring out what kind of walkway you have. Some brick walks are set in sand over a compacted gravel base, while others are mortared onto a concrete slab. The type affects what’s failing and what the replacement will involve.

Walk the path slowly and note what you see. Different problems point to different causes. Common signs include:

  • Bricks that rock, sink, or stick up at the edges
  • Cracked or flaking brick faces
  • Empty joints or loose mortar
  • Low spots where water sits after rain
  • Bulges near tree roots
  • Cracks running across a mortared walk, which may follow cracks in the slab below

Each sign hints at the cause. Sinking usually points to a weak or washed-out base, while long cracks in a mortared walk often mean the concrete below has moved. Ask your mason to lift a few bricks or check the slab so the new walk doesn’t repeat the old failure.

Old brick can sometimes be saved. Sound clay pavers can be cleaned and reused as borders or accents, which keeps some of the original character. Damaged or soft bricks should be replaced, since they’ll keep breaking down.

Masonry Contractor Improving Front Entry Layout, Width, and Walking Comfort

Replacement is the right time to rethink the route. Many older walks are too narrow, too straight for how people actually approach the door, or tied into the driveway at an awkward angle. Watch how guests and family really walk from the driveway or street, and plan the new walk along that line.

Width makes a big difference in comfort. Many designers aim for roughly four to five feet at a front entry so two people can walk side by side. A wider landing at the porch gives room to stand while someone answers the door, and it makes the entry feel more open.

Changes in elevation need care too. Steps should have consistent heights, and a long gentle slope is easier to walk than one steep section. If the yard slopes sharply, a short retaining wall or raised planter edge can hold soil back and keep the walk level, though the wall design should suit the site’s soil and height.

Selecting Brick Materials and Patterns for the Replacement Walkway

Brick made for paving is denser and more wear-resistant than most wall brick. Paving brick, often sold as brick pavers, comes in clay and concrete versions with different looks and costs. Clay holds its color well over time, while concrete pavers offer more shapes and sizes, and both can perform well when installed correctly.

Pattern changes the whole feel of the entry. Running bond is simple and draws the eye toward the door. Herringbone is busier and holds together well under traffic, and basketweave gives a more traditional look. A border of bricks set on end, called a soldier course, frames the walk and helps keep the edges straight.

Match the walk to the house. Brick that complements the home’s exterior brick, trim, or stone masonry makes the entry look planned. Stone pavers are another option if they suit the home, and the choice can come down to appearance, traffic, maintenance, and budget.

How a Masonry Contractor Prepares the Base and Installs Bricks

Base work decides how long the walk lasts. For a sand-set walkway, the crew excavates to firm soil, installs a layer of crushed aggregate, and compacts it in layers. A thin bed of sand goes on top, and the bricks are set in the chosen pattern.

Edge restraints keep the bricks from creeping outward. These may be concrete, metal, or plastic edging anchored along the sides. After the bricks are laid and cut to fit, the surface is compacted and joint sand is swept in to lock everything together.

Mortar-set walks follow a different process. The bricks are bedded in mortar on a sound concrete slab, and joints in the slab should carry through the brick so cracks have a planned place to form. Base depth, slab design, and materials depend on soil conditions, traffic, and the site, so ask your contractor to explain the method they recommend.

Masonry Contractor Manage Drainage and Walkway Transitions for Long-Term Performance

Water is the main reason brick walks fail early. The new walk should slope slightly so rain runs off the surface instead of sitting in the joints. It should also carry water away from the house and porch, never toward the foundation.

Look at what feeds water onto the walk. Downspouts that empty onto the path, planting beds built higher than the walk edges, and sprinklers aimed at the bricks all add moisture. Fixing those sources at the same time protects the new base.

Transitions deserve just as much care. Where the walk meets the driveway, a porch step, or a brick patio, the surfaces should sit flush or step cleanly so nobody catches a toe. Plan these connections early, since adjusting a porch landing or driveway edge after the walk is built gets expensive.

Frequently Asked Questions

Can I lay new bricks over my old walkway?

Laying new brick over an old walk rarely works unless the base below is sound and level. Most worn walks have base problems that would show through the new surface. Overlays also raise the walk height, which can create trip edges at doors and transitions. A mason can check whether an overlay is realistic for your walk.

How long does a brick walkway replacement take?

Many residential front walks take a few days, depending on size, access, and weather. Removing the old walk and building the base often takes longer than laying the bricks. Mortar-set walks also need time to cure before heavy use. Your contractor should give you a schedule before work starts.

Should my new walkway be sand-set or mortar-set?

Both methods can work well. Sand-set walks flex slightly and are easier to repair one brick at a time. Mortar-set walks give a more formal look but rely on a stable concrete slab underneath. The right choice comes down to your soil, existing conditions, and the look you want.

Why Hire a Masonry Contractor for a Backyard Pizza Oven Surround?

Masonry contractor building a brick and stone surround for a backyard pizza oven in an outdoor kitchen

Hiring a masonry contractor to plan and build the surround gives you a stable, heat-ready structure that works as well as it looks. A pizza oven can reach temperatures most backyard features never see. That heat doesn’t stay inside the dome. It moves into the structure around it, the countertop beside it, and anything built too close. A surround that isn’t designed for that heat can crack, stain, or pull apart within a few seasons.

This guide is for homeowners adding a pizza oven to a patio or outdoor kitchen. Builders and landscape designers coordinating these projects will find it useful too. A surround is the masonry enclosure, base, and counters built around the oven itself. Getting the layout, materials, and heat details right from the start saves costly repairs later.

Planning the Surround Layout for Cooking and Preparation Space

Start with how you’ll actually cook. Pizza moves fast, so you need landing space beside the oven opening for peels, trays, toppings, and finished pies. A cramped counter makes cooking awkward and pushes people too close to the heat. Plan prep space on at least one side, and think about where guests will stand while you work.

Placement matters just as much. Consider wind direction, smoke drift, and distance from the house, fences, trees, and seating areas. The oven opening should face a spot where the cook has room to work and smoke won’t blow into the dining area. If the oven will sit within an outdoor kitchen, plan how it connects to the grill, sink, and storage.

Discuss storage early. Many owners want a wood storage nook under the oven or nearby. That space needs to stay dry and be built with heat and fire safety in mind. Your contractor can suggest a layout that keeps wood handy without putting it at risk.

Choosing Heat-Appropriate Masonry Materials for a Pizza Oven Surround

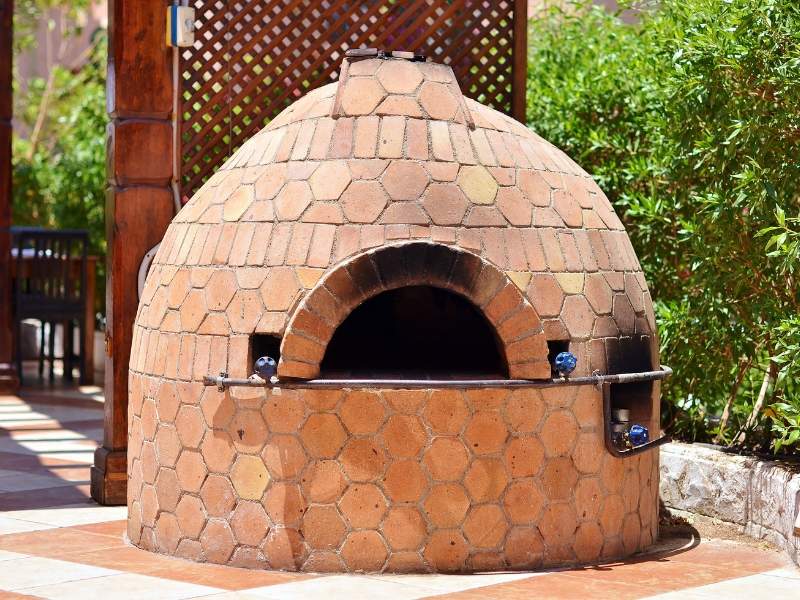
Different parts of the surround face very different temperatures. The oven floor and dome see direct fire, so they’re typically built with firebrick and refractory mortar, which are made to handle high heat. The outer surround usually doesn’t touch the flame directly. That gives you more freedom with brick, stone, or stucco finishes.

An insulation layer between the oven and the surround makes a big difference. It keeps heat inside the oven for better cooking and reduces heat moving into the outer masonry. Without it, the surround can get hot to the touch and may crack over time. Insulation products and methods vary, so follow the oven maker’s instructions and your contractor’s recommendations.

Brick and stone masonry both work well for the outer shell. Brick offers a classic look and clean lines, while stone brings natural texture. The choice can depend on your home’s style, existing patio or outdoor fireplace materials, maintenance preferences, and budget. Matching the surround to nearby brick or stone masonry helps the whole space feel connected.

How a Masonry Contractor Builds a Stable Oven Surround

A pizza oven and its surround are heavy. The structure needs a solid foundation that won’t settle or shift. That usually means a concrete footing or slab sized for the load, soil conditions, and local requirements. Building on an existing patio may or may not work, depending on how that slab was built and what it can carry.

Above the footing, the contractor builds the base walls, often from concrete block or brick. A reinforced hearth slab sits on top to support the oven floor. Each layer needs to be level and square so the oven sits evenly. Small errors at the base show up later as uneven floors or cracks in the dome or surround.

Here are questions worth asking before construction starts:

  • What footing or slab will support the oven and surround
  • Whether your existing patio can carry the added weight
  • How the hearth slab will be reinforced
  • Which materials will be used for the core, insulation, and finish

A contractor with oven experience should answer these clearly and explain how the build will handle heat and weight together.

Managing Heat Clearance and Ventilation Around the Pizza Oven

Clearance means the safe distance between the hot oven and anything that can burn or be damaged by heat. That includes wood framing, siding, roof overhangs, pergolas, and plants. Oven manufacturers usually list specific clearances, and local codes may apply as well. Follow both, and have your contractor confirm them before finalizing the layout.

Ventilation matters too. Wood-fired ovens produce smoke that needs a clear path out, often through a flue or chimney. Taller chimneys can help draw smoke up and away from people. If the oven sits under a covered area, venting becomes even more critical and may need extra review.

Enclosed surrounds can trap moisture and heat inside. Some designs include small vents to let moisture escape as the oven heats. That helps prevent cracking and steam buildup within the masonry. Ask your contractor how they’ll handle airflow for your specific oven.

Finishing Masonry Edges and Countertops for Outdoor Use

Countertops take heat, spills, and weather. Stone slabs, concrete, and brick are common choices, each with its own look and upkeep. Counters closest to the oven opening should handle heat from hot pans and peels. Ask whether your chosen countertop material needs sealing and how often.

Edge details affect comfort and durability. Rounded or eased edges are easier on hands and hips than sharp corners. A slight overhang helps shed water away from the masonry below. Proper slope keeps rain from pooling on the surface.

The base should drain well too. Make sure the patio around the surround slopes away from the structure. If the oven sits on brick pavers or stone pavers, check that the joints and base are in good shape. Water collecting at the foot of the surround can lead to staining and damage over time.

Frequently Asked Questions

Can I build a pizza oven surround on my existing patio?

Sometimes, but it depends on how the patio was built. Ovens and surrounds are heavy, and many patios aren’t designed for that load. A contractor should check the slab, base, and soil first. In many cases, a new footing is the safer choice.

What materials work best around a pizza oven?

Firebrick and refractory mortar are typically used where the fire touches. The outer surround can be brick, stone, or stucco over block. An insulation layer between the two helps control heat. Your contractor can match the finish to your patio and home.

How far should a pizza oven be from my house?

Clearance depends on the oven model, its venting, and local code. Manufacturers often list minimum distances to combustible materials. Covered patios and roof overhangs may need extra review. Confirm clearances with your contractor before choosing a location.

Outdoor Kitchen Walls Need a Plan for Access Panels

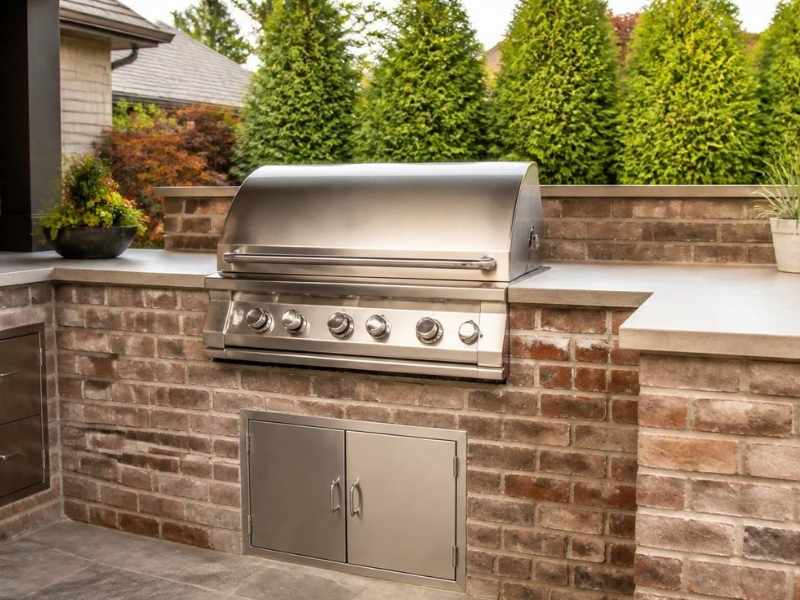
Outdoor kitchen with a built-in grill and access panel in the brick masonry wall in Frisco, Texas.

An outdoor kitchen turns a backyard into a place people gather. Careful brick installation and stonework give the walls a solid, finished look that lasts. Those same walls can become a headache the first time something breaks.

Behind the masonry sit gas lines, water lines, and electrical connections. A grill, a fridge, or a burner will eventually need service. If the wall has no way in, a plumber or tech may have to cut through solid brick to reach the problem. That kind of fix is slow, costly, and hard to hide.

Here is the takeaway. An outdoor kitchen needs access panels planned before the masonry goes up. These wall openings provide removable access points that let you reach utilities, connections, and equipment behind the masonry. The sections below explain where they go, how to size them, and why early planning saves you real money later.

Why Access Panels Should Be Planned Before Masonry Begins

Masonry is meant to stay put. Brick and block get locked in place with mortar and cure into one solid mass. That strength is a good thing for a wall and a bad thing when you need to get behind it.

Access panels and other service openings solve that problem, but only if they are planned during construction. The mason builds the wall around a frame or opening for each panel. Try to add one later, and you are cutting into finished masonry. The patch rarely matches, and the wall can lose some of its strength.

Planning early also means the panels line up with what they serve. Each utility and appliance connection needs its own reachable point. Deciding on those spots before the first brick keeps the whole layout clean. It is far easier to plan an opening than to carve one out after the fact.

Locating Access Panels Around Utilities and Equipment

An access panel is only useful if it sits in the right place. Each one should line up with a connection or piece of equipment that needs service. Careful transition details around the panel help it fit cleanly into the surrounding masonry while keeping access practical.

Start by mapping what runs behind the walls. An outdoor kitchen usually hides several systems that need access:

  • Gas shutoff valves and connections
  • Water supply and drain lines
  • Electrical outlets and junction boxes
  • The back of a built-in grill or burner
  • Space behind a fridge or ice maker

Each of these should have a panel within reach. A gas shutoff you cannot reach is a safety concern, not just an inconvenience. Work with your mason and the trades to mark every spot before building. That coordination makes sure nothing gets sealed away.

Sizing Openings for Inspection, Repairs, and Replacement

A panel that is too small is almost as bad as no panel at all. The opening has to be big enough for real work, not just a peek. Sizing each one correctly is part of the plan.

Think about what has to pass through the opening. A hand and a wrench need less room than a full appliance. If a fridge or grill may be replaced someday, the panel or opening should allow it. Planning for replacement now avoids tearing out masonry later.

Different jobs call for different sizes. A shutoff valve needs enough space for a hand and a tool. A built-in appliance needs an opening it can slide through. Your mason and the appliance specs can guide the right dimensions. Getting this right means future repairs stay simple.

Coordinating Access Panels With the Masonry Wall Layout

Access panels have to fit the look of the wall, not fight it. A well-placed panel blends into the brick or stone pattern. Poor placement leaves an opening that stands out or breaks the design.

Good masons plan panels around the coursing. Coursing is the pattern of brick or stone rows in a wall. Lining a panel up with the joints helps it sit cleanly within the design. That way the opening looks intended, not tacked on.

The panel material matters too. Some panels use a masonry-faced door that matches the wall. Others use a stainless frame that fits a modern kitchen. Weather resistance is key outdoors, and this varies by climate and product. In the Frisco area, with hot summers and the odd hard freeze, durable panels hold up best.

Checking Service Access Before Outdoor Kitchen Completion

The last check happens before the project wraps. Once the kitchen is finished, a missing access point means cutting into a brand-new wall. A quick review at the end prevents that.

Walk the kitchen with your builder before it is called done. Confirm every utility and appliance has a reachable panel. Check that each opening is the right size for service or replacement. Catching a gap now is simple, while fixing it later is not.

This step protects your investment for years. Good access means faster, cheaper repairs down the road. Ask your mason and contractor to verify service access before final completion. If any permit or inspection applies to the gas or electrical work, handle it before closing out the job.

Frequently Asked Questions

What is an access panel in an outdoor kitchen?

An access panel is a removable opening built into the kitchen’s walls or cabinets. It lets you reach utilities and equipment hidden behind the masonry. Common spots include gas valves, water lines, and the backs of appliances. The panel makes service and repairs possible without cutting into the wall.

Why do outdoor kitchen walls need access panels?

Masonry walls are solid and hard to open once they cure. Behind them run gas, water, and electrical connections that will need service someday. Without a panel, reaching those means breaking through finished brick or stone. Access panels make repairs faster, cheaper, and far less messy.

Where should access panels go in an outdoor kitchen?

They should line up with anything that needs service or replacement. That includes gas shutoffs, water and drain lines, electrical boxes, and built-in appliances. Each connection should have a reachable panel nearby. Mapping these spots before building is the way to place them well.

How big should an outdoor kitchen access panel be?

The size depends on what the panel needs to reach. A shutoff valve needs room for a hand and a tool, while an appliance needs a larger opening. If you may replace a grill or fridge later, plan the opening to allow it. Your mason and the appliance specs can guide the right size.

Can I add an access panel after the kitchen is built?

It is possible, but it usually means cutting into finished masonry. That patch rarely matches the original brick or stone and can weaken the wall. Planning panels before construction avoids all of that. It is always easier to build in the opening than to carve one out later.