Stone Hearth Ideas That Make a Fireplace Feel More Finished
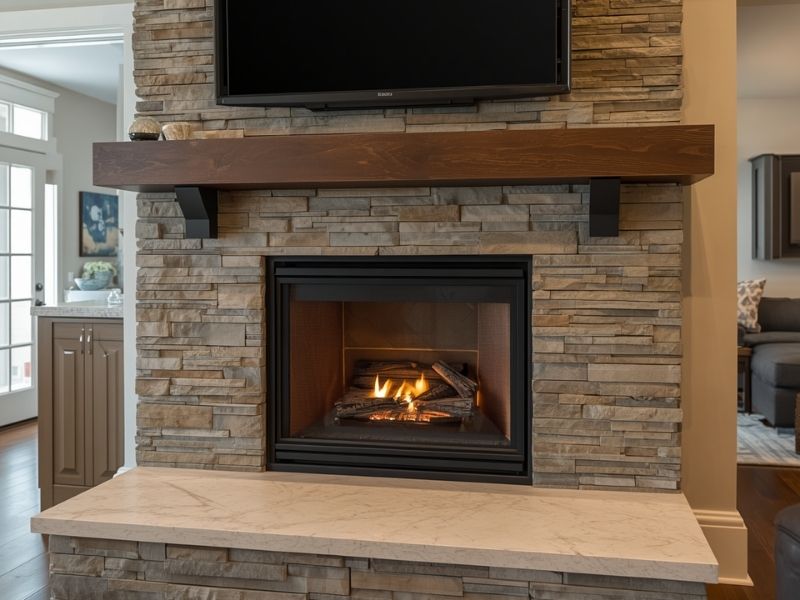
Custom stone hearth fireplace design in a Frisco Texas home featuring a natural stone surround and finished masonry details

A fireplace without the right hearth looks unfinished, even if the firebox itself is beautiful. A stone hearth ties the whole feature together, giving it the weight and presence that makes a room feel complete.

For homeowners in Frisco planning a new build or a fireplace update, the hearth often gets less attention than it deserves during the design phase.

The right stone hearth depends on room style, fireplace size, and how the space gets used daily. A hearth that fits these details well makes the whole fireplace look intentional instead of an afterthought.

The Overlooked Slab That Ties the Whole Room Together

The hearth is the stone or masonry surface extending out from the base of the fireplace. It serves a real safety purpose, protecting the floor from heat and stray embers. It also plays a huge role in how finished the fireplace looks overall.

A fireplace with a small, plain hearth can look unbalanced next to a large stone surround. A hearth sized and styled to match the rest of the fireplace pulls the whole feature together instead of looking like two separate pieces.

Letting the Room Set the Tone for Stone Choice

Stone hearths come in a wide range of finishes, and the right choice depends heavily on the room around it.

For modern spaces, consider:

  • Large format stone slabs with minimal seams
  • Honed or matte finishes rather than heavily textured stone
  • Simple, clean edge profiles without ornate detailing

For traditional or rustic spaces, consider:

  • Natural fieldstone with varied texture and color
  • Rougher cut edges that show the stone’s natural character
  • Warmer tones that complement wood beams or exposed brick nearby

Picking a style that clashes with the room’s overall feel is one of the most common reasons a hearth looks out of place, even when the stone itself is high quality.

Deciding Between a Step Up and a Level Surface

One of the first decisions in hearth design is whether it sits flush with the floor or raises up as its own platform.

Flush hearths work well when:

  • The room has limited space and a raised platform would feel bulky
  • The homeowner wants a more minimal, streamlined look
  • Furniture will sit close to the fireplace

Raised hearths work well when:

  • The fireplace serves as a major focal point in a larger room
  • Extra seating on the hearth’s edge is part of the design plan
  • The homeowner wants more visual presence without expanding the fireplace’s width

Neither option is universally better. It depends on the room’s proportions and how the space actually gets used.

Getting the Scale Right So Nothing Looks Off

A hearth that’s too small looks stingy next to a large fireplace. One that’s too large can overwhelm a smaller room.

General guidelines to think through with your mason:

  1. The hearth should extend far enough from the firebox opening to meet local safety clearance requirements
  2. Width should generally match or slightly exceed the width of the fireplace surround above it
  3. Depth needs to account for how the space in front of the fireplace gets used, whether for seating, walking through, or keeping furniture at a distance

Getting these proportions right is often the difference between a hearth that looks planned and one that looks like it was added as an afterthought.

Squeezing More Use Out of the Stone Without Cluttering the Look

A stone hearth doesn’t have to be purely decorative. Several functional additions can blend into the design without disrupting the finished appearance.

Options worth considering:

  • A slightly raised hearth edge that doubles as extra seating during gatherings
  • Built-in storage niches nearby for firewood, styled to match the stone
  • A wider hearth extension that provides a stable surface for holiday decorations or seasonal displays

The key is choosing additions that feel like part of the original design, not something bolted on afterward.

Small Choices That Quietly Undercut a Good Design

Some choices consistently make a hearth look less finished rather than more.

Watch out for:

  • Mismatched stone between the hearth and the surround above it
  • A hearth that’s noticeably thinner or thicker than the visual weight of the fireplace above
  • Skipping proper edge detailing, leaving raw or unfinished looking cuts visible
  • Choosing a finish that doesn’t hold up well to foot traffic if the hearth sits in a walkway

Avoiding these issues usually comes down to planning the hearth and the surround together, rather than treating them as separate decisions.

What to Bring to Your First Design Conversation

Bring these details to your first conversation with a mason:

  • Photos or examples of stone finishes you like for the room’s style
  • Whether you want a flush or raised hearth
  • Any functional needs, like extra seating or firewood storage
  • The general layout of furniture near the fireplace, so proportions work with the space

A mason who understands both the safety requirements and the visual goals can usually suggest adjustments that improve the design before construction even starts.

Final Questions Worth Settling Before Work Begins

  • What stone finish will best match the room’s existing style?
  • Should this hearth be flush or raised, given the room’s layout?
  • What size and depth does local code require for safety clearance?
  • Can we add functional features like seating or storage without disrupting the design?
  • How will this stone hold up to daily foot traffic in this specific spot?

Frequently Asked Questions 

How Much Does a Stone Hearth Cost Compared to the Rest of a Fireplace Project?

The cost of a stone hearth depends on the material, size, design, and whether it is flush or raised. In most fireplace projects, the hearth represents a smaller portion of the overall budget compared to the surround, firebox, and installation work.

Can an Existing Hearth Be Resurfaced Instead of Fully Replaced?

In some cases, yes. If the existing hearth structure is stable and undamaged, a mason may be able to install a new stone veneer or surface layer without removing the entire hearth.

Does Stone Type Affect Heat Performance Around a Fireplace?

Yes. Different stone materials have different heat resistance and durability characteristics. A qualified mason can recommend stone options and finishes that are suitable for areas exposed to heat near the firebox.

Is a Raised Stone Hearth More Difficult to Maintain Than a Flush Hearth?

Not necessarily. Raised hearths may require additional cleaning around edges and visible surfaces, while flush hearths integrate more closely with the surrounding floor and may be easier to clean with regular maintenance.

Can Different Stone Types Be Combined in a Custom Hearth Design?

Yes. Combining stone types can create a unique layered appearance, but the materials should be selected carefully to ensure they complement each other in color, texture, and overall fireplace design.
Retaining Wall Drainage Problems That Lead to Early Failure

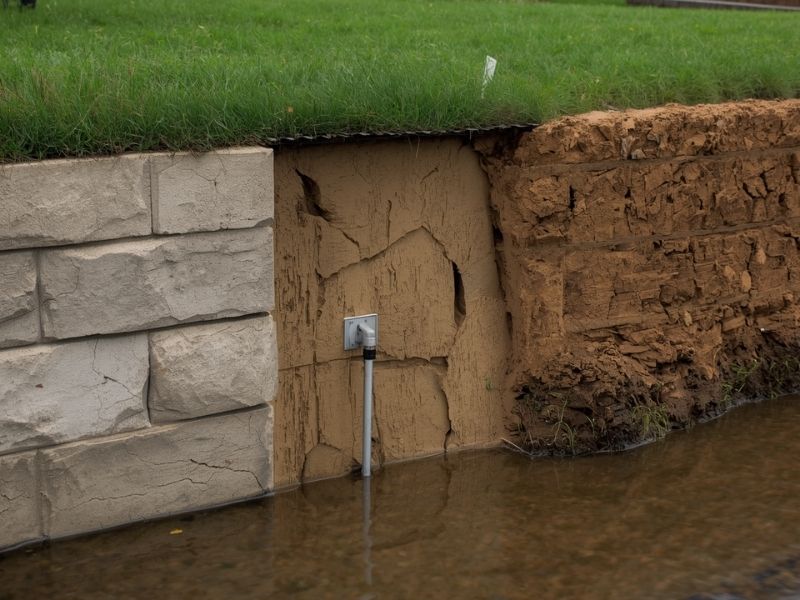
Retaining wall drainage failure showing water buildup, cracked soil, and erosion caused by trapped moisture behind the wall

A retaining wall looks simple. Stack the blocks, build it strong, done. But most retaining wall failures have nothing to do with the blocks themselves. They come from water trapped behind the wall with nowhere to go.

In Frisco, where clay soil and heavy seasonal rain are both common, drainage mistakes show up faster than in many other parts of Texas.

A retaining wall fails from the inside out, usually because of trapped water. Good drainage design matters more than the material or the height of the wall itself.

Why Water Is the Real Enemy of a Retaining Wall

A retaining wall holds back soil, and soil holds water. When rain falls, that water soaks into the ground behind the wall. If it has nowhere to escape, it builds up pressure against the wall’s back side.

This pressure, called hydrostatic pressure, is far stronger than most people expect. Enough water buildup can push a wall forward, crack it, or tip it over completely, even if the wall was built with solid materials.

The Gravel Backfill Mistake That Causes Early Problems

Every retaining wall needs proper backfill material behind it, usually crushed gravel that lets water drain down and away instead of soaking into the soil and pushing against the wall.

Common backfill mistakes include:

  • Using native clay soil as backfill instead of gravel
  • Not compacting the gravel layer properly during construction
  • Backfilling too thin a layer, leaving water with no clear path to drain

Clay soil, especially the kind common in North Texas, holds water instead of letting it pass through. Using it as backfill turns the area right behind the wall into a sponge that stays saturated after every rain.

Missing or Clogged Drainage Pipes

Most retaining walls need a drainage pipe running along the base, often called a French drain, to carry collected water away from the structure.

Signs this system has failed or was never installed correctly include:

  • Water seeping through the wall face after rain, rather than draining away underground
  • Damp or soggy soil at the base of the wall long after a storm has passed
  • Visible staining or efflorescence on the wall’s lower sections

A drainage pipe that gets clogged with dirt or debris over time stops working just as effectively as one that was never installed. Regular inspection catches this before it becomes a bigger problem.

Why Weep Holes Matter More Than They Look

Weep holes are small gaps built into the face of a retaining wall, giving water an escape route instead of letting it build up behind the structure.

Problems with weep holes usually include:

  • Too few holes for the wall’s height and length
  • Holes clogged with dirt, roots, or debris over time
  • Poor placement that doesn’t line up with the actual water flow behind the wall

A wall with working weep holes will show small trickles of water after a storm. A wall with blocked or missing weep holes may show no water at all right after rain, which sounds fine but often means the water is trapped and building pressure instead.

How Grading Around the Wall Affects Long-Term Performance

The ground surface above and around a retaining wall needs to slope in a way that carries water away, not toward the wall.

Poor grading often shows up as:

  • Water pooling at the top of the wall after rain
  • Soil erosion channels running toward the wall from higher ground
  • Standing water in the yard above the wall for hours after a storm

Even a well built wall with good internal drainage can struggle if the surface grading keeps sending more water toward it than the drainage system was designed to handle.

Signs Your Retaining Wall Already Has a Drainage Problem

Walk your property after a heavy rain and look for these warning signs:

  1. Visible bulging or leaning in the wall’s middle or upper sections
  2. Cracks running horizontally across multiple blocks or stones
  3. Water seeping through the wall face instead of draining underground
  4. Soil settling or sinking directly behind the top of the wall
  5. Persistent damp spots at the base that don’t dry out between rains

Catching these signs early usually means a repair. Ignoring them often means a full rebuild once the wall shifts too far to correct.

Fixing a Wall With an Existing Drainage Problem

Depending on how far the damage has progressed, a mason may be able to:

  • Install or clear drainage pipes behind an existing wall without a full rebuild
  • Add or unclog weep holes to relieve current pressure
  • Regrade the soil above the wall to redirect surface water away
  • Replace saturated backfill material with proper gravel in the affected section

Severe bulging or leaning usually means the wall has already moved too far, and a partial or full rebuild becomes the safer long-term fix.

What to Ask Before Building a New Retaining Wall

  • What backfill material will you use, and how deep will that layer be?
  • Will this wall include a drainage pipe, and where will it discharge?
  • How many weep holes will the design include, and where will they be placed?
  • How will the grading above the wall direct water away from the structure?
  • What is your plan for inspecting or maintaining the drainage system after construction?

Frequently Asked Questions

What Causes Most Retaining Wall Failures?

Trapped water behind the wall is the most common cause. When drainage is not properly designed, water pressure builds against the structure over time, leading to bulging, cracking, shifting, or complete failure.

How Do I Know If My Retaining Wall Has a Drainage Problem?

Common warning signs include bulging sections, horizontal cracks, water seeping through the wall face, or soil settling behind the top of the wall. These issues often indicate that water is trapped and pressure is increasing behind the structure.

Can a Retaining Wall Drainage Problem Be Fixed Without Rebuilding the Entire Wall?

Sometimes. If the problem is identified early, solutions such as installing drainage pipes, clearing blocked weep holes, or improving grading above the wall may reduce pressure. However, severe leaning, cracking, or structural movement may require partial or complete reconstruction.

Why Is Clay Soil a Problem for Retaining Wall Drainage?

Clay soil retains water rather than allowing it to drain freely. When used as backfill behind a retaining wall, it can trap moisture, increase hydrostatic pressure, and contribute to long-term wall failure.

How Often Should a Retaining Wall’s Drainage System Be Inspected?

A retaining wall drainage system should be checked at least once a year and after major storms. Regular inspections help identify clogged weep holes, damaged drainage pipes, or water buildup before they cause serious structural issues.

How to Build an Outdoor Fireplace That Lasts for Years

An outdoor fireplace looks simple. Stack some stone, add a chimney, light a fire. But a fireplace built without a good plan can crack, shift, or stop drawing smoke right within a few years. An outdoor fireplace that lasts needs the right spot, the right base, and the right materials from day one.

This article covers what really makes an outdoor fireplace hold up over time. This means where to place it, how to build the base, what materials to use, and how to protect it from weather.

Choosing the Right Location for Long-Term Outdoor Fireplace Stability

Where a fireplace sits matters as much as how it gets built.

Here’s what to check before you pick a spot:

  • Pick ground that doesn’t hold water after rain. Standing water weakens the soil under a foundation over time.
  • Stay away from trees with big root systems. Roots can shift soil and crack a foundation years after the build.
  • Keep enough space between the fireplace and the house. Local fire code rules set the exact distance.
  • Check which way the wind blows on the site. A fireplace facing the wrong way can push smoke right into a patio or home.

Frisco has clay-heavy soil. This soil expands and shrinks as moisture changes. Pick a bad spot on this kind of soil, and foundation problems often show up within just a few years.

Foundation Preparation That Prevents Cracking and Shifting Over Time

A fireplace foundation holds a lot of weight in a small space. Get this step wrong, and every problem after it traces back here.

Steps that keep a foundation stable for the long run:

  1. Dig below the frost line. Remove any loose or organic soil that won’t pack down right.
  2. Add a layer of packed gravel to help drainage under the footing.
  3. Pour a reinforced concrete footing sized for the full weight of the finished fireplace. Not just the base layer.
  4. Let the footing cure fully before starting any stone or brick work on top of it.
  5. Check that the footing is level before laying the first row of stone or brick.

Skip any of these steps, and cracking often shows up within the first two or three years. This happens even more in areas where the soil shifts with moisture.

Selecting Heat-Resistant Materials for Durable Fireplace Construction

Not every stone or brick can handle heat again and again. Pick the wrong material, and you’ll see cracking, flaking, or crumbling much sooner than you’d expect.

Materials worth choosing:

  • Fire brick for the inside of the firebox. It’s built to handle direct, steady heat.
  • Refractory mortar for joints inside the firebox. It expands and shrinks differently than regular mortar under heat.
  • Natural stone or manufactured stone veneer for the outside. Pick a type that resists soaking up moisture.
  • Stainless steel or cast iron for any dampers, grates, or hardware exposed to heat and weather.

Regular mortar and brick can handle some heat. But years of high heat exposure will crack materials that weren’t built to take it.

Proper Chimney and Airflow Design for Safe Long-Term Performance

A fireplace that doesn’t draw smoke right isn’t just annoying. It shows a real design flaw. And that flaw only gets worse over time.

Key airflow points to get right:

  • Size the flue opening correctly compared to the firebox opening. Follow standard masonry fireplace ratios.
  • Build the chimney tall enough to create good draft. This matters more if nearby structures or trees could block airflow.
  • Avoid tight turns or offsets in the flue path. These restrict airflow and cause more creosote buildup.
  • Add a spark arrestor cap at the top of the chimney. This stops embers from escaping and keeps debris out of the flue.

A fireplace with poor airflow design tends to run into problems early. It often needs repairs that a well-built chimney would have avoided in the first place.

Weather Protection Strategies to Extend Outdoor Fireplace Lifespan

Outdoor fireplaces face weather that indoor fireplaces never deal with. That exposure is often what wears them down the fastest.

Ways to protect a fireplace over time:

  • Apply a breathable masonry sealer to the outside stone or brick. This cuts water absorption without trapping moisture inside.
  • Install a proper cap or cover on the chimney. This keeps rain and debris out of the flue when it’s not in use.
  • Make sure the firebox can drain. Water shouldn’t pool and freeze inside during colder months.
  • Check mortar joints every year. Fix small cracks before winter freeze and thaw cycles make them worse.

Frisco’s climate doesn’t see the harshest freeze and thaw cycles. But summer heat and the occasional winter freeze still stress masonry joints over time if they’re left unsealed and unchecked.

Frequently Asked Questions

How long should a well-built outdoor fireplace last?

A properly constructed outdoor fireplace with a solid foundation and heat-resistant materials can last several decades when maintained regularly.

Can I build an outdoor fireplace on any type of soil?

Not always. Expansive soils, such as clay-heavy soil common in parts of Texas, often require additional foundation design to prevent shifting and cracking over time.

What is the most common reason outdoor fireplaces crack early?

Early cracking is most often caused by poor foundation preparation, including insufficient depth, improper compaction, or lack of reinforcement in the footing.

Do I need a professional to design the chimney and flue?

Yes. Chimney and airflow design directly affect safety and performance, so it is strongly recommended to work with someone experienced in masonry fireplace construction.

How often should an outdoor fireplace be inspected for wear?

An annual inspection, ideally before colder seasons, helps identify small cracks or drainage issues early before they develop into more costly repairs.

Stone Masonry Design Ideas for Modern and Traditional Homes

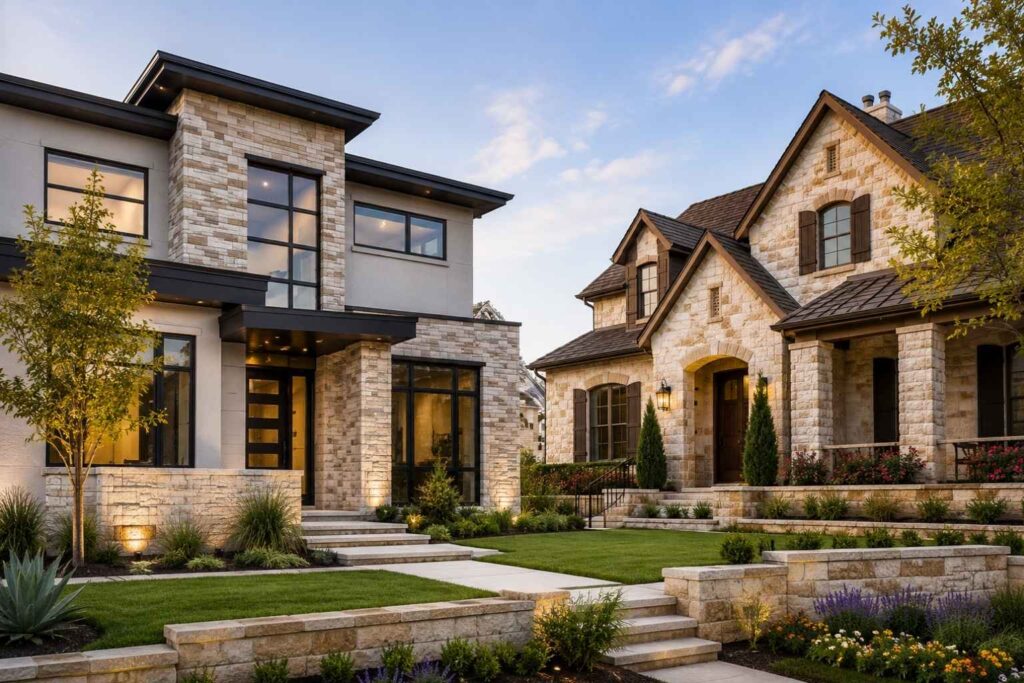
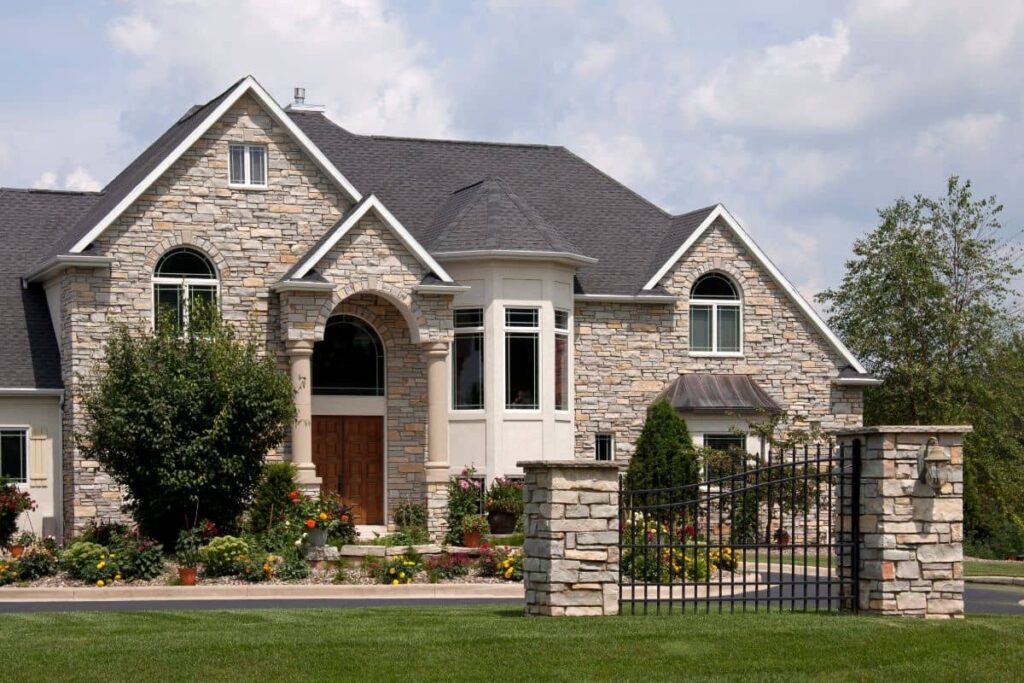
Modern and traditional luxury homes in Frisco, Texas featuring natural stone masonry facades, stone columns, and landscaped front yards.

Stone masonry does something few materials can do. It makes a house look like it belongs to the land it sits on. Stone isn’t just a finish choice. It shapes how a home looks from the street. It shapes how the home ages over the years. It also shapes how the home fits in with the houses around it.

This article covers how stone masonry shapes a home’s look. It shows how to blend stone with modern design. And it covers how to use stone well, both as structure and as decoration.

How Stone Masonry Shapes Architectural Identity in Homes

A home’s identity starts with its materials. Stone carries more visual weight than siding, brick, or stucco. It signals that a home is built to last.

Here’s how stone shapes that identity:

  • Texture and color change give a home a one-of-a-kind look. No two stones cut exactly the same.
  • Heavy stone at the base of a home creates a solid, grounded feel. Lighter materials can’t match that feel.
  • Stone details around doors and windows draw the eye. They show where the important architectural points are.
  • The way stone catches light changes how a home looks throughout the day, from morning to evening.

Frisco has a lot of new construction near older, established neighborhoods. Stone masonry often bridges the gap between the new builds and the older homes nearby.

Blending Raw Stone Textures With Contemporary Home Design

Modern homes and raw stone might seem like an odd match. But they work well together when done with care.

Here are a few ways to blend the two:

  • Pair rough-cut stone with clean, flat stucco or metal panels. This creates contrast instead of visual clutter.
  • Use large stone pieces instead of small, busy patterns. Large pieces feel more modern.
  • Keep stone to certain areas, like a fireplace wall or an entry feature. Don’t cover the whole front of the house.
  • Pick one stone tone that matches the home’s other materials. Avoid mixing several competing colors.

The goal is balance. Too much raw texture can overwhelm a modern design. Too little loses the character stone is meant to add.

Regional Stone Masonry Styles That Influence Residential Design Choices

Stone styles change by region. Those regional habits still shape what homeowners expect today.

Here are a few styles that show up often in home design:

  1. Hill Country stone is common across Central Texas. It uses tan and cream limestone with a rugged, natural face.
  2. Fieldstone was popular in older East Coast homes. It uses uneven, rounded stones set with visible mortar lines.
  3. Ashlar stone is cut into rectangular blocks with tight joints. It gives a more formal, structured look.
  4. Dry-stack stone is laid without visible mortar. It creates a cleaner, more modern look.

Frisco mixes new development with Texas Hill Country style. Because of this, both rugged limestone looks and clean dry-stack styles show up often in home design requests.

Structural vs Decorative Stone Masonry Applications in Home Design

Stone plays two very different roles in home building. Mixing up the two can lead to costly mistakes.

Structural Stone Masonry

Structural stone actually carries weight. This includes:

  • Foundation walls built from solid stone or stone-faced concrete block.
  • Retaining walls that hold back soil on sloped lots.
  • Load-bearing exterior walls in traditional stone homes.

These uses need engineering review. They also need proper footings and drainage planning behind the wall.

Decorative Stone Masonry

Decorative stone is a veneer. It gets applied over a wall that’s already doing the structural work. This includes:

  • Thin stone veneer over a home’s outside wall.
  • Stone accents around fireplaces, entries, or feature walls.
  • Stone caps on columns or low garden walls.

Decorative stone is lighter. It installs faster. It also costs a lot less than full structural stone. But it still needs proper flashing and moisture barriers to hold up well over time.

Designing Visual Balance With Stone Masonry Across Exterior Surfaces

Stone works best with a clear plan. It shouldn’t get scattered across a home’s front without a reason.

Here are a few rules that keep stone balanced on a home’s exterior:

  • Anchor stone at the base of the home. Let lighter materials carry the upper floors.
  • Use stone to frame key features, like an entry. Don’t spread it evenly and lose its impact.
  • Keep stone coverage steady on all visible sides. This stops the home from looking unfinished from certain angles.
  • Match the mortar color to the stone tone. This avoids a busy, distracting grid pattern on the surface.

A home with stone placed with care looks intentional. A home with stone placed carelessly looks unfinished, even when the stone itself is high quality.

Frequently Asked Questions

Is stone veneer as strong as full structural stone?

Stone veneer is durable when installed correctly with proper backing and moisture protection, but it is not load-bearing like full structural stone masonry.

How much of a home’s exterior should use stone for a balanced look?

There is no fixed rule, but many designs use stone as an accent at the base, entry points, or key architectural features to maintain visual balance without overwhelming the façade.

Can stone masonry work on a modern minimalist home?

Yes. Modern designs often use large-format stone, neutral tones, and clean joint patterns to achieve a minimal, contemporary appearance.

Does stone masonry require more maintenance than brick or siding?

Stone masonry generally requires less maintenance than siding, but mortar joints should still be inspected periodically for cracking or weather-related wear.

What is the most common mistake homeowners make when choosing stone?

Using too many colors, textures, or stone types is a common mistake, as it creates visual clutter instead of a cohesive and unified architectural look.

Fireplace Repair Before Winter Is Worth Planning

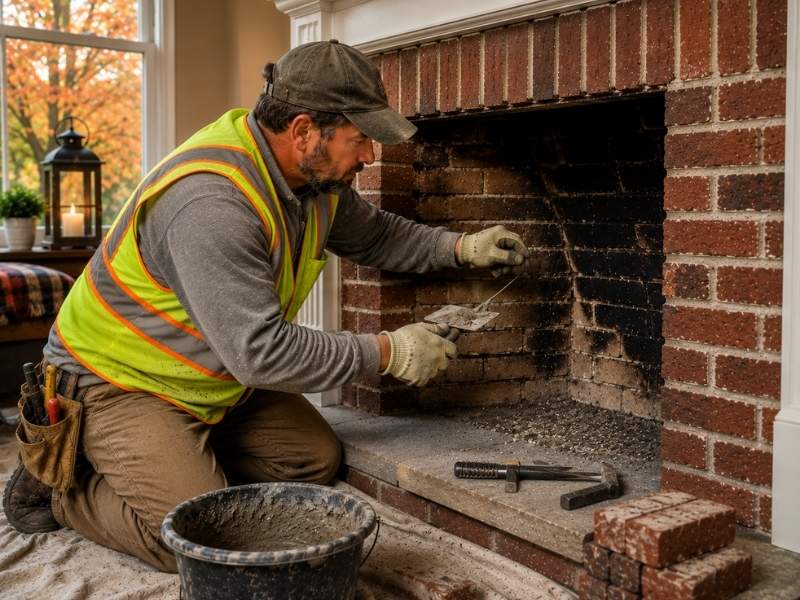
Fireplace repair by a skilled mason restoring mortar joints inside a brick fireplace before winter to improve safety and performance.

The best time to handle fireplace repair is before the cold weather arrives, not in the middle of it. A fireplace sits unused for months, and small problems can hide until the first fire of the season exposes them. Planning repairs in early fall gives you time to fix issues before you rely on the fireplace for warmth. It also means you’re not scrambling for help during the busy winter rush. A little planning now buys a safe, worry-free heating season.

Here’s why it pays to get ahead of it.

Look for Damage Before You Use It

A careful look before the first fire can catch trouble early. Months of sitting idle, plus summer humidity, can loosen brick and open small cracks you didn’t notice in spring. Scan the firebox, the surround and the visible mortar for anything that looks off.

Cracked mortar is the most common find. Thin gaps in the joints let heat and gas reach places they shouldn’t, so they deserve attention before you light a fire. Loose or chipped brick is another red flag worth marking down.

Don’t rush the inspection. Good light and a slow look turn up problems that a quick glance misses. Spotting damage now, before heavy use, is far better than discovering it once the fire is roaring.

Fix Small Repairs Early

Timing is everything with fireplace repairs. A small crack or a bit of loose mortar is quick to fix in the fall, but the same problem grows once you’re running fires through winter. Heat and cold work on small flaws and make them spread.

Early repairs also cost less. Repointing a few joints or resetting a loose brick is minor work compared to rebuilding a firebox later. Waiting until a small issue becomes a structural one turns a cheap fix into an expensive one.

There’s a safety reason to move early too. Cracks and gaps near the fire can let heat or fumes escape where they shouldn’t. Closing those up before the season starts keeps the fireplace both efficient and safe to use.

Check the Parts That Get the Most Heat

The areas that take the most heat are the ones most likely to need repair. The firebox, where the fire actually burns, faces extreme temperatures that slowly break down brick and mortar. Look closely here for cracked joints, gaps or crumbling spots.

The chimney and flue carry heat and smoke up and out, so they take a beating too. Cracks in the flue or a damaged chimney crown can let heat or water reach places that cause real damage. These spots are worth a professional look, since much of the chimney hides from view.

Mortar joints throughout the firebox earn special attention. They expand and contract with every fire, which slowly works them loose. Solid joints here keep the firebox sealed and the heat where it belongs.

Keep Your Fireplace in Good Shape

Steady care through the season keeps a fireplace working well. Clearing out ash and soot after fires keeps the firebox clean and makes problems easier to spot. A buildup of soot can hide a forming crack until it’s worse.

Watch for changes as you use it. A fire that suddenly smokes into the room, a strange smell or fresh staining can signal a developing problem. Catching these signs early lets you handle a repair before the next cold spell.

Keep the area around the fireplace clean and clear too. Wiping down the surround and hearth keeps soot from settling into the brick. A clean fireplace is easier to inspect and simply more pleasant to use.

Make Repairs Part of Home Care

The simplest way to avoid winter surprises is to make fireplace care a yearly habit. Booking a professional inspection once a year, ideally before heating season, catches hidden problems in the chimney and firebox. Safety guidelines call for at least one inspection a year for exactly this reason.

Pair that yearly check with your own seasonal look. A quick inspection each fall, plus attention to any change during use, covers most issues between professional visits. Together they keep small repairs small.

Treated this way, fireplace repair becomes routine instead of an emergency. You head into winter knowing the fireplace is ready, and you skip the stress of a breakdown on the coldest night. That peace of mind is worth the small effort.

Frequently Asked Questions

What are the signs I need fireplace repair?

Watch for cracked or crumbling mortar, loose or chipped brick and white staining on the surface. Smoke pushing into the room or a strong odor when you light a fire are warning signs too. Any of these means it’s worth a closer look before regular use.

Can cracked mortar be repaired?

Yes, a mason repairs cracked mortar by repointing, which means removing the damaged material and packing in fresh mortar. Done early, it seals the joint and stops heat or water from spreading the damage. It’s a routine fix when handled before the cracks grow.

Why should the chimney be inspected?

The chimney hides much of its length from view, so problems like cracks, blockages or creosote buildup go unseen. An inspection checks that smoke and heat can exit safely and that nothing flammable has collected inside. This is as much a safety step as a repair one.

How often should a fireplace be checked?

Have a fireplace inspected at least once a year, ideally before you start using it for the season. A fall check leaves time to fix anything found before the cold sets in. Add your own quick look whenever you notice a change while using it.

Can small repairs prevent bigger damage?

Absolutely, since most major fireplace damage starts as a small, ignored crack. Sealing a minor gap or resetting one brick stops heat and water from working deeper. Handling little repairs early is the cheapest way to avoid a major rebuild.

Why a Skilled Brickmason Delivers Better Results

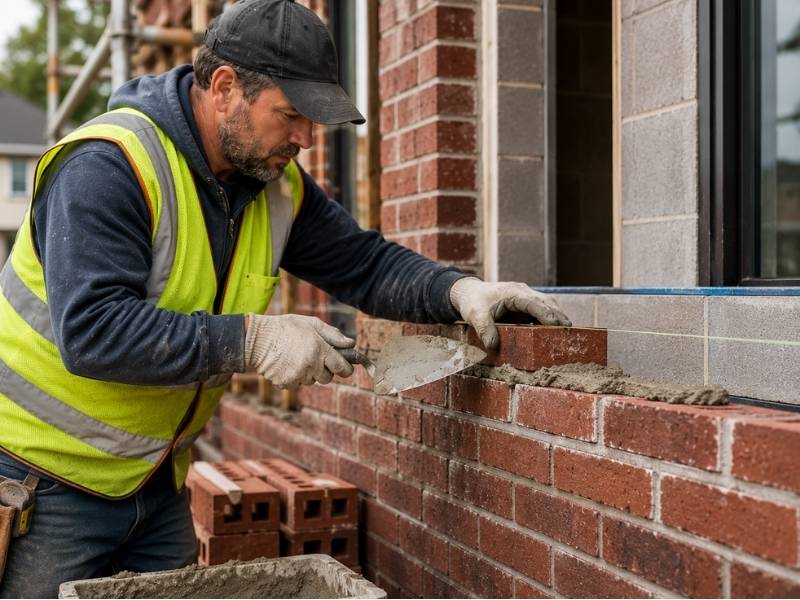
Skilled brickmason wearing a safety vest laying brick with mortar and a string line to build a strong, level masonry wall.

Two brick walls can look alike on day one and tell very different stories ten years later. The difference is the brickmason who built them. A skilled brickmason builds masonry that stays strong, sheds water and holds its shape for decades, while rushed work cracks and leaks long before its time. Good masonry is mostly invisible craft, since the careful choices happen inside the wall where you can’t see them. That hidden skill is what you’re really paying for.

Here’s where an experienced hand makes the difference.

Plan the Job the Right Way

Strong masonry begins long before the first brick is set. A good brickmason starts by reading the plans and checking the foundation, since brick is heavy and needs solid, level support underneath. A weak or uneven base will telegraph cracks straight up through the finished wall.

Layout comes next. The mason measures and dry-lays a course to work out spacing, so the brick pattern lands evenly and cuts fall in sensible spots. This planning avoids awkward slivers of brick and keeps openings for doors and windows square.

Weather and timing factor in too. Mortar needs the right temperature to cure properly, so a skilled mason plans around cold snaps and heavy rain. Setting brick in bad conditions weakens the bond before the wall ever bears a load.

Choose Quality Materials

The right materials decide how long masonry lasts. A brickmason matches the brick grade to the job, since brick rated for severe weather holds up outdoors far better than softer, indoor-rated brick. Using the wrong grade is a common cause of flaking and crumbling down the road.

Mortar is just as important as the brick. The mason mixes the correct mortar type and strength for the wall, because mortar that’s too hard or too soft works against the brick instead of with it. The proportions of sand, cement and lime all affect how the joint performs.

Quality also means consistency. A good mason keeps each batch of mortar mixed the same way, so the whole wall cures and ages evenly. Mismatched batches can leave some joints weaker than others.

Build with Care

Careful building gives a brick wall its strength, not just its looks. The work that keeps a wall standing for generations comes down to three things a skilled brickmason never rushes.

  • Keeping every course level and the whole wall plumb, since a wall that leans even slightly carries its load unevenly. Constant checking with a level and line keeps the structure true from bottom to top.
  • Filling each mortar joint completely and tooling it so the joint sheds water instead of trapping it. Hollow or sloppy joints let water sit, and trapped water is what cracks masonry over time.
  • Laying the bricks in a proper bond so they overlap and spread weight across the wall. Stacking them in weak vertical lines invites cracks, while a solid interlock helps brickwork stand for decades.

That care turns a plain stack of bricks into a wall that lasts.

Handle Problems with Skill

Real job sites rarely go exactly to plan, and experience keeps small surprises from becoming big ones. When a foundation comes in slightly off, a seasoned brickmason adjusts the first courses to bring everything back to level. A beginner might build the error straight up the wall.

Tying new brick into an existing structure takes skill too. The mason matches heights and locks the new work into the old so the two move as one. Done poorly, the seam between old and new becomes a crack waiting to open.

Moisture problems call for know-how as well. A good mason builds in weep holes and flashing where needed, so water that gets behind the brick has a way out. Handling these details quietly prevents the leaks and stains that plague rushed jobs.

Help Masonry Last Longer

Great workmanship is the biggest reason masonry lasts, but a little care extends it further. Walls built with full joints and the right materials already shed water well, which is the single most important factor in a long life. Good work up front saves years of repairs later.

Simple upkeep protects that investment. Keeping plants and sprinklers from soaking the brick, and clearing debris from weep holes, helps the wall stay dry. A quick look each year catches any cracked joint early, while it’s still a small fix.

The payoff is masonry that holds strong for generations. Brick built well by a skilled hand can outlast the people who built it. That long life is the real return on hiring someone who knows the craft.

Frequently Asked Questions

What does a brickmason do?

A brickmason builds and repairs structures using brick, block and stone held together with mortar. The work ranges from walls and chimneys to walkways and home exteriors. A skilled mason handles layout, material choice and the building itself, all with an eye on strength and a clean finish.

Why is good workmanship important?

Workmanship decides whether masonry lasts decades or fails early. Full mortar joints, level courses and the right materials keep water out and spread weight evenly. Poor work might look fine at first, but it tends to crack, lean or leak within a few years.

How do I know if brick work is well done?

Look for straight, plumb walls and mortar joints that are even and fully packed. Quality brickwork has consistent spacing, clean tie-ins and no early cracks or bulges. Water draining away from the wall rather than pooling against it is another good sign.

Can a brickmason repair damaged brick?

Yes, repairing brick is a core part of the trade. A brickmason can replace cracked bricks and repoint crumbling mortar so the fix blends with the surrounding wall. Calling the mason early, while the damage is small, keeps the repair quick and affordable.

What helps brick last a long time?

Solid workmanship is the foundation, since well-built joints keep damaging water out. Beyond that, keeping the brick dry helps most, so manage sprinklers, drainage and gutters around it. A yearly glance for cracked mortar lets you fix small issues before they spread.

Brick Repair That Preserves Your Home’s Character

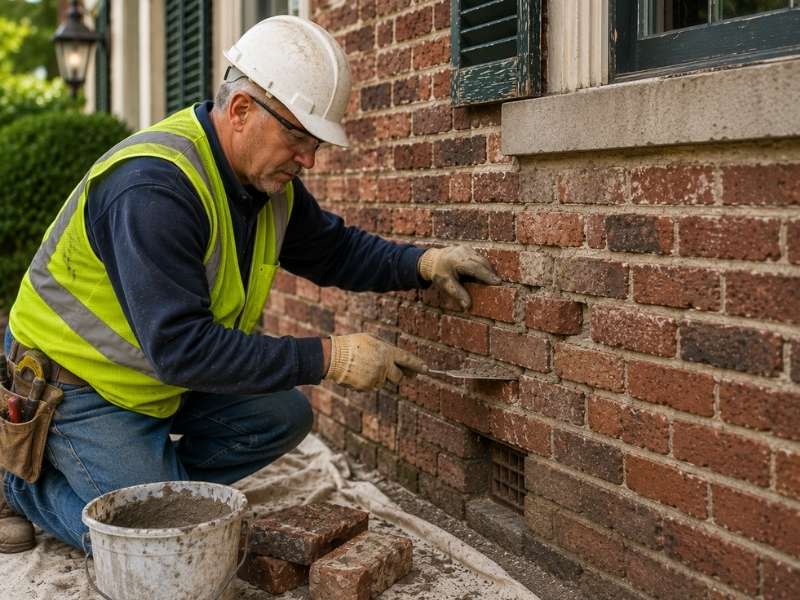
Brick repair on a historic home with a skilled mason restoring weathered brick and mortar to preserve the home's original character and appearance.

Old brick gives a home a warmth and character that new materials struggle to copy. The soft colors, worn edges and handmade feel are part of what makes an older house special. When that brick starts to crack or crumble, brick repair done the right way can fix the damage without erasing the charm. Done the wrong way, a quick patch can leave a home looking worse than before. The goal is simple. Fix the problem and keep the character intact.

Here’s how a careful repair protects the look you love.

Match the Old Brick, Not Just the Damage

The first rule of character-friendly repair is matching the brick itself, not just patching the hole. Bright, uniform new bricks dropped into a weathered wall draw the eye straight to the patch. Old brick differs from modern stock in several ways, and a good mason checks each one before laying a single piece.

  • Color matters most, since old brick often has uneven, weathered tones that bright new brick can’t fake.
  • Size counts too, because older brick was frequently made smaller or more irregular than today’s uniform stock.
  • Texture and wear should match, so the new pieces share the same surface and age as the wall around them.
  • The source helps a lot, since reclaimed brick from the same era blends in far better than anything new off a pallet.

Match these well, and the repair settles into the wall instead of standing out. The right pieces make a patch nearly vanish. The aim is a fix that a passerby would never notice.

Use Mortar That Suits Old Brick

The mortar matters as much as the brick, and this is where many repairs go wrong. Old brick is usually soft, so it needs a soft, breathable mortar made mostly with lime. Preservation experts follow one simple rule. The mortar should always be softer than the brick it sits against.

Modern mortar made with a lot of Portland cement is far too hard for old brick. It traps moisture inside the wall and won’t flex as the brick expands and contracts. Over time that hard mortar makes the brick faces crack and flake off, a problem masons call spalling.

The right mortar protects the brick instead of fighting it. A breathable lime mix lets moisture escape and gives gently with the wall’s natural movement. It acts as a sacrificial layer, wearing slowly so the brick stays sound for decades.

Blend the Repair So It Disappears

A repair that preserves character should be hard to spot. Beyond matching the brick, the mason matches the mortar’s color, texture and joint shape to the existing wall. A wall pointed with bright gray mortar next to soft, sandy original joints looks patched. Even good brickwork can’t hide that.

Color comes from the sand and any added pigment. A careful mason mixes test batches until the mortar dries to the right shade. The way the joint is tooled, whether flush, raised or recessed, should copy the original profile too. These small details are what make a repair blend in.

Testing first saves regret later. A few sample joints in a hidden spot show how the mortar will dry and age before the whole wall is done. That patience is the difference between an invisible repair and an obvious one.

Protect the Details That Give a Home Character

Older brick homes often carry small details that newer ones lack. Arched windows, decorative trim, patterned brickwork and rows of upright brick over doors all add personality. These features deserve extra care during any repair, since they’re the hardest parts to replace.

Rushing a repair near these details can flatten what makes the home special. A careful mason works around an arch or a decorative course by hand, keeping the original shape and pattern intact. Replacing a whole feature should be a last resort, not a shortcut.

When original details are too damaged to save, a thoughtful mason copies them closely. Rebuilding an arch with the same curve and brick pattern keeps the home’s look consistent. The effort here pays off every time someone admires the house.

Know When to Repair Instead of Replace

Saving original brick almost always beats tearing it out. Every piece of original material you keep holds a bit of the home’s history and look. Full replacement is faster for a contractor, but it often strips away the very character you want to protect.

Most damage is fixable without a full tear-out. Repointing crumbling joints, swapping a few broken bricks and cleaning the surface can revive a wall that looks far gone. A mason who values old work will push to repair before suggesting replacement.

Replacement makes sense only when brick is truly failing or unsafe. Even then, reusing as much sound original brick as possible keeps the wall honest to its age. The best repairs leave a home looking like itself, just cared for.

Frequently Asked Questions

How do I match new brick to old brick?

Start by comparing color, size and texture against the existing wall in daylight. Reclaimed brick from the same period usually blends best, since old brick differs from modern stock. A mason experienced with older homes can source close matches and lay them so the repair disappears.

Why does old brick need a different kind of mortar?

Old brick is soft, so it needs a soft, breathable lime mortar rather than hard modern cement. Hard mortar traps moisture and won’t flex, which makes the brick faces crack and flake over time. A softer mix protects the brick and lets the wall breathe as it should.

Can brick repairs be made nearly invisible?

Yes, when the mason matches both the brick and the mortar carefully. Blending the mortar’s color and joint shape to the original, plus testing samples first, hides the repair well. Good work on an older wall should be tough for anyone to spot.

Is it better to repair original brick or replace it?

Repairing and keeping original brick is almost always the better choice. It preserves the home’s character and history, while full replacement tends to erase both. Replacement should be reserved for brick that’s truly unsafe or beyond saving.

Will repairs change my home’s character?

Done well, repairs protect your home’s character rather than change it. The point of matching brick, mortar and details is to keep the original look intact. A careful repair should leave the house feeling exactly like itself, only sounder.

How Much Does Brick Repair Cost in Frisco, TX?

If you’re wondering how much brick repair costs in Frisco, TX, most jobs fall between $500 and $2,500. If that feels like a wide range, it’s because Texas soil is rarely kind to masonry.

Most homeowners in Frisco deal with some level of brick repair over time, especially with how the soil shifts in North Texas. What starts as a small cosmetic crack can turn into a bigger structural issue if it’s ignored too long.

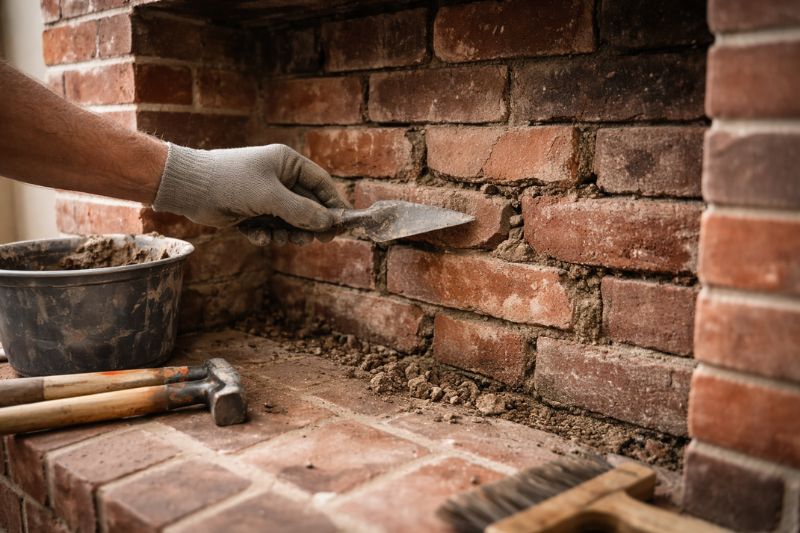
Brick fireplace repair with cracked mortar and damaged bricks in a Frisco TX home

The Price Breakdown

While every house is different, here’s what the local market looks like for typical Frisco repairs.

Repair TypeEstimated Cost
Minor Cracks$250 – $800
Tuckpointing (Mortar)$3 – $20 per sq ft
Brick Replacement$10 – $30 per sq ft
Mailboxes$150 – $750
Structural/Major Walls$2,000 – $6,500+

Why Frisco Prices Vary

The price of a job depends on more than just the number of bricks involved.

  • Foundation Movement: Since Frisco sits on heavy clay, masonry cracks are often a symptom of the ground moving. If your foundation is shifting, a simple patch won’t last.
  • The Match: On older homes, finding bricks that match the original color and texture takes extra time. If a contractor has to hunt down a specific discontinued brick, you’ll pay for that effort.
  • Accessibility: Fixing a first-floor garden wall is simple. Setting up scaffolding to reach a second-story chimney or a tight corner between houses adds to the labor bill.

Repair or Rebuild?

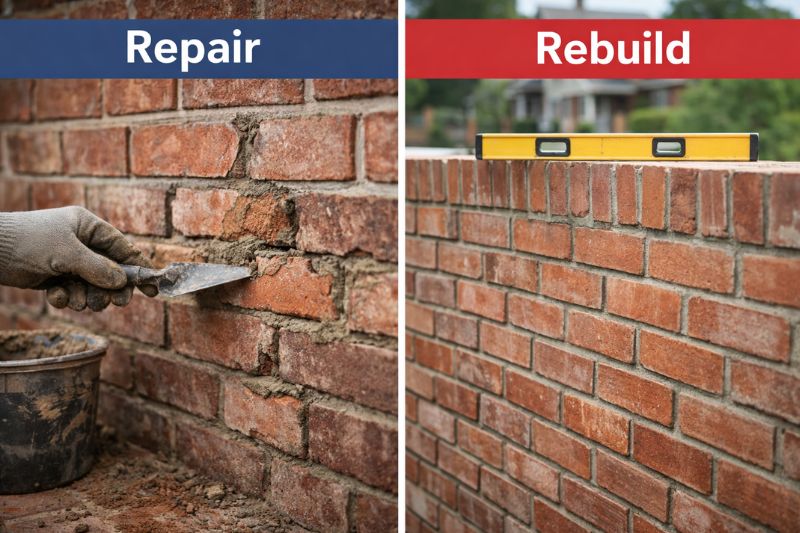
Side by side comparison of brick wall repair versus full rebuild showing damaged bricks and newly constructed wall in Frisco TX

Sometimes patching a wall is like putting a band-aid on a broken leg. If the damage is widespread or the wall is bulging, a full rebuild is often the smarter move. New brickwork typically costs between $20 and $50 per square foot, but it saves you from paying for the same repair again in two years.

How to Keep Costs Down

The best way to save money on masonry is to stop waiting. Small gaps in mortar let water in, which freezes, expands, and eventually pops the faces off your bricks.

Fix the small cracks now. If you see cracks running through multiple bricks or walls that look like they’re leaning,it’s worth having a local masonry contractor take a closer look. A general handyman might fill a gap with caulk, but a mason will actually fix the problem.

The Ultimate Guide to Outdoor Masonry Materials for Texas Climate

If you’re planning an outdoor project in Frisco TX, choosing the right masonry material is key. From patios and walkways to fireplaces and outdoor kitchens, the right material ensures durability, beauty, and longevity — even under the intense Texas sun, shifting soil, and occasional heavy rains.

In this guide, we’ll break down the most popular masonry materials, discuss their pros and cons, and explain which options work best for Texas homes.

Custom stone and brick masonry on a Texas home in Frisco TX, built to withstand the Texas climate

Understanding Common Masonry Materials

1. Brick

Brick has been a classic masonry material for centuries. It’s durable, timeless, and works well for patios, walls, and fireplace surrounds.

Pros:

  • Long-lasting and resistant to wear
  • Can match existing home exteriors
  • Low maintenance

Cons:

  • Higher cost than some alternatives
  • Limited color options

Best Uses in Texas: Brick works great for patios, retaining walls, and outdoor fireplaces. It handles heat well but may require occasional sealing in humid areas.

2. Natural Stone (Limestone, Granite, Flagstone)

Natural stone is prized for its beauty and variety. Each stone is unique, offering a rustic or elegant look depending on your project.

Pros:

  • Unique textures and colors
  • Extremely durable
  • Low maintenance if sealed properly

Cons:

  • Can be expensive
  • Requires professional installation for best results

Best Uses in Texas: Stone patios, walkways, outdoor kitchens, and fire pits. Flagstone and limestone are especially popular for their natural heat resistance.

3. Manufactured Stone (Veneer)

Manufactured stone provides the look of natural stone at a lower cost. It’s lightweight and flexible for decorative walls and facades.

Pros:

  • Cost-effective
  • Easy to install over existing surfaces
  • Wide range of colors and shapes

Cons:

  • Less durable than real stone in harsh conditions
  • Can chip or fade over time if not properly sealed

Best Uses in Texas: Accent walls, outdoor kitchen facades, and fireplace surrounds.

4. Concrete Pavers

Concrete pavers are versatile and affordable, offering many patterns and finishes. They’re commonly used for driveways, patios, and walkways.

Pros:

  • Flexible design options
  • Durable and strong
  • Can be replaced individually if damaged

Cons:

  • Can stain if not sealed
  • May shift over time if base isn’t properly prepared

Best Uses in Texas: Patios, walkways, and driveway edges where durability and style are important.

How Texas Climate Affects Masonry Choices

Texas has hot summers, occasional heavy rains, and soil expansion/contraction, which can damage poorly chosen materials.

Tips:

  • Use heat-resistant materials like natural stone and brick for patios and fireplaces
  • Ensure proper drainage to avoid erosion and water damage
  • Consider sealed surfaces for high humidity areas

Maintenance & Longevity

  • Brick & Stone: Sweep and wash annually, reseal every 3–5 years
  • Concrete Pavers: Clean stains, check for shifting
  • Veneer Stone: Inspect for chips, reseal as needed

Regular maintenance ensures your outdoor features last decades, even under harsh Texas conditions.

Design Ideas for Your Outdoor Space

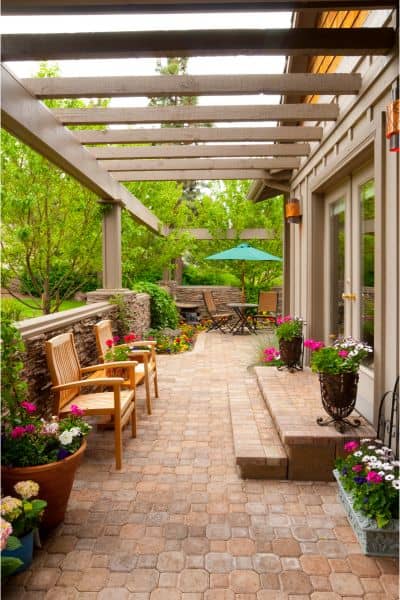
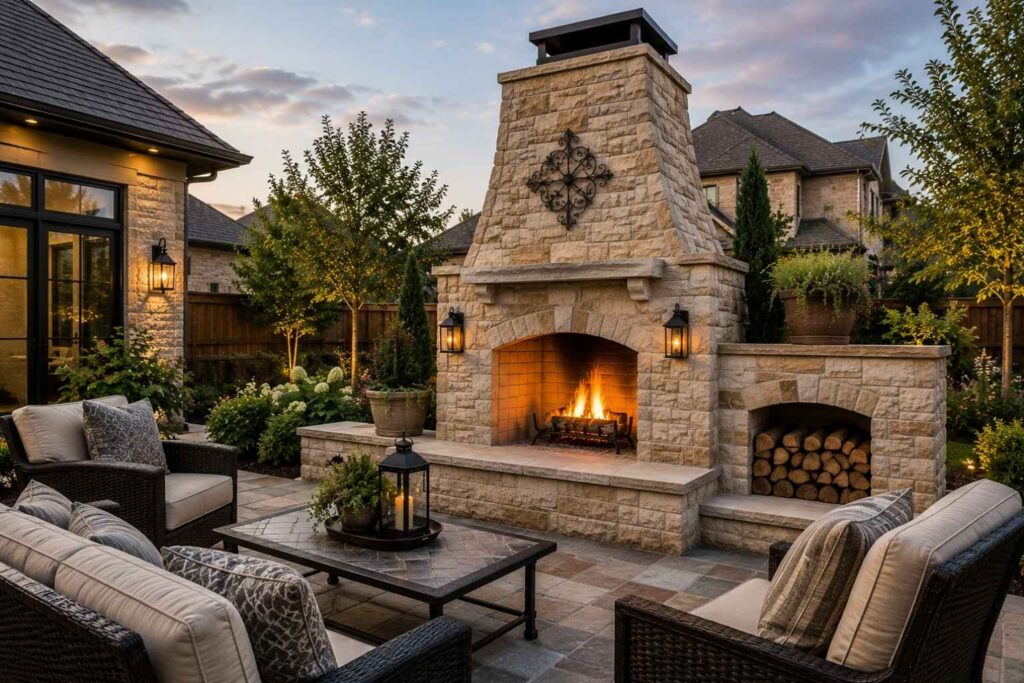
Outdoor patio and seating area with stone masonry and brick features in Frisco TX
  • Rustic backyard: Rubble stone fireplace + flagstone patio
  • Modern outdoor kitchen: Sleek veneer stone with built-in grill
  • Classic entertaining space: Brick patio + outdoor fireplace + seating walls

FAQ

Q1: What is the best masonry material for outdoor projects in Frisco TX?

The best masonry material depends on your project and budget. Natural stone is durable and weather-resistant, brick offers classic appeal, and concrete pavers are versatile and cost-effective. All can withstand the Texas climate when installed properly.

Q2: How does the Texas climate affect masonry choices?

Hot summers, occasional heavy rains, and soil movement can affect masonry durability. Materials like stone and brick are ideal because they resist heat, weathering, and shifting soils common in Frisco TX. Proper installation and sealing also extend longevity.

Q3: How much does outdoor masonry cost in Frisco TX?

Costs vary based on material, size, and complexity.

  • Brick patios/walls: $12–$25 per sq ft
  • Stone patios/fireplaces: $20–$45 per sq ft
  • Concrete pavers: $10–$20 per sq ft
    Labor and design fees may increase total cost. Contact a local masonry expert for a precise estimate.

Q4: How do I maintain outdoor masonry in Texas?

Regular maintenance ensures durability:

  • Sweep and wash patios or walkways annually
  • Reseal stone or brick surfaces every 3–5 years
  • Inspect for cracks or shifting stones and repair promptly

Q5: Can I mix brick and stone in the same project?

Yes! Combining brick and stone adds visual interest and allows you to take advantage of each material’s strengths. Many homeowners in Frisco TX use stone for patios and fireplaces, with brick accents for walls or pathways.

Q6: Do I need a professional mason for outdoor projects?

While DIY is possible for small projects, professional masonry ensures:

  • Proper installation for durability
  • Materials suited for Texas climate
  • Structural integrity for fireplaces, retaining walls, and outdoor kitchens

Welcome to Frisco Brick & Stone

Frisco Brick & Stone specializes in stone masonry and brick masonry construction. Our expertise in masonry covers brickwork, block work, stonework, and all sorts of related products and applications. We serve the City of Frisco and the North Texas communities.

Call us at (469) 981-7757 to discuss your project.

What is Masonry Work?

Seamless Masonry Stone WallsMasonry is building structures from individual units, which are often laid in and bound together by mortar. Common materials of masonry construction are brick, natural stone (such as marble, granite, travertine, and limestone,) cast stone, concrete block, stucco, tile, and glass block. Masonry is a highly durable form of construction.

The strength and durability of masonry are affected by the materials used, the quality of the mortar, the workmanship, and the pattern in which they are assembled. A person who constructs masonry is called a mason, a brick mason, stone mason, or bricklayer.

Applications of Masonry

brick stone wall landscapingMasonry is commonly used for walls and buildings, either inside or outside. Brick and concrete block are the most common types of masonry in use and may be either weight-bearing or a veneer.  Stone, both natural and man-made, is being used more and more for decorative features inside, outside and in backyards. Patios, outdoor kitchens, outdoor fireplaces, fire pits, decorative walls, decking, retaining walls, landscaping or hardscaping, and lots of other amenity applications are common place now. Natural stone masonry can provide very aesthetically pleasing projects.

Advantages of Brick or Stone in Building

  • Bricks and stone masonry increases the thermal mass of a building
  • Brick and stone masonry is non-combustible and provides fire protection
  • Brick and stone masonry walls are more resistant to projectiles, such as debris from hurricanes or tornadoes.
  • Brick and stone masonry weathers well and needs much less maintenance over time than other natural materials.
  • No painting is necessary for brick or stone. Color and finish selections are almost endless.
  • Brick and stone masonry typically lasts longer than wood products
  • Brick and stone masonry has higher compressive strength compared to wood and other natural products.
  • Brick and blockwork walls provide excellent sound insulation.
  • Stone does not warp, swell, bend, splinter, or dent.
  • Brick and stone are versatile in their aesthetic appeal and can work well with other construction materials.
  • Use of brick and stone signals a strong sense of permanence and longevity.

Call Frisco Brick & Stone at (469) 981-7757 for a free quote on your brick or stone masonry project. Or, fill out the contact form to the right.